All time
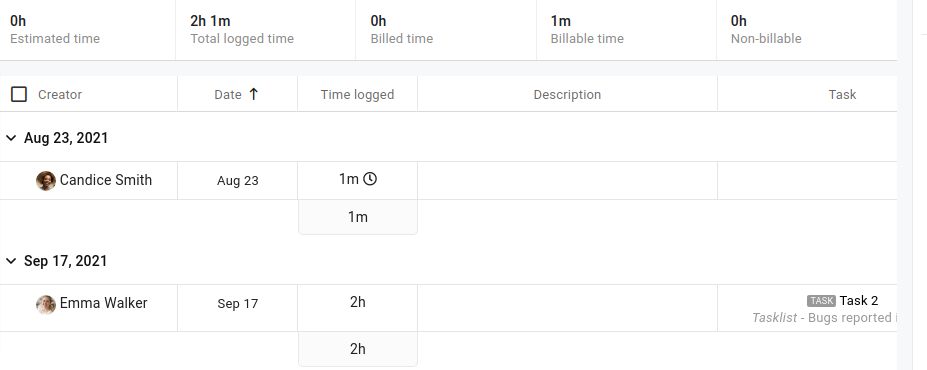
All time tab is available under Everything section where you can see time entries logged, from starting of current month to the current date, across all the projects by all the users. By default, the time entries will be grouped project-wise.

Add time
You can also add time entries directly from All time. Here’s how:
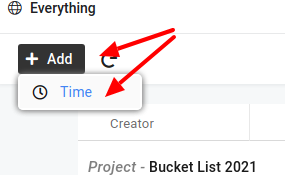
- Click Add from top left of your screen.
- Choose Time option.
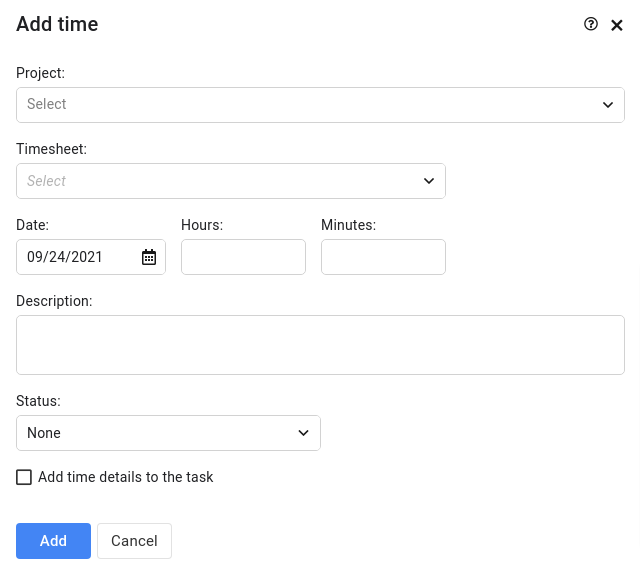
- A window will open on the right side. Now, select the project and timesheet. If you wish to log time for a task, then you need to select the relevant task list and task as well.
- You can also select a date from the date picker and enter time which to log in form of hours and minutes.
- Add description to your time entry.
- Select “Status” of the time entry.
- Click on Add and it will be saved.
Edit/Delete time entries
Edit time entry:
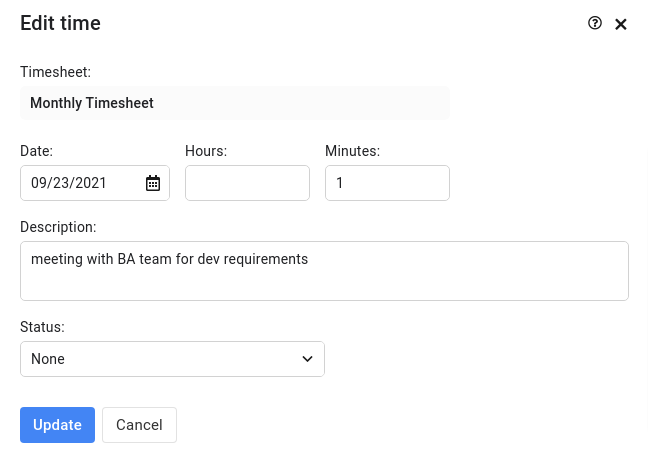
- To edit a time entry, either right click on it or click on the context menu icon and choose Edit.

- Edit time window will open on the right from where you can make the necessary changes to a time entry.
- Click on Update to save the changes.
Delete time entry:
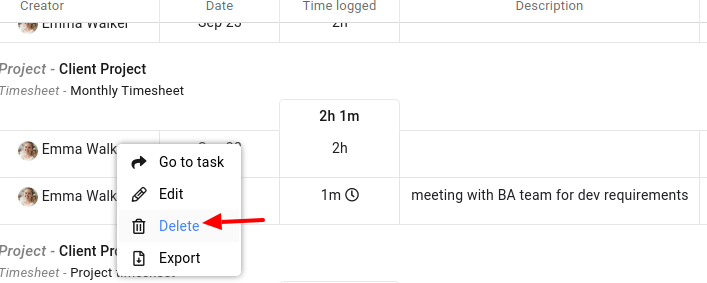
- Select a time entry that you would like to delete. Either right click on the time entry or click the context menu icon and choose Delete.
- A confirmation window will open. Click Yes to confirm the deletion and your time entry will be deleted.

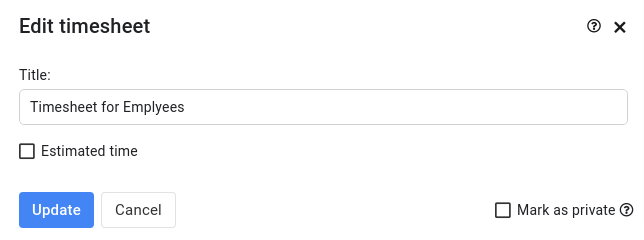
Edit timesheet:
Following are the steps to edit a timesheet:
- Click on the context menu icon appearing on the right side of the timesheet name.
- Choose Edit timesheet option.

- The Edit timesheet window will open on the right side in which you can make the necessary changes.
- Click on Update to save the changes.
Go to timesheet:
With this option, you can reach the timesheet which was appearing in All time. Following are the steps:
- Click on the context menu icon appearing on the right side of the timesheet name.
- Choose Go to timesheet option.

- On choosing it, you’ll be taken to the time section of the project in which the timesheet was created.
Export time entry
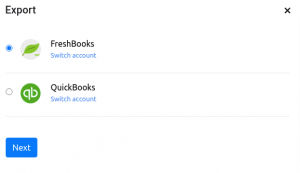
ProofHub has integration with Freshbooks and Quickbooks. You can export your time entries and that can help in preparing invoices for your clients. Here’s how you can export your time entries:
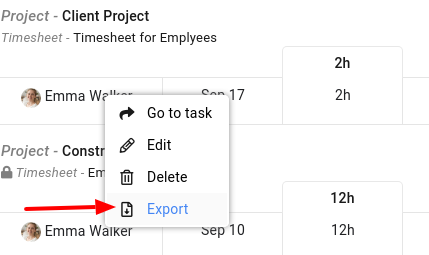
- Either right-click or click on the Context menu icon appearing on the top right side of the filters to export all time entries appearing in All time.
- Choose Export option and then select Freshbooks or Quickbooks.
- A window will open from where you can select the staff member, project and task to which you want to export that time entry
- Click Export and that time entry will be exported to Freshbooks or Quickbooks.
Filters
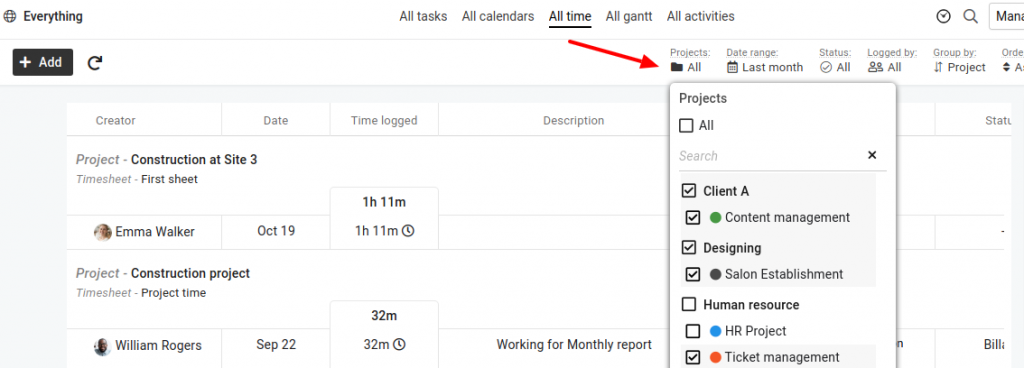
By project’s name:
You can use this filter to view time entries from specific projects. Here’s how:
- Click on the filter icon.
- Either select a project category or select a specific Project name.
- Click on Apply and it will display the time entries of selected projects only.
By people:
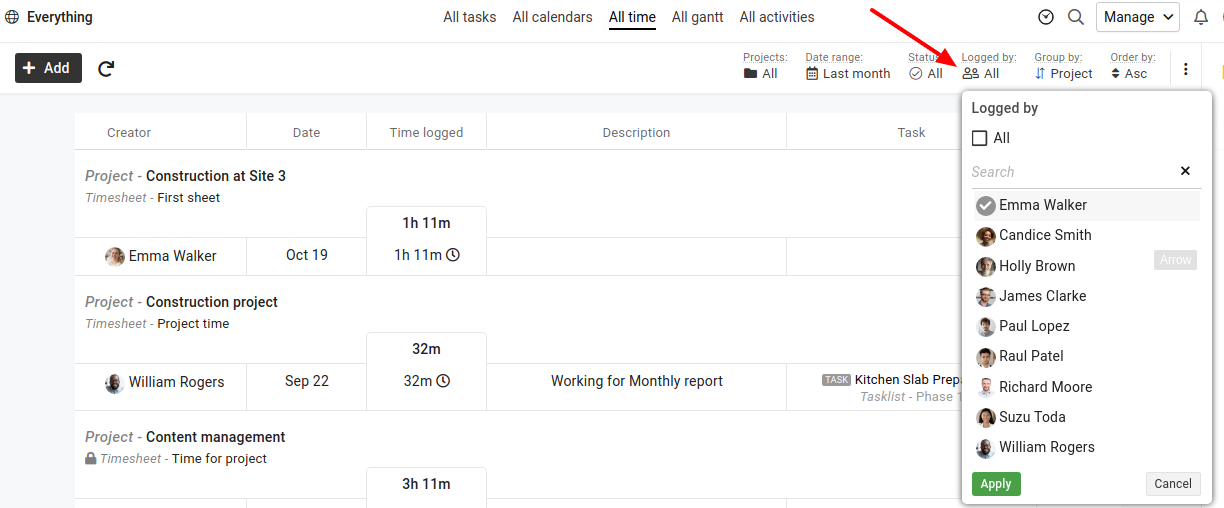
You can use this filter to view the time entries of a particular person. Here’s how:
- Click on filter icon.
- Either type and search or select person from the dropdown
- Click on Apply and it will display the time entries of a specific person.
Note:
Only one person can be selected at one time.
By status:
You can filter your time entries status wise as well. Here’s how:
- Click on the filter icon.
- Under Status, you will get options such as Billable, billed, non-billable, etc.
- Select any of the options and click on Apply to see the time entries having a particular status. For e.g. if you want to see only billable time entries, then select Billable option from the dropdown menu.

By Date Range:
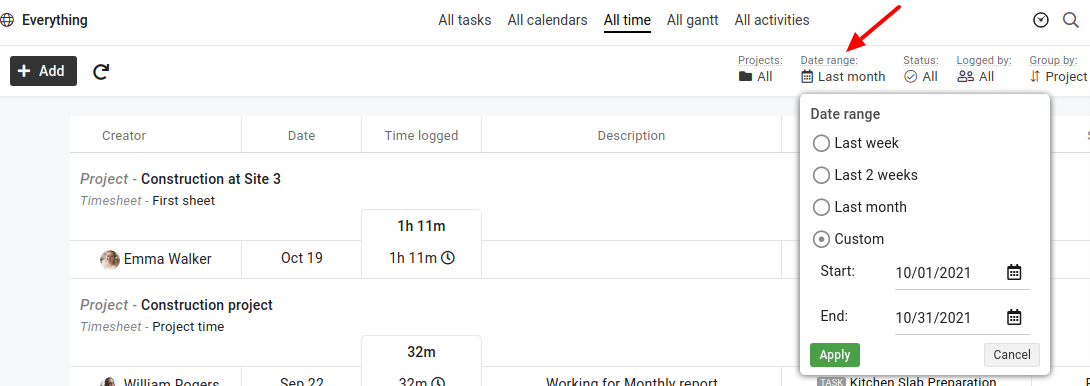
You can filter time entries based on date ranges as well. It is helpful if you want to see the time logged for a particular time duration. By default, the time duration selected in this filter is from the 1st date of the current month to the current date. Following are the steps to change the date range :
- Click on the filter icon
- Click on the date range filter and select the date range as per your need.
- Click Apply button to see time logged within the selected date range.
Group by time entries:
Time entries can be grouped in various ways to get the detailed and clear view of the time consumed in the tasks. Following are the ways to group time entries:
- Date:
To group time entries appearing in All time by date, you need to follow the below-mentioned steps:
- Click on filter icon.
- Select the Date option under the Group by filter.
- Click Apply button to see time entries grouped by date.
- Person:
To group time entries appearing in All time by person, you need to follow the below-mentioned steps:
- Click on filter icon.
- Select the Person option under the Group by filter.
- Click Apply button to see time entries grouped by person.
- Project:
To group time entries appearing in All time by project, you need to follow the below-mentioned steps:
- Click on filter icon.
- Select the Project option under the Group by filter.
- Click Apply button to see time entries grouped by project.
- Timesheet:
To group time entries appearing in All time by timesheet, you need to follow the below-mentioned steps:
- Click on filter icon.
- Under the Group by option, select Timesheet option.
- Click Apply button to see time entries grouped by timesheet.

Order time entries:
Time entry groupings can be ordered either in ascending or descending order. To do it, you need to follow the below-mentioned steps:
- Click on the filter icon
- Under Order by select either Asc or Desc.
- Click Apply button to see all grouping of time entries arranged as per the option selected.

View time entry details:
To view time entry details, click on a time entry and a window will open on the right side containing all details of the time entry. You’ll get the following options in it:
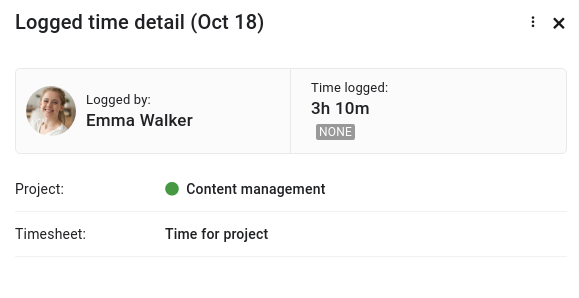
- Edit
On clicking it, the Edit time window opens in which you can update details regarding the time entry.
Note: Project and timesheet cannot be changed.
- Delete
On clicking it, a confirm window will appear. Click on Yes to change the time entry.
- Go to task (if time entry is made on a task)
On clicking it, one will be taken to the task in which the time was logged.
- Go to time entry
On clicking it, one will be taken to the time entry in which time was logged.
Download CSV
To download CSV from All time, you need to do the following:
- Click on Context menu icon present on the top right side alongside the filter options.
- Choose Export as CSV option.

Note:
In case no CSV gets downloaded, please check if the pop up for the browser is blocked or not.
Need more help?
- Can't find the answer to your questions? Contact ProofHub Support
- Check our blog for the latest additions, updates and tips.


