How to add and manage group
Add group
- Navigate to the people section: In the top-left corner of the “People” section, find and click the “+” button to initiate adding a group.
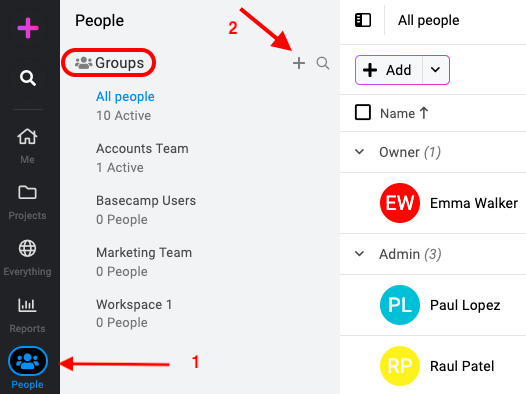
- Provide group details: A new window will open for creating the group.
- Group name: Enter a clear and descriptive name for your group.
- Add members: Select the individual users you want to include in this group.
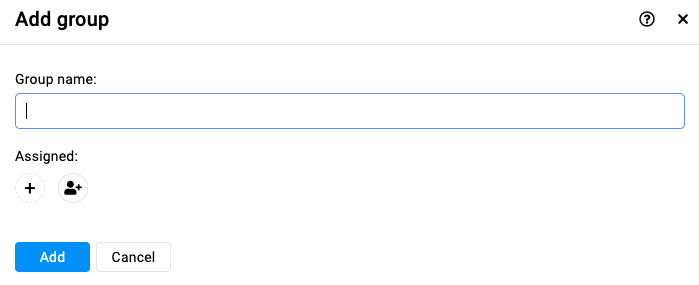
- Finalize group creation: Once you’ve added the desired members, click the “Add” button to finalize creating the group.
Edit Group
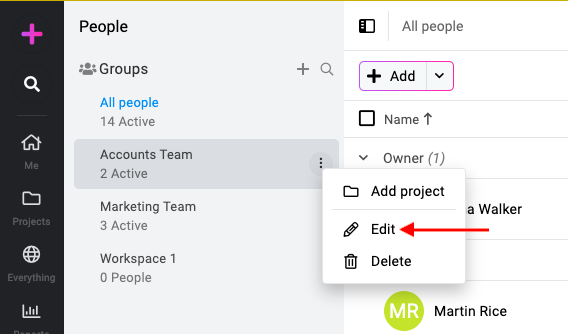
- Navigate to the people section: Click on the three dots icon or right-click on the group and select “Edit”.
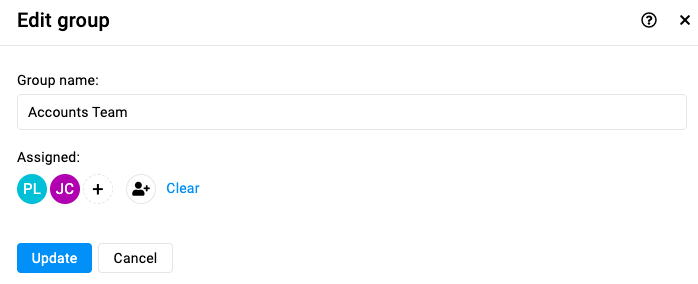
- Save changes: Modify the group name, add or remove a user from your account. After making the changes, click the “Update” button to save.
Delete group
- Navigate to the people section: Click on the three dots icon or right-click on the group and select “Delete”.
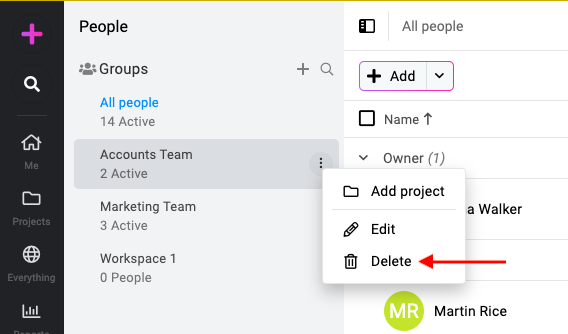
- Delete group: Click “Yes” on the confirmation window to delete the group from your ProofHub account.
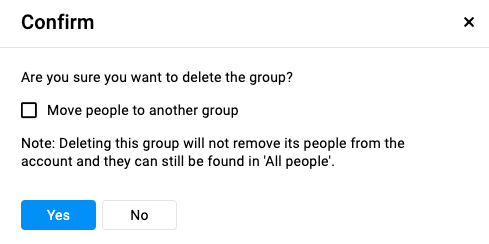
Note: While deleting a group, you will have the option to move existing people to another group.
ProofHub keeps items in the “Trash” for 15 days. Restore them easily by going to Trash. For detailed instructions on restoring deleted items from the trash, please refer to Trash.
Search group
- In order to find any particular group from your account, click on the “Search icon” at the top-left of the section.

- Now, enter the name of the group and it will display the results for your search.

Need more help?
- Can't find the answer to your questions? Contact ProofHub Support
- You can also book a demo.