How to add and manage people
Add people
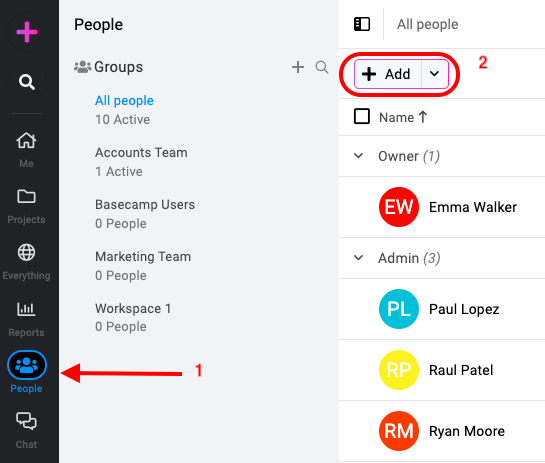
- Navigate to the people section: Find and click the “Add” button.
- Fill in user details: A new window will appear for adding user information.
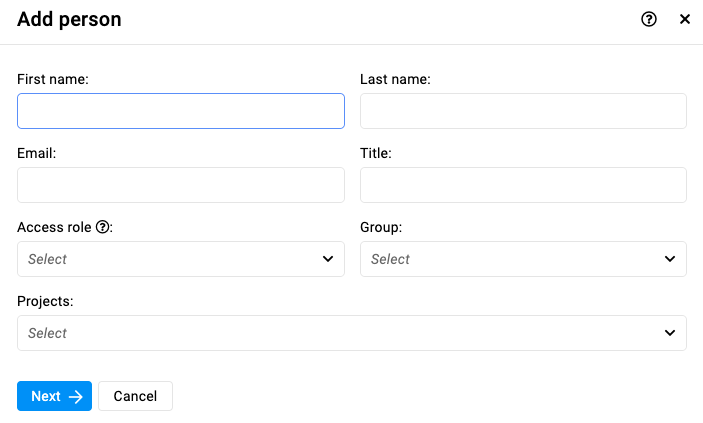
- Enter first and last name: Enter the user’s first and last name in the designated fields.
- Email address: Provide a valid email address that the user will use to log in to ProofHub.
- Title: Enter the user’s title (e.g., Marketing Manager)
- Access role: Assign an appropriate access role within ProofHub that defines the user’s permissions.
- Select group: Select a group (or multiple groups) to add the user to for easier organization.
- Projects: Assign the user to specific projects they’ll be working on within ProofHub and click “Next”.
- Fill further details:
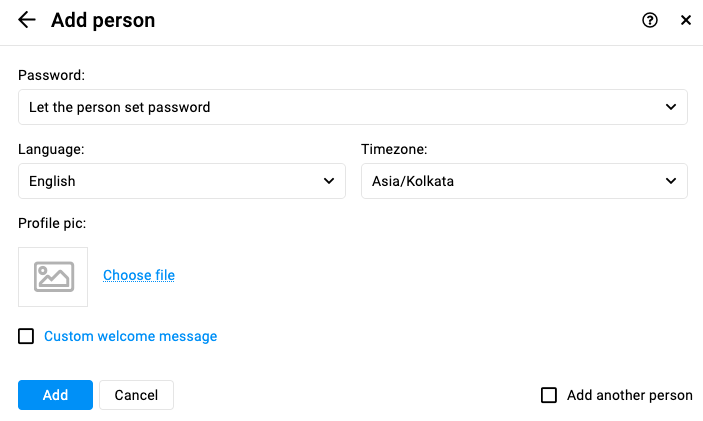
- Login setup: Choose whether to set a password for the user or allow them to create their own upon first login.
- User preferences: Select the user’s preferred language and time zone.
- Profile pic: Upload a profile picture for better identification.
- Welcome message: Craft a personalized welcome message that will be sent to the user upon adding them.
- Add User: Click the “Add” button to save the new user profile.
Import people
- Find and click the drop-down menu right next to the “Add” button.
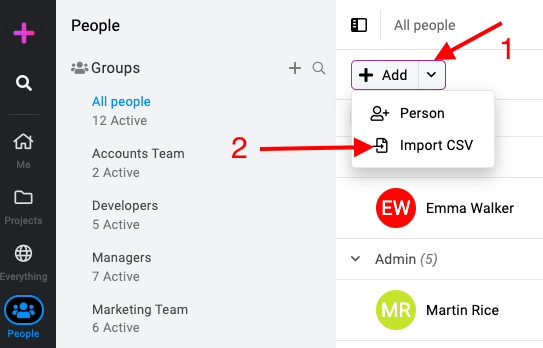
- Select import CSV: Choose “Import CSV” from the available options.
- Browse and select CSV file: A window will pop up, allowing you to browse and select the CSV file containing your user data from your system.
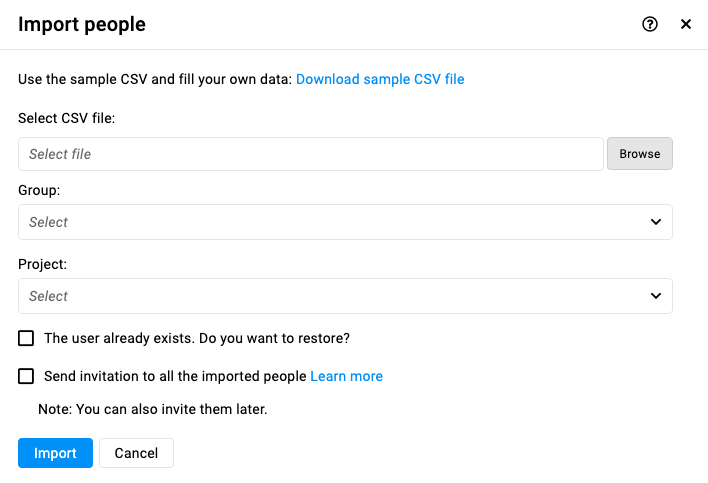
- Import users: Click the “Import” button, and all users listed in the properly formatted CSV file will be added to your ProofHub account.
Note: A sample CSV is provided to help you understand the order and headings of the columns that should be there in order to successfully import to ProofHub.
Edit people
- Click on the three dots icon or right-click on the user name and select “Edit“.

- Update user information: A window will pop up displaying the user’s current details. You can make any necessary changes to their information, such as name, email address, access role, group memberships, project assignments, and other preferences.

- Save changes: Click the “Update” button to save the changes to the user’s profile.

Suspend people
- Click on the three dots icon or right-click on the user name and select “Suspend“.

- Suspend user: By selecting “Yes” with the confirmation window, you’ll be temporarily restricting the user’s access to ProofHub. They won’t be able to log in or access any projects or groups until their access is restored.

Note: You can select multiple users at once by checking the boxes next to their names. Then, the “Suspend” option will appear at the top of the list, allowing you to suspend them all simultaneously.
Restoring people
- Filter suspended users: Click the filter icon located at the top-right corner of the list. This will display all the filter options.

- Select the “Status” option from the filter menu. Now, select “Suspended” option and click “Apply”

- Find the user you want to restore. Right-click on their name and select “Restore” from the context menu.

- User access restored: Selecting “Yes” will grant the user access to ProofHub again. They will be able to log in and resume their work within the platform.

Delete people
- Click on the three dots icon or right-click on the user name and select “Delete“.

- Confirm deletion: Select “Yes” within this confirmation window to delete the user.

Note: ProofHub keeps items in the “Trash” for 15 days. Restore them easily by going to Trash. For detailed instructions on restoring deleted items from the trash, please refer to Trash.
Sort and filter people
Sorting users
ProofHub offers two ways to sort your user list:
- Sort by role: This option arranges users based on their assigned roles within ProofHub (e.g., admin, normal user, or custom roles). Sorting by role can be helpful when you need to quickly identify users with specific permissions.
- Sort by name: This option arranges users alphabetically. Sorting by name is a simple way to find users you know or locate them quickly within a large list.
Filtering users
ProofHub also lets you filter your user list based on user’s role and their status.
- Filter by role: You can filter the list to display only users with a particular role (e.g., admin, normal user, or custom roles). This is useful when you need to focus on a specific user group for communication or task assignments.
- Filter by status: You can filter based on user status (e.g., active, suspended). This allows you to quickly identify active users or manage suspended accounts.
Download people list
ProofHub offers a convenient way to export a complete list of all users in your account as a CSV file. This downloadable file contains valuable details about your team members, including their names, email addresses, ProofHub status (active, suspended, etc.), and assigned access roles.
You can download this CSV file through the context menu in the People section.
Resend invite
In ProofHub, account owners can send invitations to users after importing projects or to those who have never logged in. The users will receive an invitation containing their login credentials.
- Send an invite to a single person: Click on the three dots icon or right-click on the user name and select “Resend invite” from the context menu to send the invite.

- Send invite to multiple people: Select the users by clicking the checkboxes in front of the name and select “Resend invite” to send invites.
Note: Account owners can send invitations to people after importing projects from Basecamp, as well as to users who have never logged in before.
Need more help?
- Can't find the answer to your questions? Contact ProofHub Support
- You can also book a demo.