How to add and manage custom fields
Introduction to custom fields
ProofHub takes project management a step further with custom fields. Capture the specific information that matters most to your projects. Go beyond basic task details and add fields for things like budgets, deadlines, priorities, or anything unique to your workflow. This guide will show you how to create custom fields, choose the right data type (text, numbers, dates, etc.), and leverage them to gain deeper insights into your projects.
Types of custom fields
- Text:
- Description: The text field allows you to save data of any type in a single line.
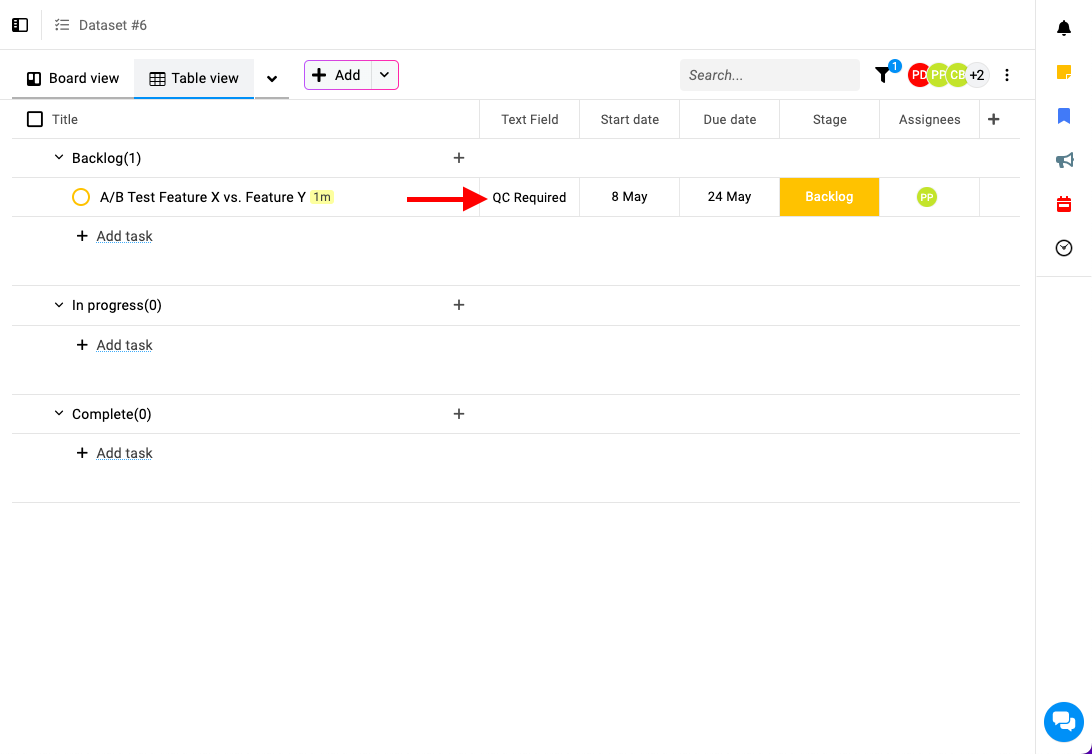
- Use case: Ideal for capturing short, concise information such as names, titles, or keywords.
- Description: The text field allows you to save data of any type in a single line.
- Textarea:
- Description: The textarea field is similar to the text field but allows data entry that appears in multiple lines.
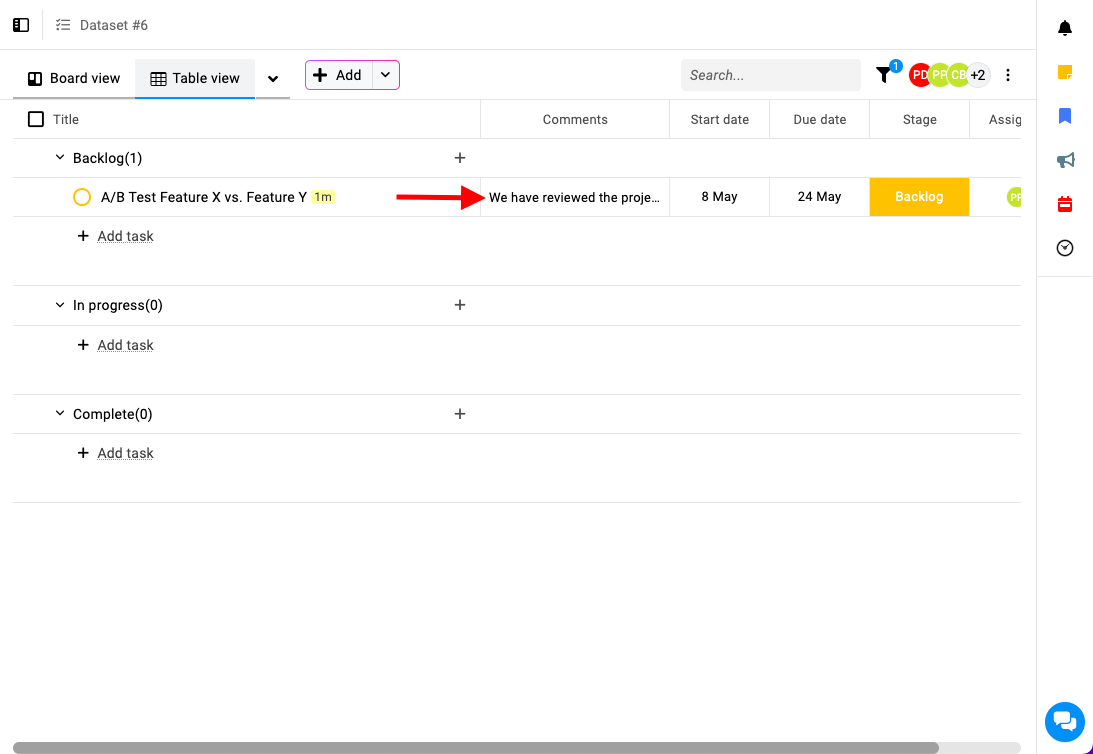
- Use case: Suitable for longer descriptions, notes, or comments requiring more space.
- Description: The textarea field is similar to the text field but allows data entry that appears in multiple lines.
- Dropdown:
- Description: The dropdown field enables you to create a list of selectable options. Customize the options and apply color coding for better visual distinction.
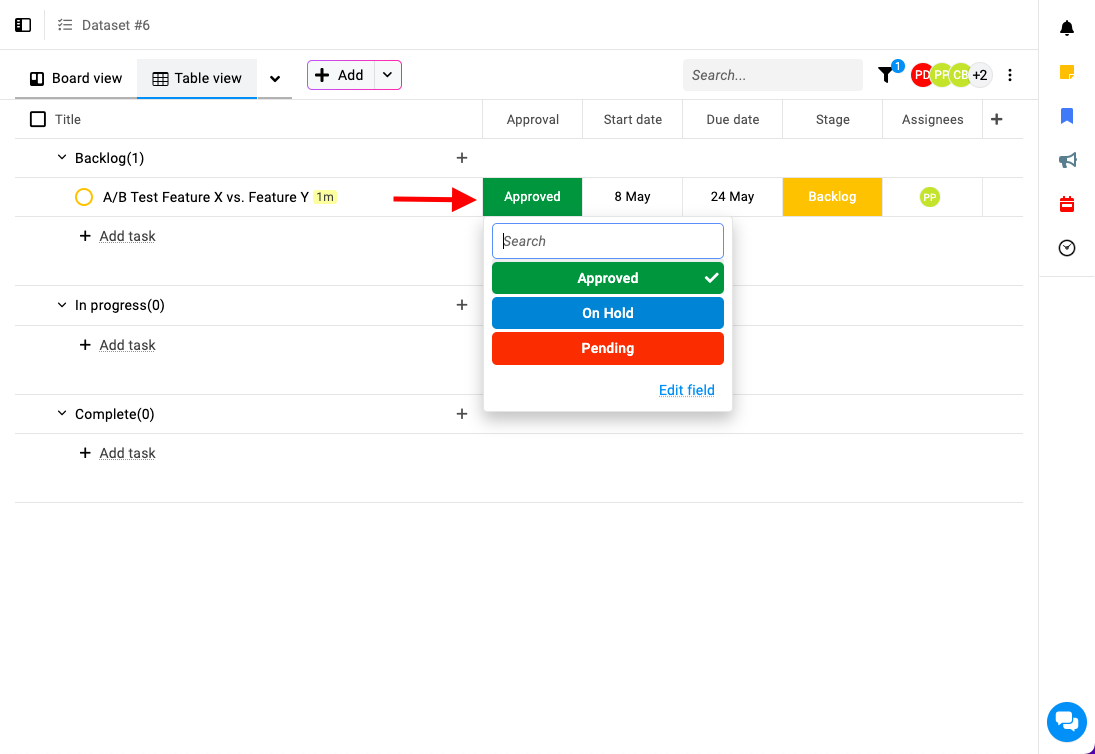
- Use case: Great for categorizing tasks or selecting specific attributes from a predefined list.
- Description: The dropdown field enables you to create a list of selectable options. Customize the options and apply color coding for better visual distinction.
- Multi-select:
- Description: The multi-select field allows you to choose multiple customized values.
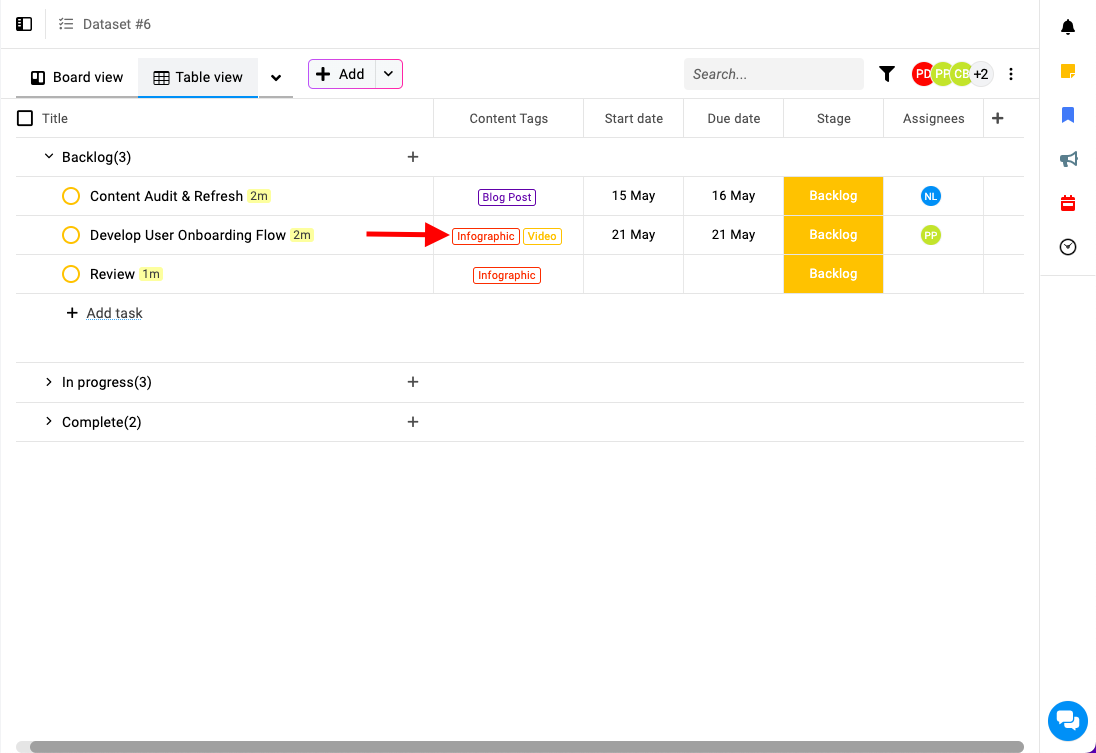
- Use case: Useful when a task or item can belong to more than one category or attribute.
- Description: The multi-select field allows you to choose multiple customized values.
- Numbers:
- Description: The numbers field is used to store numeric data, including negative, positive, decimal, and exponential figures.
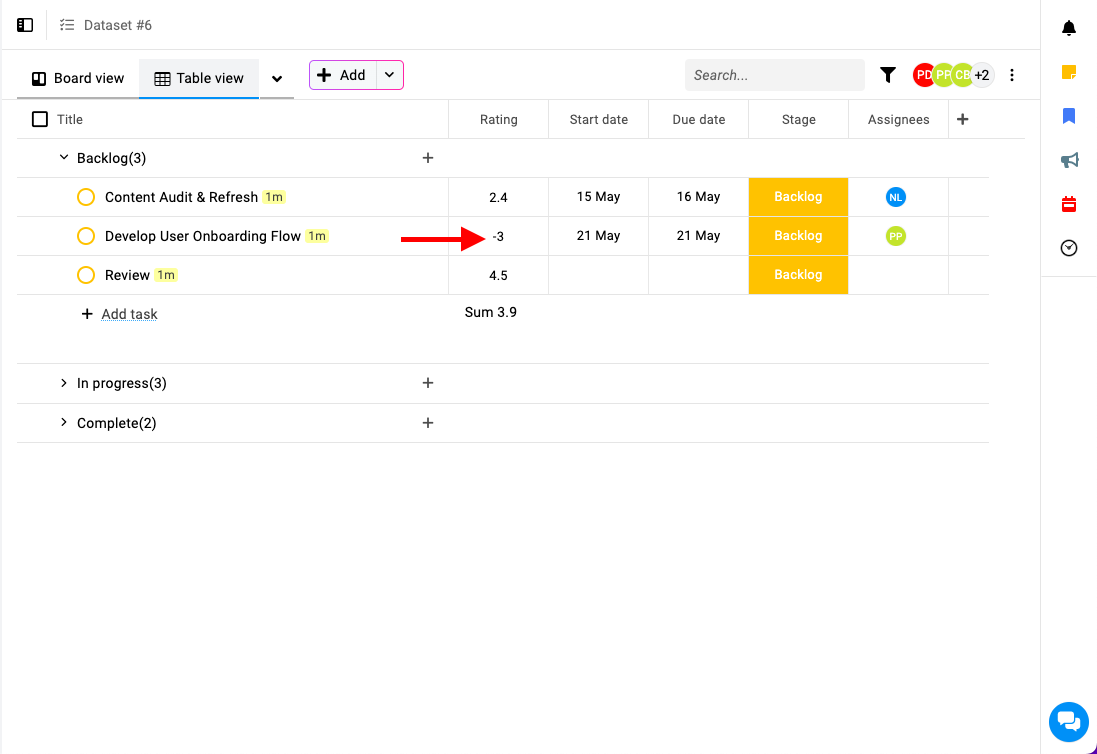
- Use case: Ideal for tracking quantities, amounts, or numerical metrics associated with tasks.
- Description: The numbers field is used to store numeric data, including negative, positive, decimal, and exponential figures.
- Percentage:
- Description: The percentage field is designed to store percentage data.
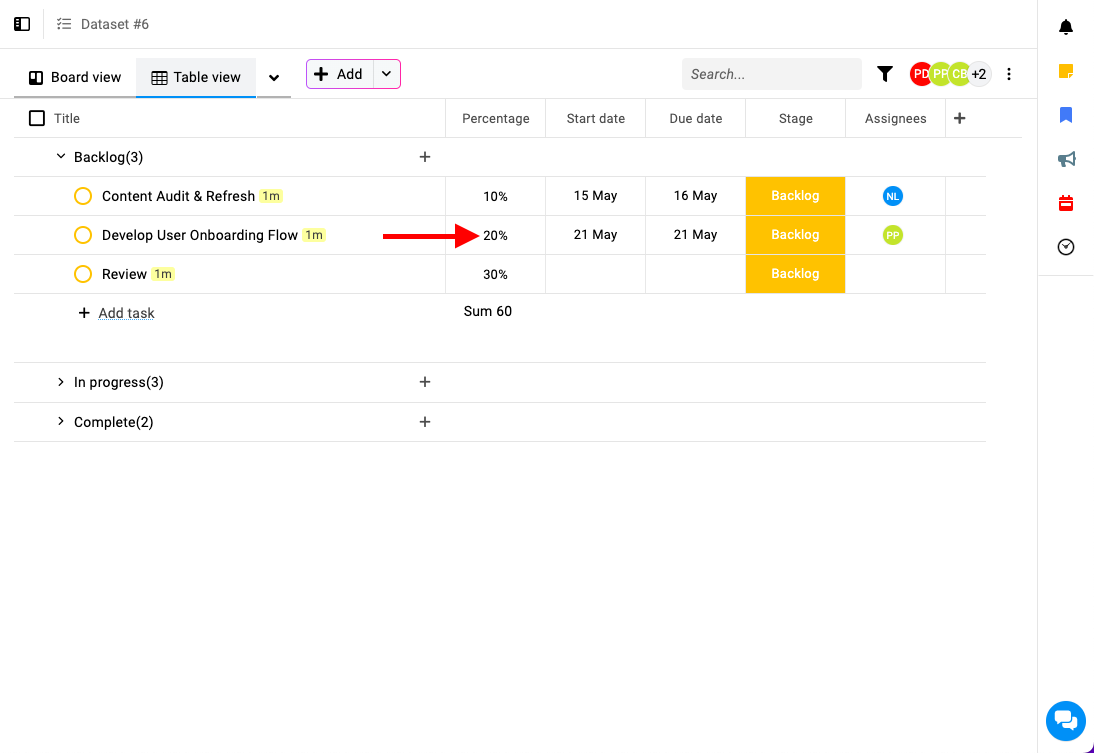
- Use case: Useful for tracking progress, completion rates, or any other metric represented as a percentage.
- Description: The percentage field is designed to store percentage data.
- Currency:
- Description: The currency field stores data in different currency types. ProofHub supports default currency types such as $ USD, $ CAD, £ GBP, € EUR, and more. Additional currency types can be added.
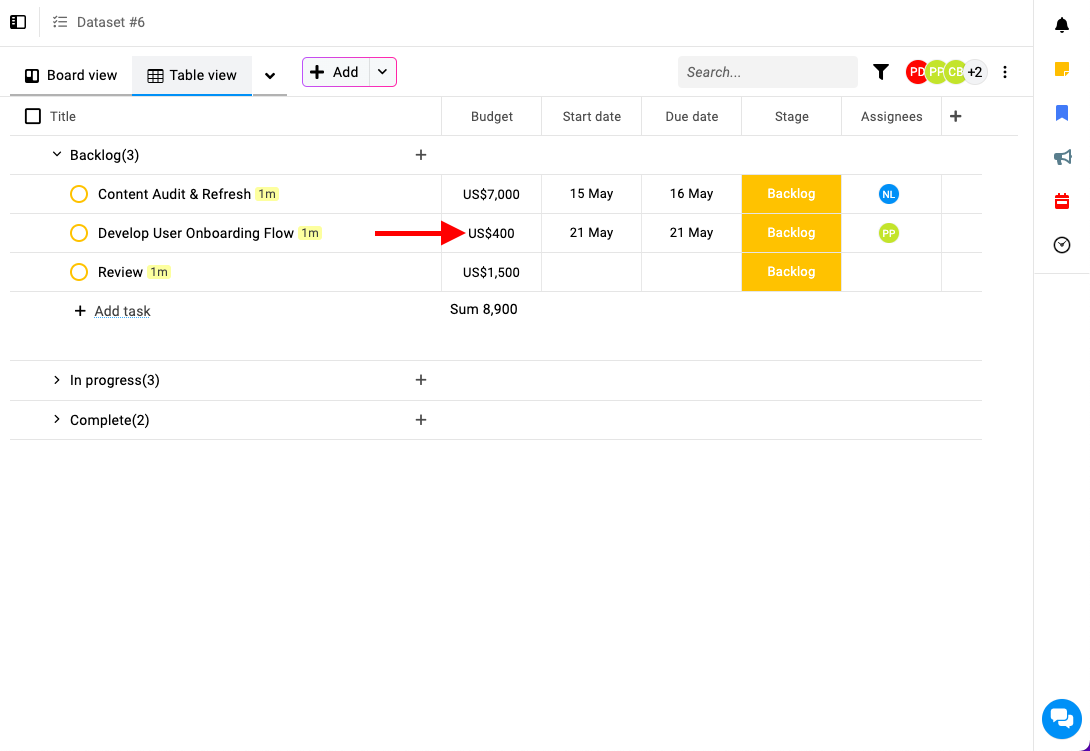
- Use case: Essential for managing financial data and costs associated with tasks.
- Description: The currency field stores data in different currency types. ProofHub supports default currency types such as $ USD, $ CAD, £ GBP, € EUR, and more. Additional currency types can be added.
- Date:
- Description: The date field allows you to save specific dates related to tasks.
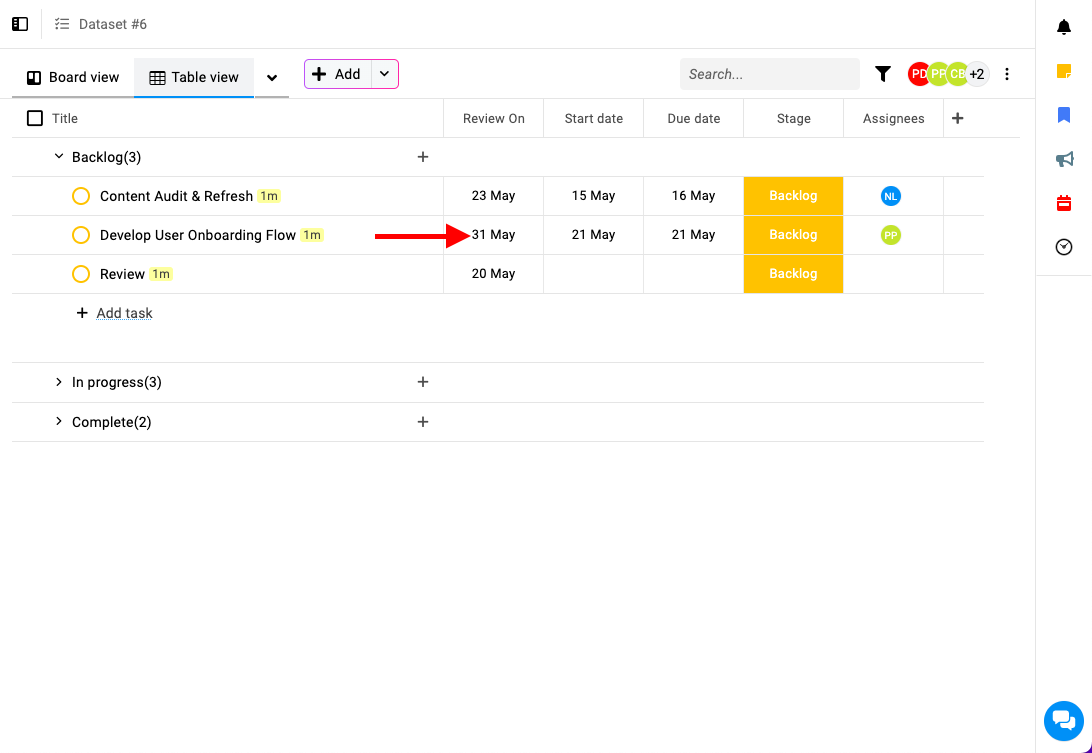
- Use case: Helpful for setting task deadlines, milestones, or tracking time-sensitive information.
- Description: The date field allows you to save specific dates related to tasks.
- Priority:
- Description: The priority field helps define task priority levels within a task list. It can be added once per task list and comes with predefined priority stages.

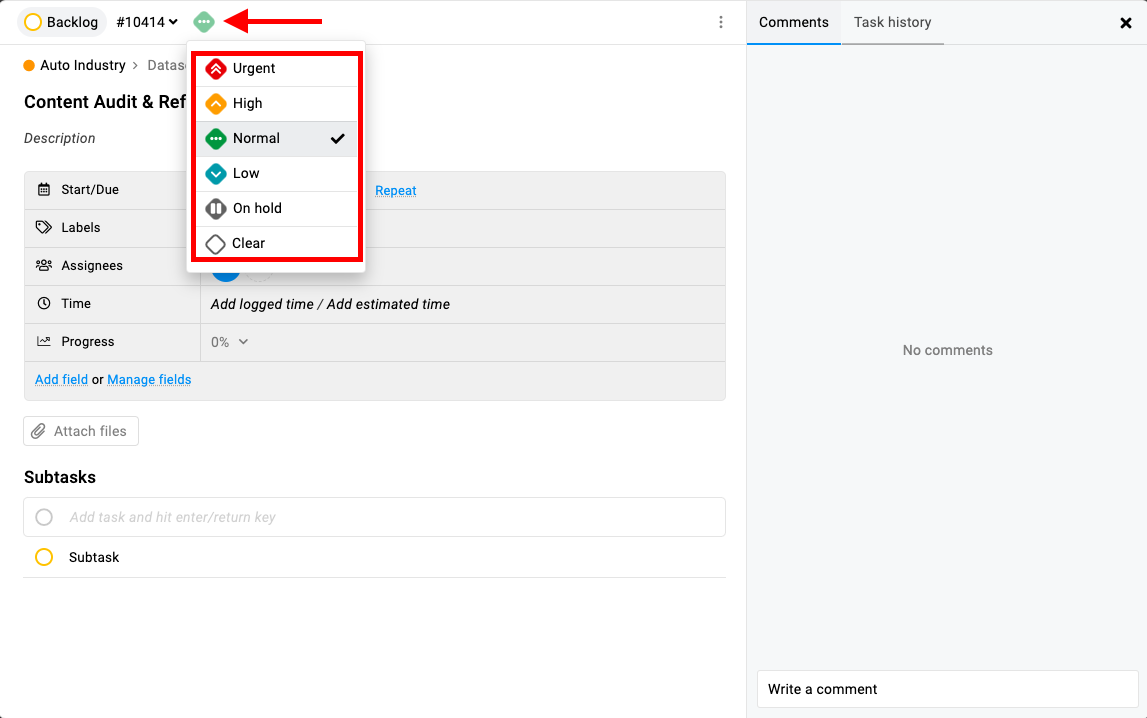
- Use case: This enables you to categorize and prioritize tasks based on urgency or importance.
- Description: The priority field helps define task priority levels within a task list. It can be added once per task list and comes with predefined priority stages.
Add custom fields
Method 1: Add a new custom field from the table view
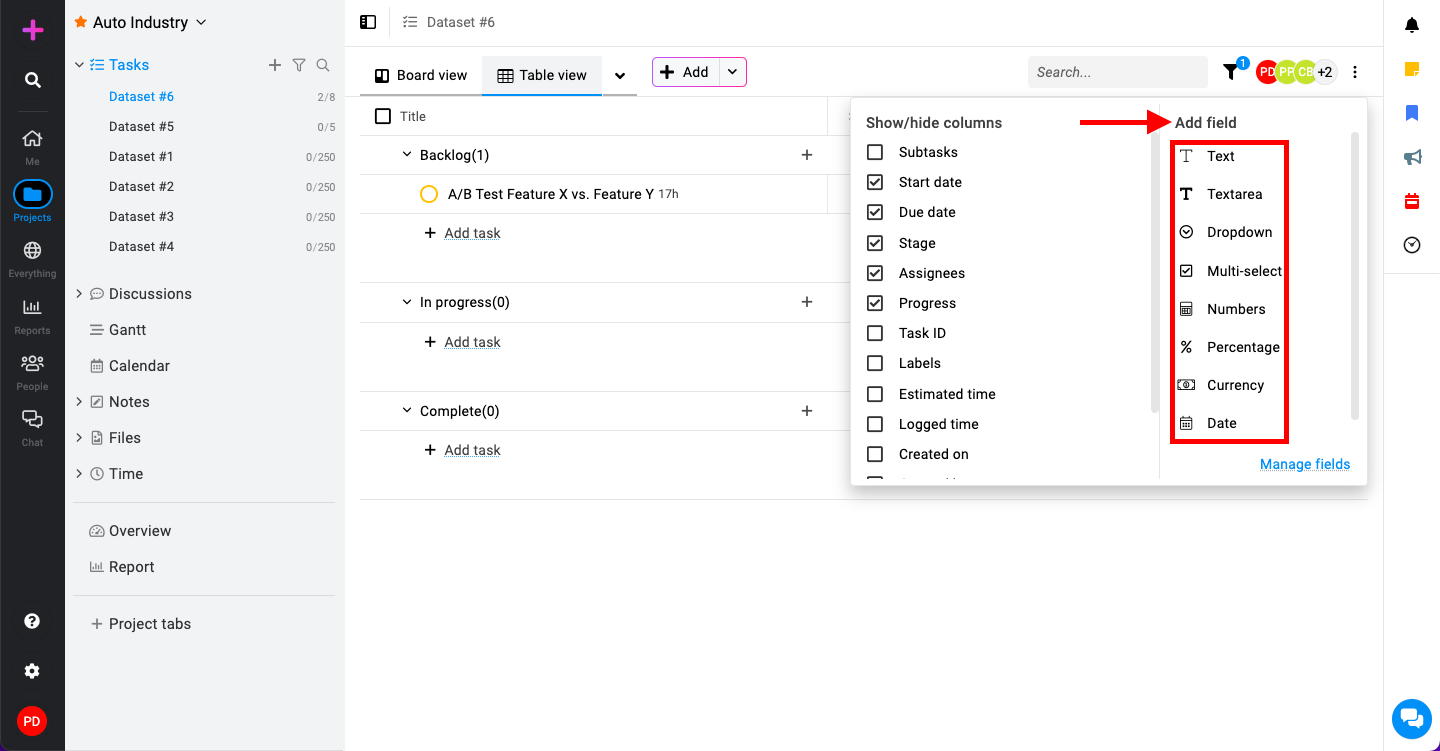
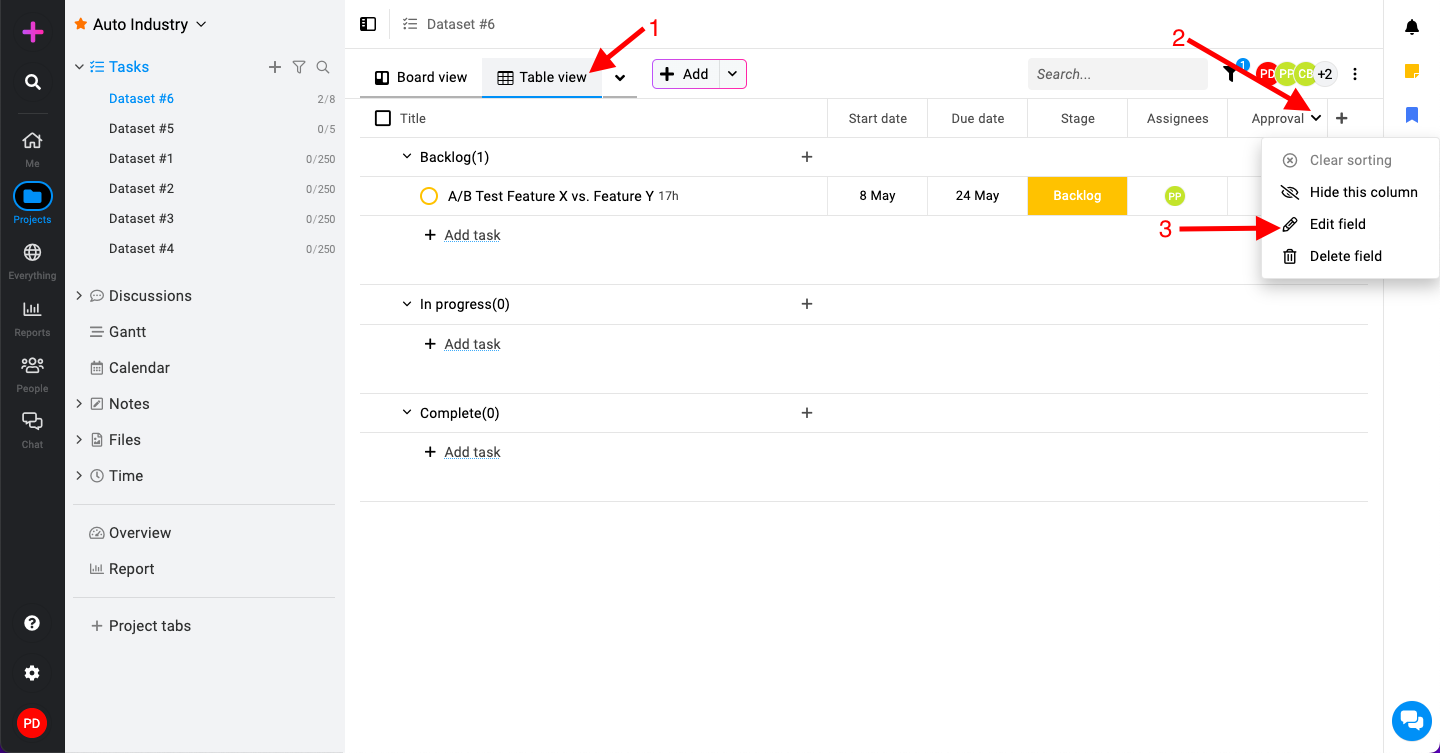
- Open the custom field options: Start by accessing the “Table view” within the tasks section of your project in ProofHub. Scroll to the far right of the screen where you’ll find a plus icon (+).

- Custom field type: Click on the plus icon, then choose your desired custom field type from the “Add field” option.
- Configure custom field details: After selecting the field type, provide the necessary details based on the type chosen:
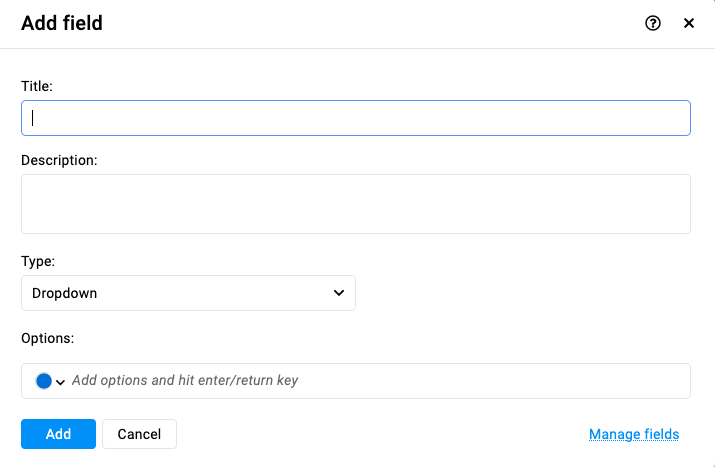
- Field name/title: Enter a name for the custom field.
- Field description: Optionally, add a description for the field. This description will appear as a tooltip when you hover over the field name.
- Field configuration: Depending on the selected field type, make any required changes or configurations (e.g., defining dropdown options, setting default values, etc.).
- Save the custom field: Click on the ‘Add‘ button to save the field.
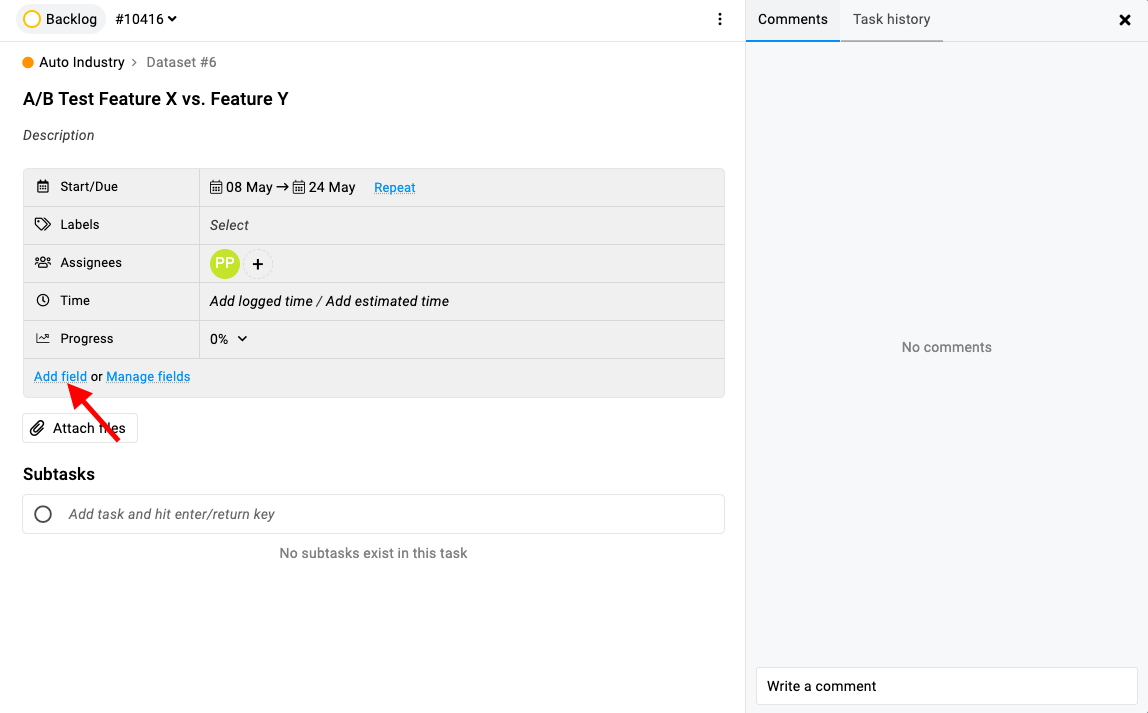
Method 2: Add a new custom field from the task window
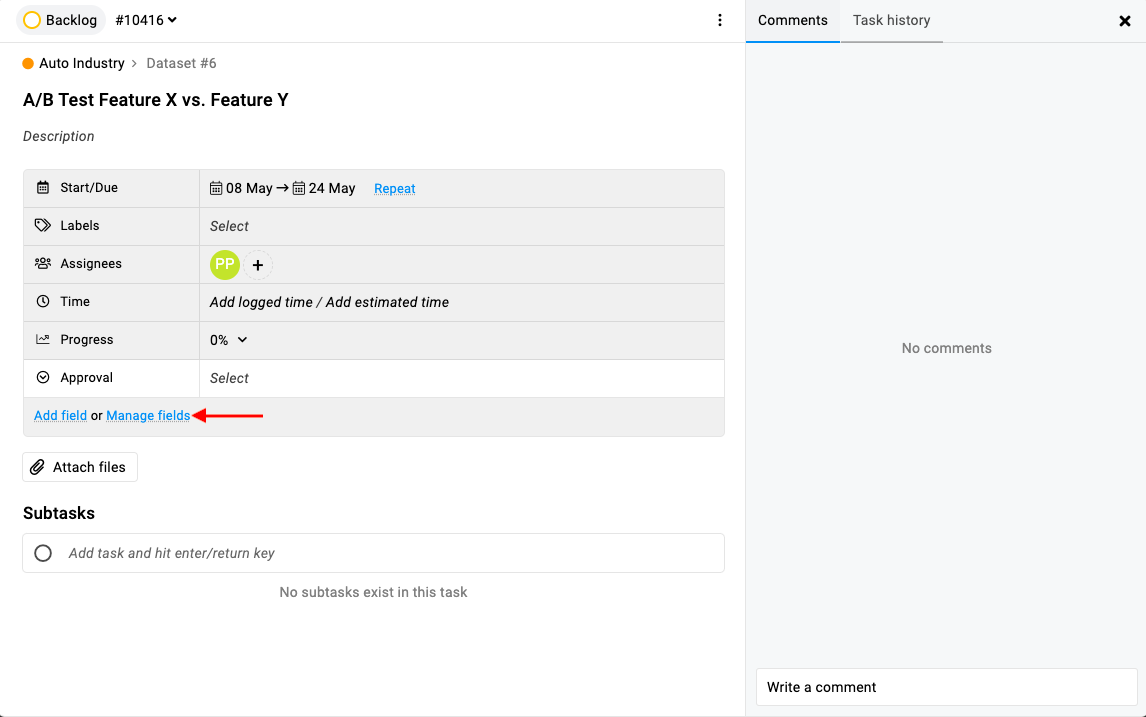
- Open the custom fields section: Open the task window of the specific task where you want to add a custom field. Within the task window, click on the “Add field” option.
- Configure custom field details: After selecting the field type, provide the necessary details based on the type chosen:
- Field name/title: Enter a name for the custom field.
- Field description: Optionally, add a description for the field. This description will appear as a tooltip when you hover over the field name.
- Field configuration: Depending on the selected field type, make any required changes or configurations (e.g., defining dropdown options, setting default values, etc.).
- Save the custom field: Click on the ‘Add‘ button to save the field.
Edit custom fields
Method 1: Edit a custom field from the table view
- Locate custom field: In the Table view, locate the custom field you wish to edit. Look for the field name displayed as a column header. Click on the arrow icon to reveal a dropdown menu. Choose the ‘Edit field‘ option.
- Modify field details: Within the edit field window, you can update the field title and description as needed depending on the custom field type.
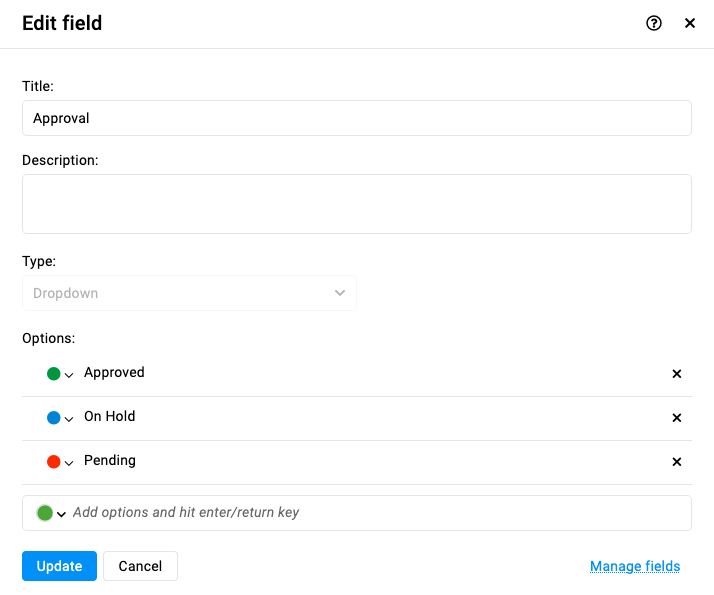
- Save changes: Note that the field type of a custom field cannot be edited. After making the desired changes, click the ‘Update‘ option to save the updated field details.
Method 2: Edit a custom field from the task window
- Open task details: Click on the specific task where the custom field is located to open the task window. Within the task window, select ‘Manage fields‘.
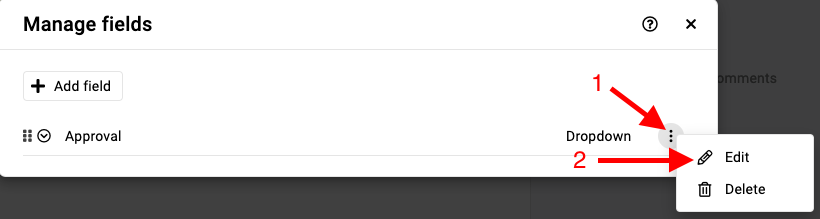
- Open edit options: Click on the three dots when you hover to the right and select ‘Edit‘.
- Update field details: Easily edit the field title and description within the edit field window depending on the custom field type.

- Save changes: Click on the ‘Update‘ option to save the changes to the custom field.
Delete custom fields
Method 1: Delete a custom field from the table view
- Locate custom field: In the Table view, locate the custom field you wish to delete. Look for the field name displayed as a column header. Click on the arrow icon to reveal a dropdown menu. Select the ‘Delete field‘.
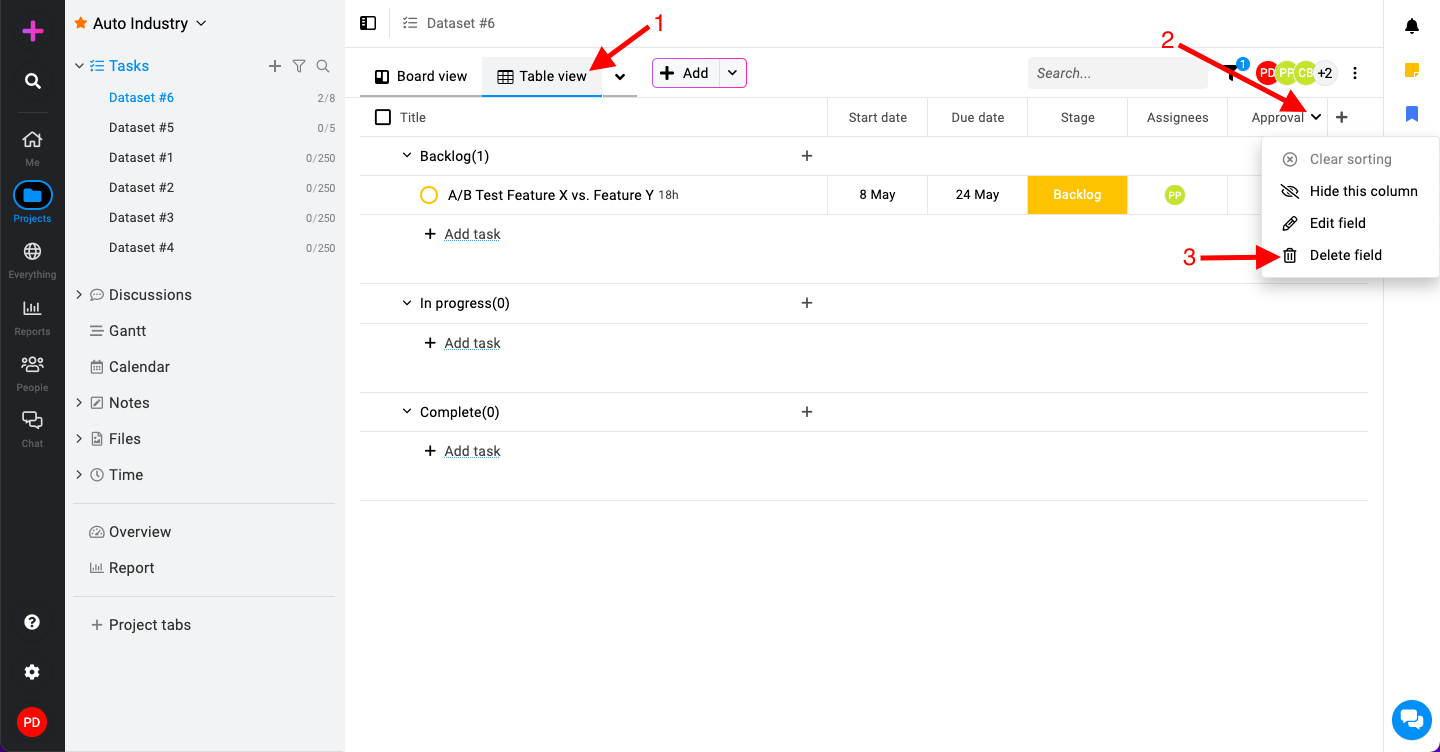
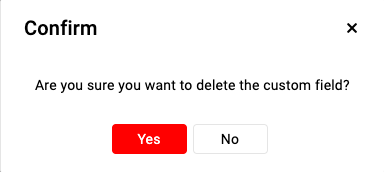
- Confirmation prompt: Select “Yes” within this confirmation window to proceed with the deletion.
Note: ProofHub keeps items in the “Trash” for 15 days. Restore them easily by going to Trash. For detailed instructions on restoring deleted items from the trash, please refer to Trash.
Method 2: Delete a custom field from the task window
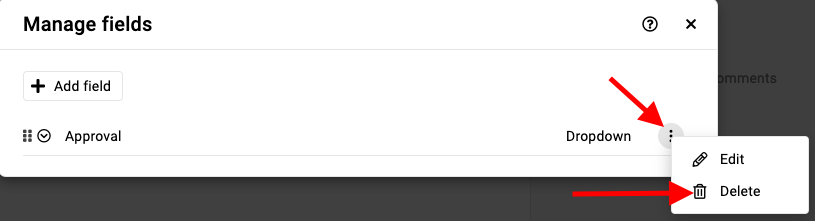
- Open task details: Click on the specific task where the custom field is located to open the task window. Within the task window, select ‘Manage fields‘.
- Open edit options: Click on the three dots when you hover to the right and select ‘Delete‘.
- Confirmation prompt: Select “Yes” within this confirmation window to proceed with the deletion.
Note: Custom fields will not be accessible outside the specific task list in which they were created. ProofHub keeps items in the “Trash” for 15 days. Restore them easily by going to Trash. For detailed instructions on restoring deleted items from the trash, please refer to Trash.
Need more help?
- Can't find the answer to your questions? Contact ProofHub Support
- You can also book a demo.
Table of contents
All the Tasks articles
- Introduction to tasks
- How to add and manage task list
- How to add and manage task
- How to add and manage custom fields
- How to import and export tasks
- How to add tasks via email-in
- How to add and manage forms
- How to change views in tasks
- How to use filters in task
- How to utilize all tasks
- How to log time in a task
- How to manage workflow in tasks
- How to view task history
- How to view task dependency
- How to add a recurring task
- How to archive and unarchive task
- How to archive and unarchive task lists