How to add and manage folders
Folder hierarchy
In ProofHub, you have the ability to organize your uploaded files into a hierarchy of folders.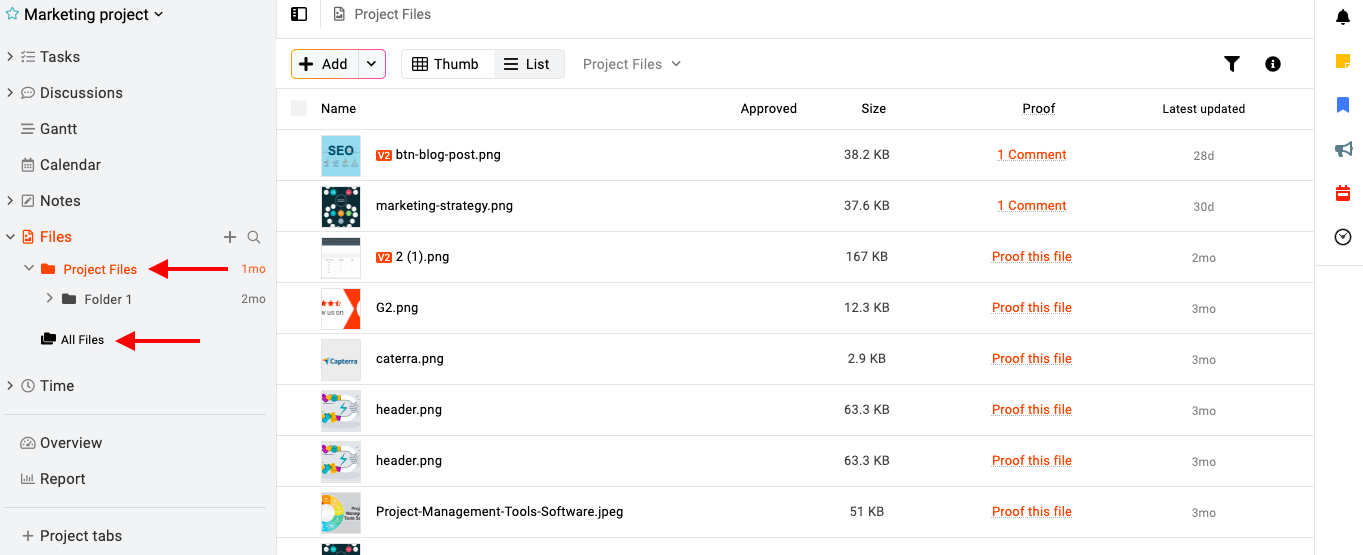
- Project files: By default, the “Project files” folder is displayed, and any additional folders you create are nested within this main folder. You have the flexibility to create folders within folders to any desired depth.
- Tree-like structure: The folder arrangement follows a tree structure, with the “Project files” folder serving as the base or root. To access files within a specific folder, simply click on the folder name.
- All files: If you wish to view all files irrespective of the folder they have been added into, you can do so using the “All files”.
- Search and add folders: You can use the magnifying glass icon to search for folders and subfolders. Clicking on the “+” icon allows you to add folders and subfolders.
Add a folder
- Navigate to the files section: Click on the “Add” button and select “Folder” from the drop-down.

- Enter the folder details: Enter the title and click “Add”.

Add a sub-folder
Right-click or click on the three dots in front of the folder name where you intend to add the subfolder and select the “Add sub folder” option.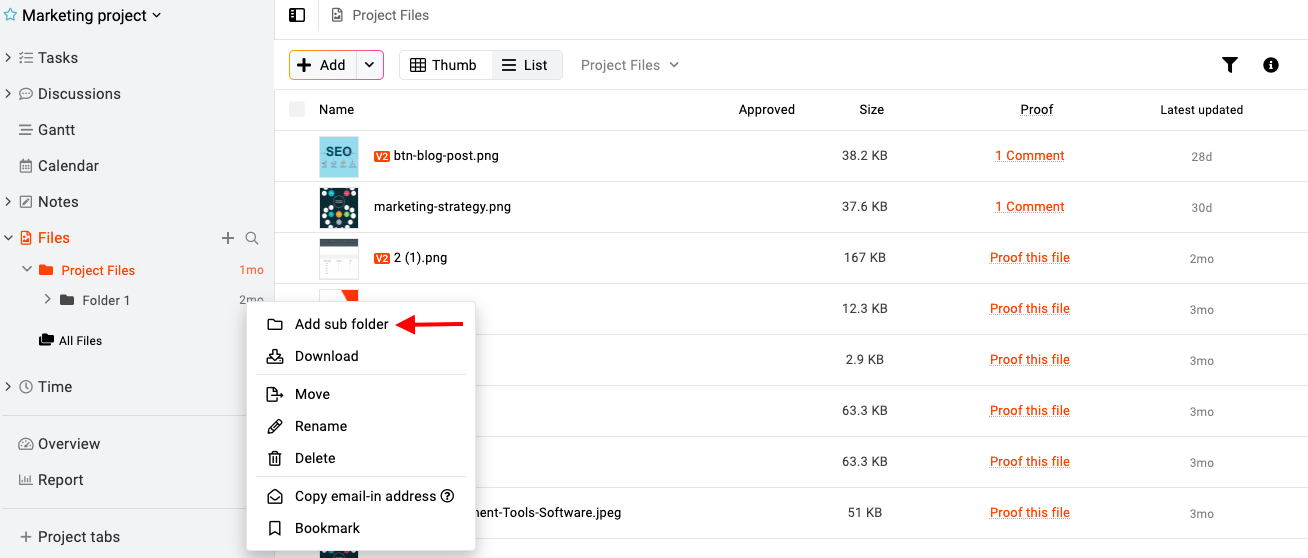
Download a folder
Right-click or click on the three dots in front of the folder name and select the “Download” option.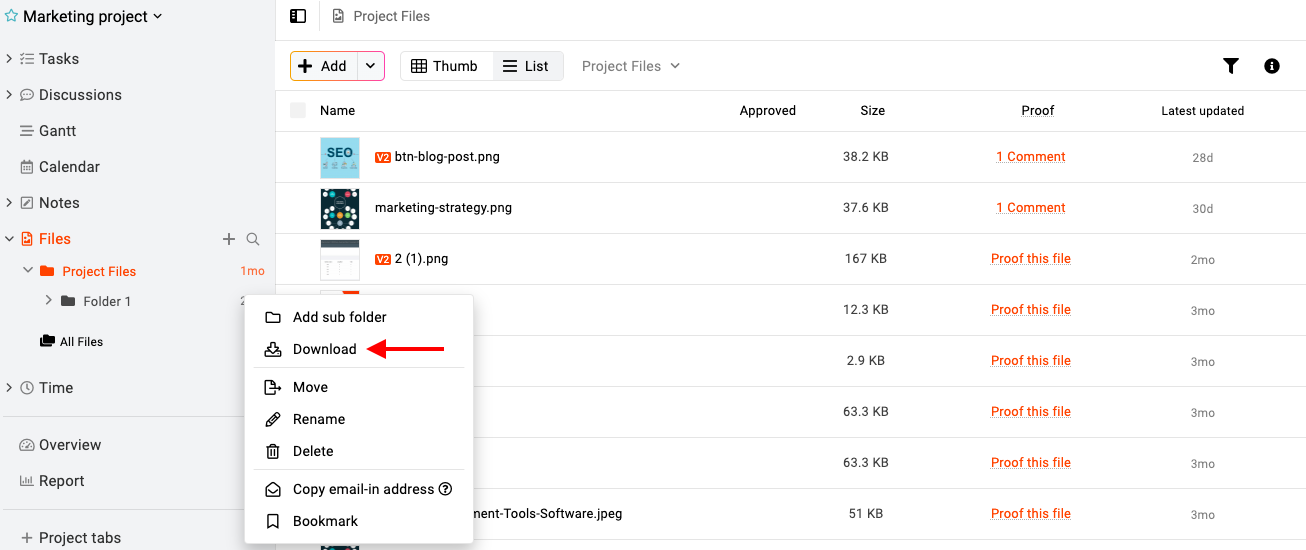
Note: All the files present in that folder will be downloaded in a zip folder.
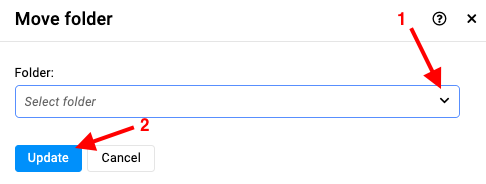
Move a folder
- Right-click or click on the three dots in front of the folder name and select the “Move” option.
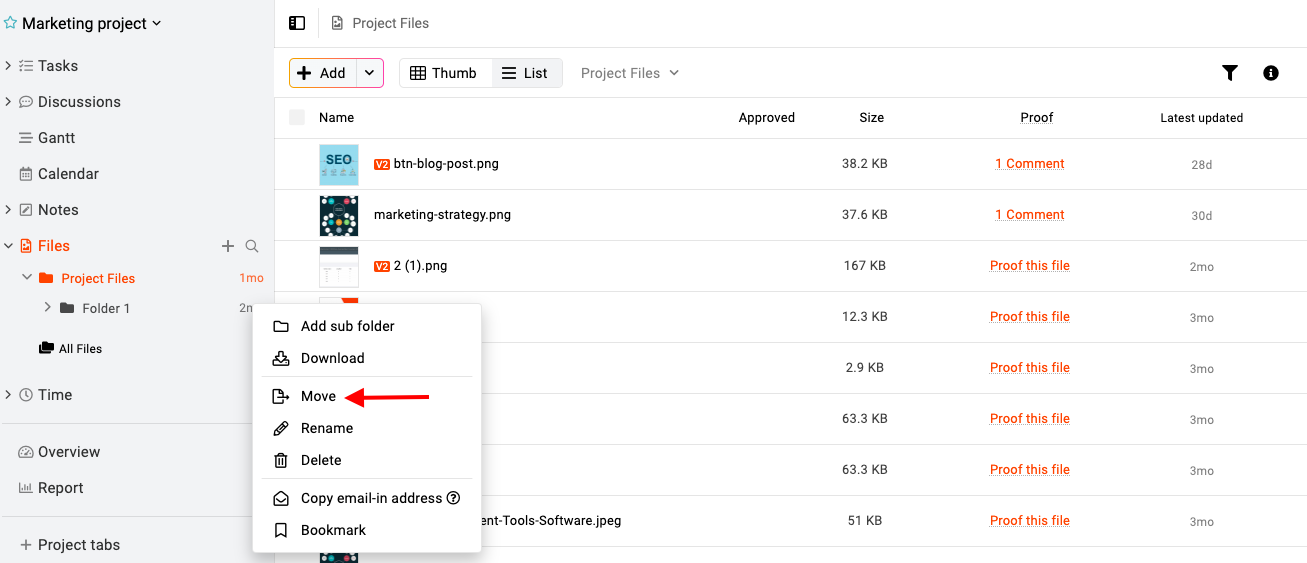
- Select the folder where you want to move the files and click on “Update”.
Rename a folder
- Right-click or click on the three dots in front of the folder name and select the “Rename” option.
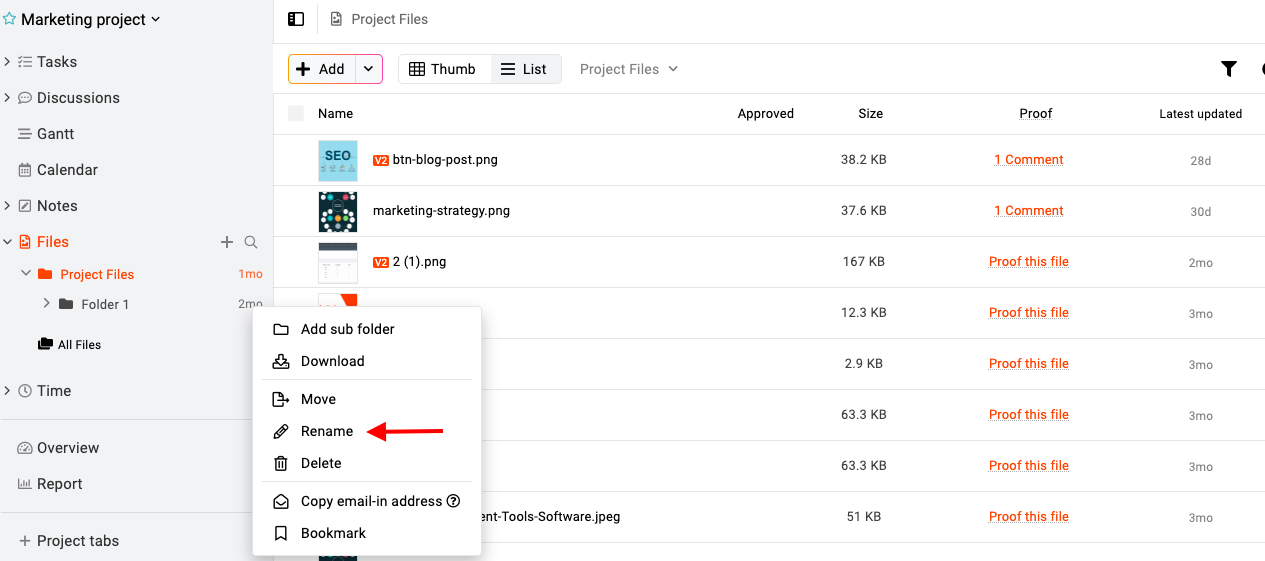
- Enter the new name and click on “Update”.

Delete a folder
- Right-click or click on the three dots in front of the folder name and select the “Delete” option.
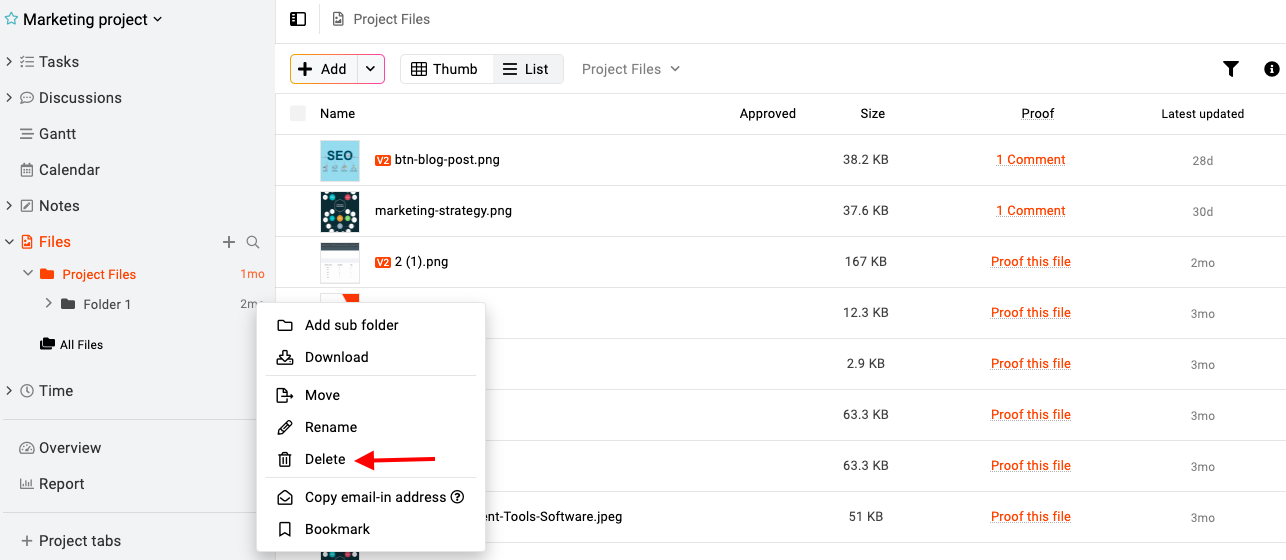
- When deleting a folder, all of its subfolders will be removed, but the files remain accessible in “All files”. If you want to completely remove the files, ensure to select the “Remove files from ‘All files’ too” option and confirm by clicking “Yes”.

Note: ProofHub keeps items in the “Trash” for 15 days. Restore them easily by going to Trash. For detailed instructions on restoring deleted items from the trash, please refer to Trash.
Bookmark a folder
- Right-click or click on the three dots in front of the folder name and select the “Bookmark” option.
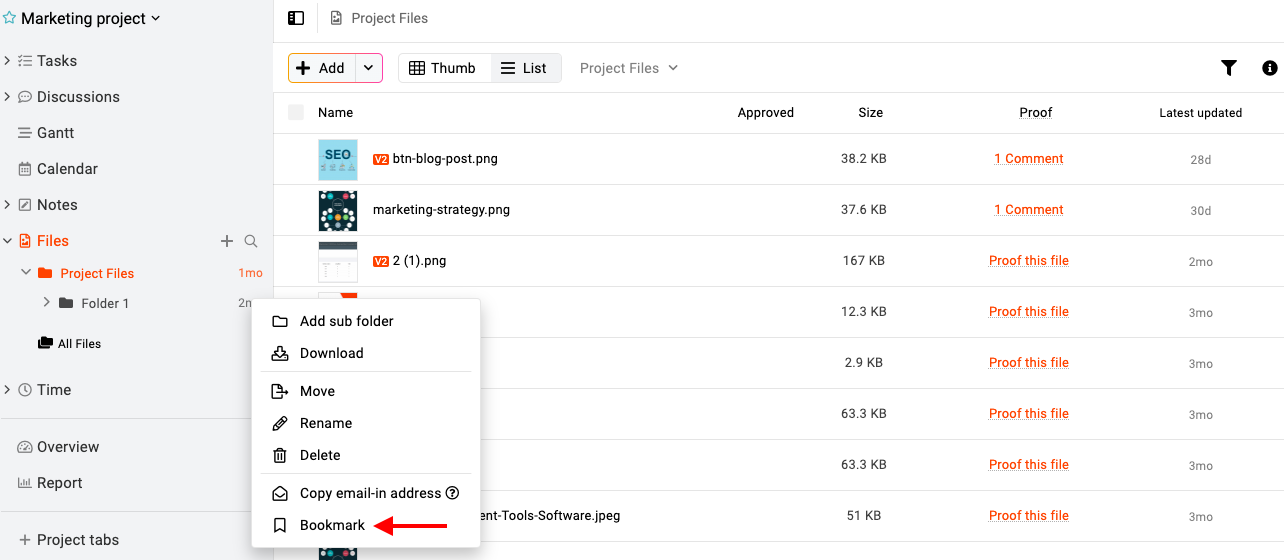
- To view all your bookmarked items, click on the bookmark icon at the right of the page. For more information on bookmark click here.

Need more help?
- Can't find the answer to your questions? Contact ProofHub Support
- You can also book a demo.