How to add and manage task list
Add a task list
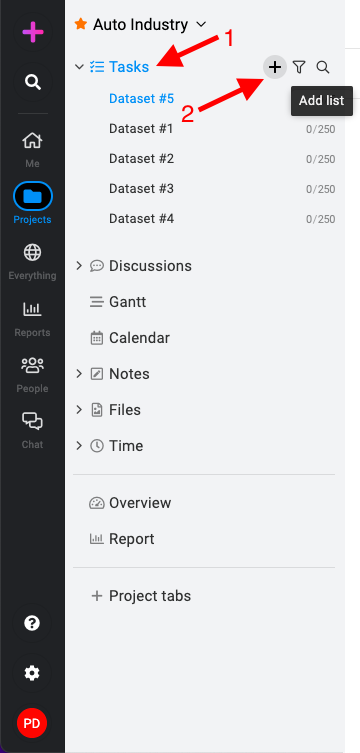
- Navigate to the “Tasks” section: Select the specific project where you want to create the task list. Click the “Tasks” tab on the left-side menu and click on the “+” icon to initiate the creation of a new task list.
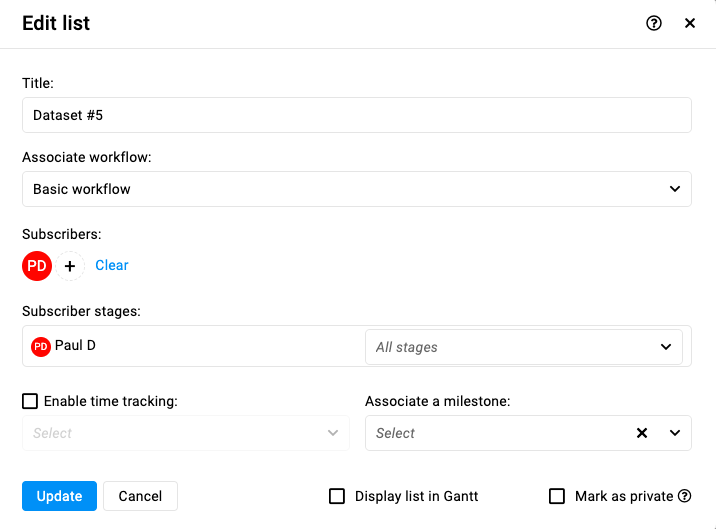
- Fill task list details:
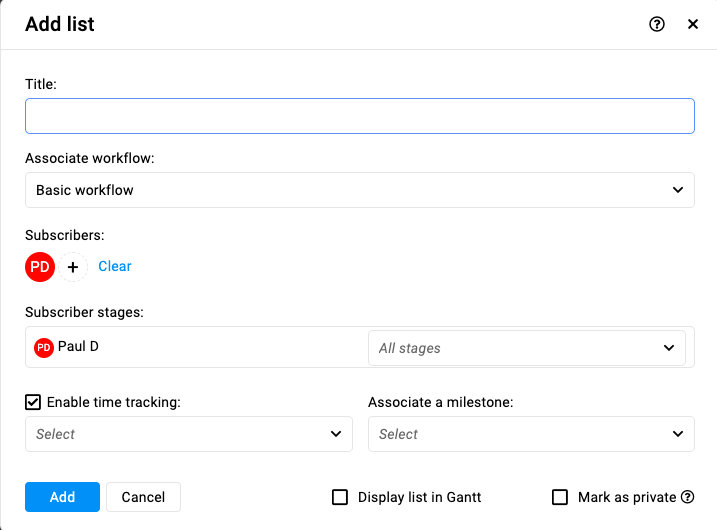
- Title: Enter a title for the task list.
- Associate workflow: Choose a workflow from the existing dropdown list to define task stages and progress. (For more on workflows, click here).
- Subscribers: Add team members who will be involved in this task list.
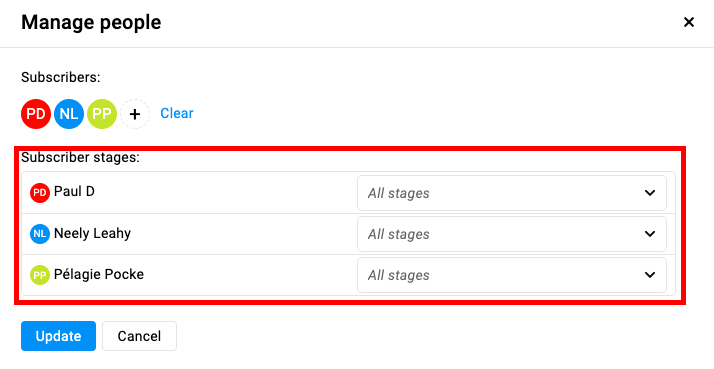
- Subscriber stages: Select the stage at which subscribers will receive notifications.
- Enable time tracking: Choose a timesheet for logging time spent on tasks within this list.
- Associate a milestone: This milestone could represent an important event or goal related to the task list.
- Display list in Gantt: If you prefer to have a timeline view and manage your task list from the Gantt, select the “Display list in Gantt” option.
- Mark as private: Check the “Mark as private” option if you need to restrict the visibility of the task list to selected subscribers only.
- Click on the “Add” button.
Manage people in a task list
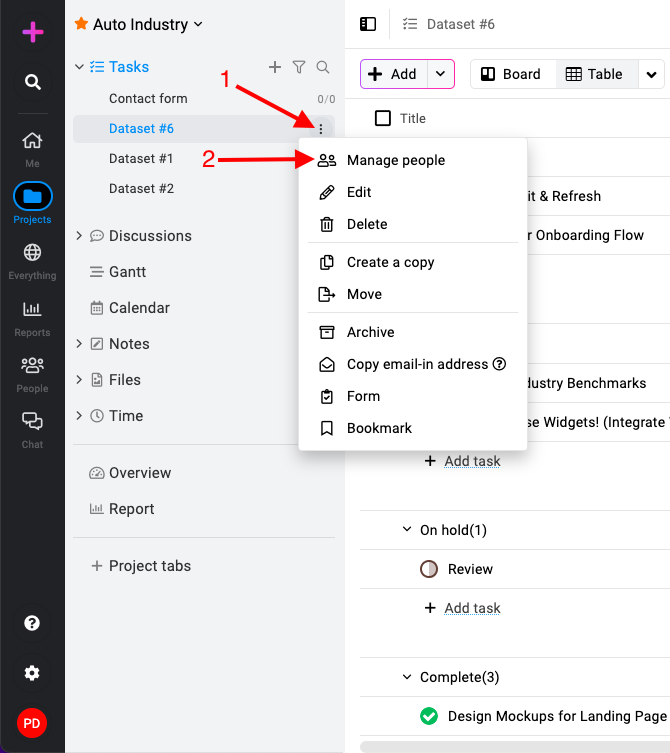
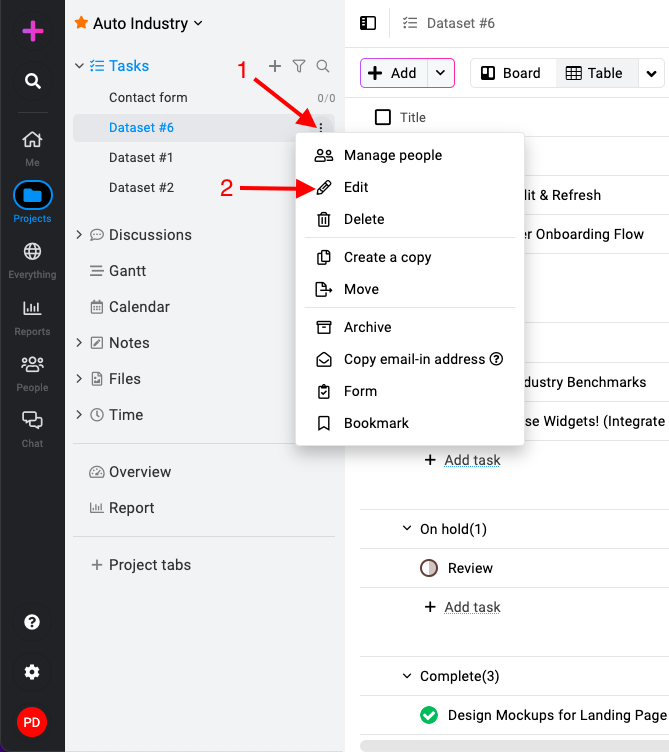
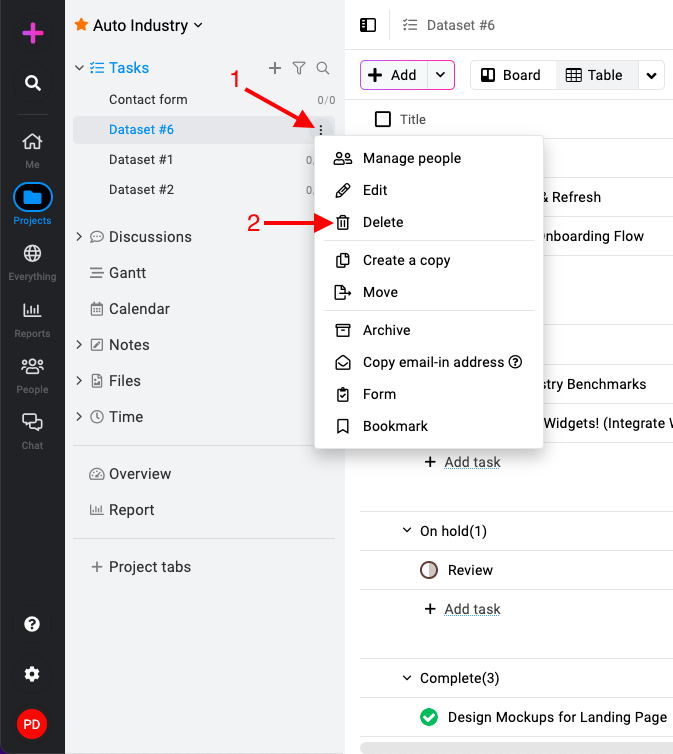
- Select the task list: Right-click or click the three-dots icon and select “Manage people“.
- View existing subscribers: In the subscribers’ option, you’ll see a list of existing subscribers who have access to this task list.
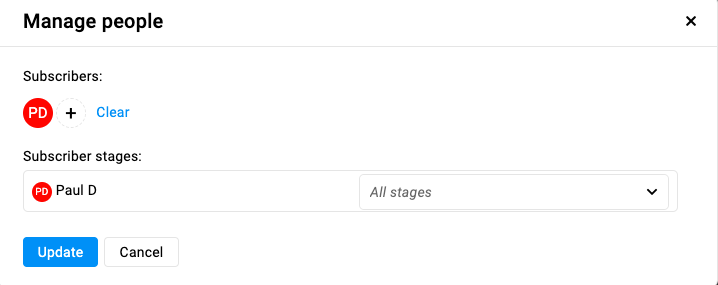
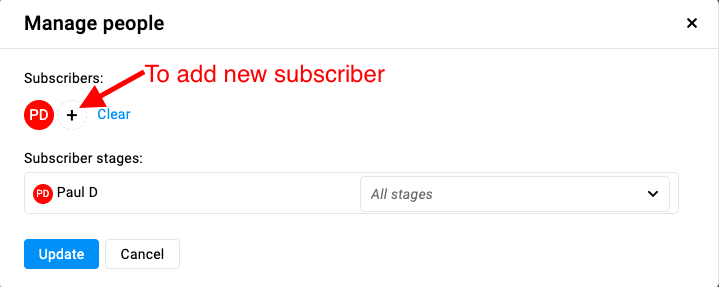
- Add new subscribers: Click on the “+” icon to add new people. From the drop-down list select new people.
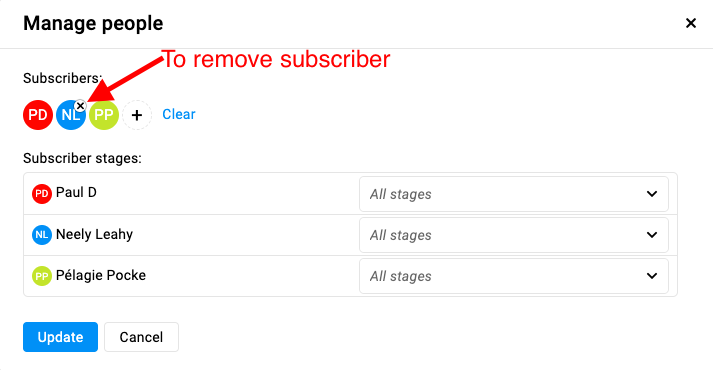
- Remove subscribers: Hover over the existing people’s names and select the “x” to remove them.
- Subscriber stages: Update subscriber stages if needed and click on the “Update” button to save and apply the changes.
Edit a task list
- Edit task list: Right-click or click the three-dots icon and select “Edit“.
- Edit the details: Modify the task list title, change workflow, add or remove new subscribers, and subscriber stages, etc, and click on “Update” to make the changes.
Delete a task list
- Select the task list: Right-click or click the three-dots icon and select “Delete“.
- Confirm deletion: Select “Yes” within this confirmation window to delete.
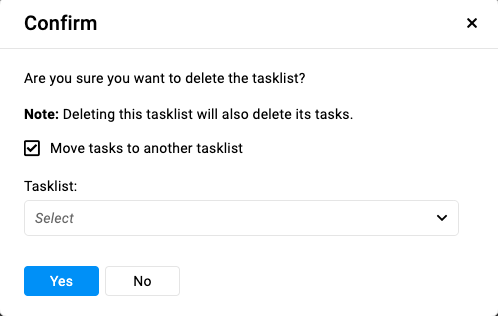
Note: Deleting this tasklist will also delete its tasks. If you want to keep the tasks, select the option “Move tasks to another tasklist”. ProofHub keeps items in the “Trash” for 15 days. Restore them easily by going to Trash. For detailed instructions on restoring deleted items from the trash, please refer to Trash.
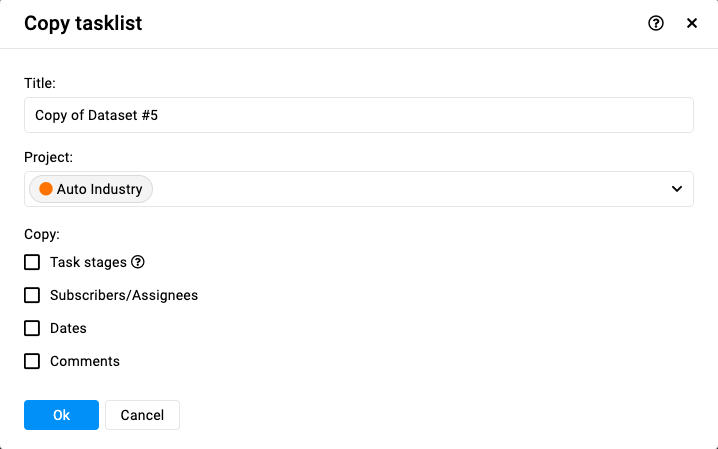
Create a copy of a task list
- Select the task list: Right-click or click the three-dots icon and select “Create a copy“.
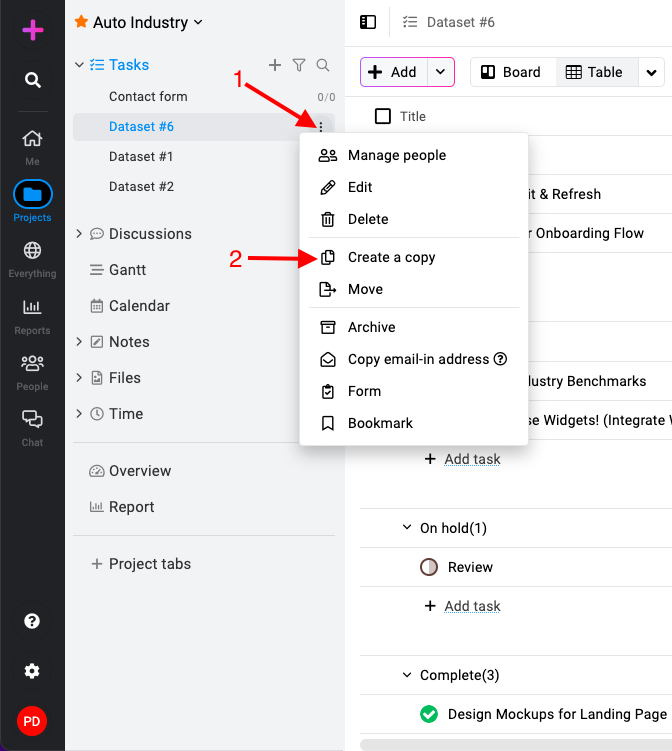
- Create a copy: A pop-up window will prompt you to rename the task list title, select the project, and let you copy task stages, subscribers/assignees, dates, and comments from the original task list.
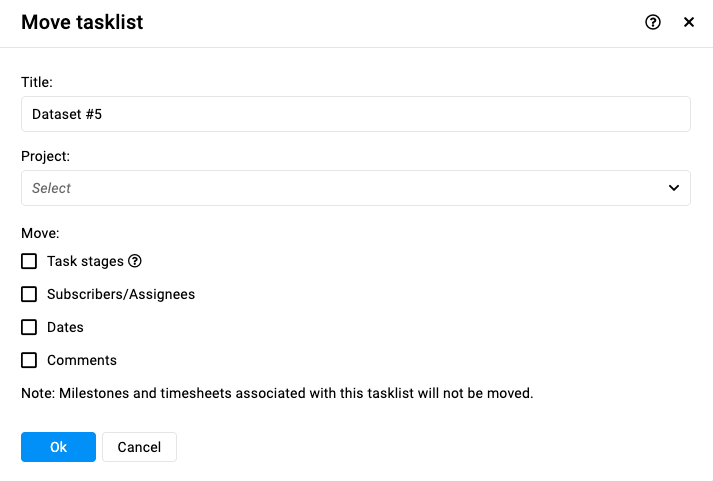
Move a task list
- Select the task list: Right-click or click the three-dots icon and select “Move“.

- Move the tasklist: A pop-up window will prompt you to rename the task list title, select the project, and let you move task stages, subscribers/assignees, dates, and comments from the task list to another project.
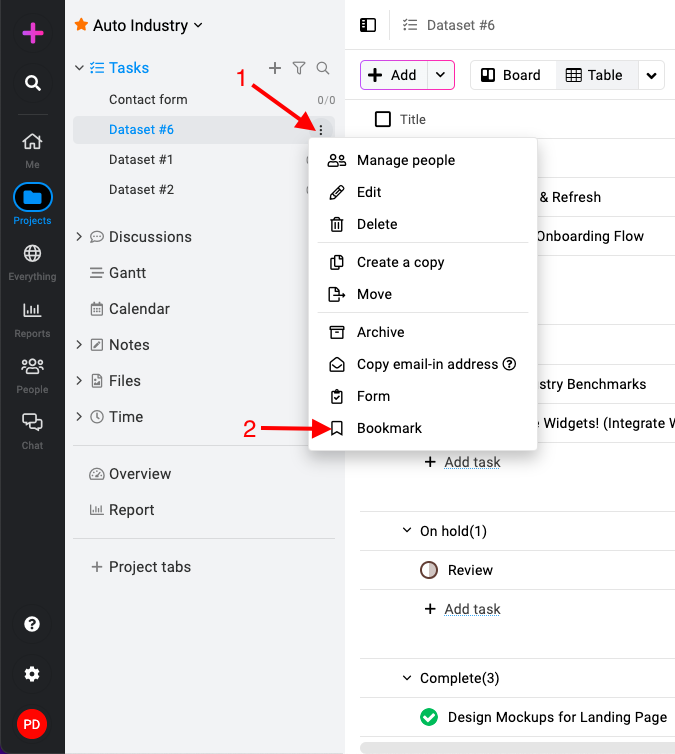
Bookmark a task list
- Right-click or click the three-dots icon and select “Bookmark“.
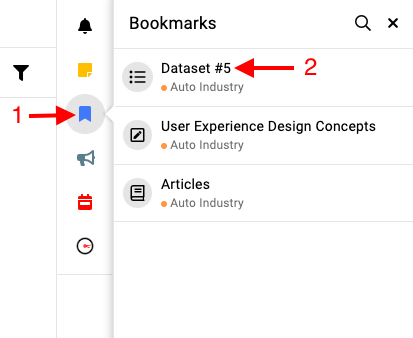
- The bookmarked task list will appear in the right-side menu with other saved bookmarks.
Search task list
- Access the search option: Click on the search icon within the tasks section to reveal the search bar and start typing the name of the task list you wish to search. As you type, the search results will dynamically update to display matching task lists based on the entered keywords.
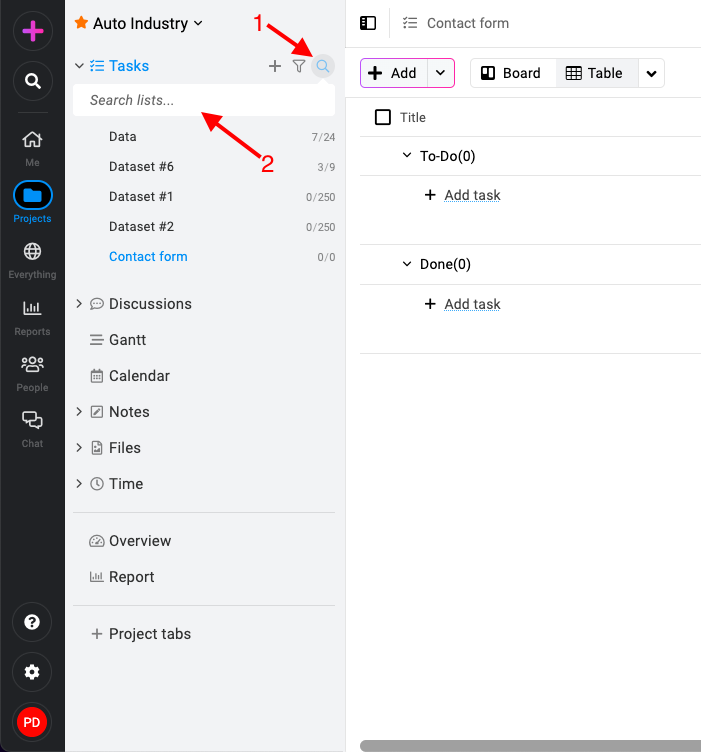
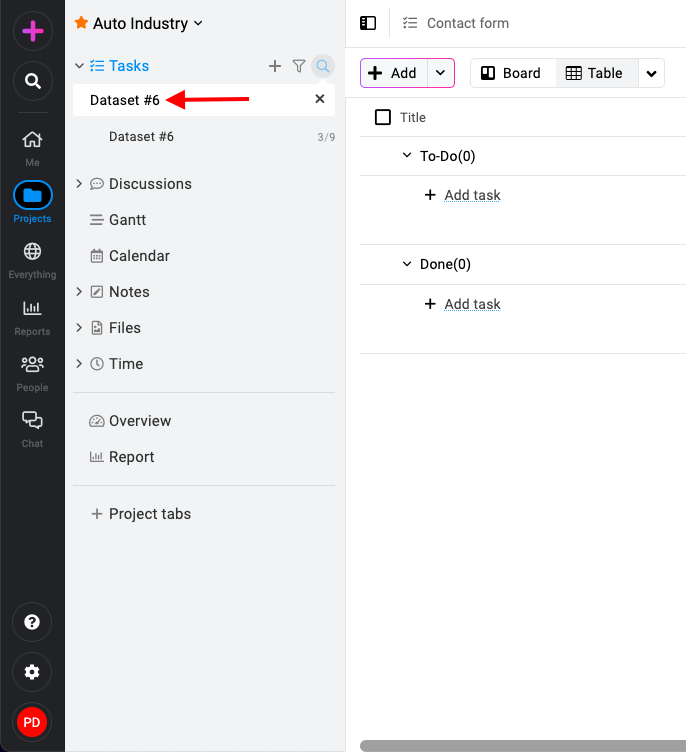
- Review search results: Browse through the search results to identify the specific task list you are looking for.
Need more help?
- Can't find the answer to your questions? Contact ProofHub Support
- You can also book a demo.
Table of contents
All the Tasks articles
- Introduction to tasks
- How to add and manage task list
- How to add and manage task
- How to add and manage custom fields
- How to import and export tasks
- How to add tasks via email-in
- How to add and manage forms
- How to change views in tasks
- How to use filters in task
- How to utilize all tasks
- How to log time in a task
- How to manage workflow in tasks
- How to view task history
- How to view task dependency
- How to add a recurring task
- How to archive and unarchive task
- How to archive and unarchive task lists