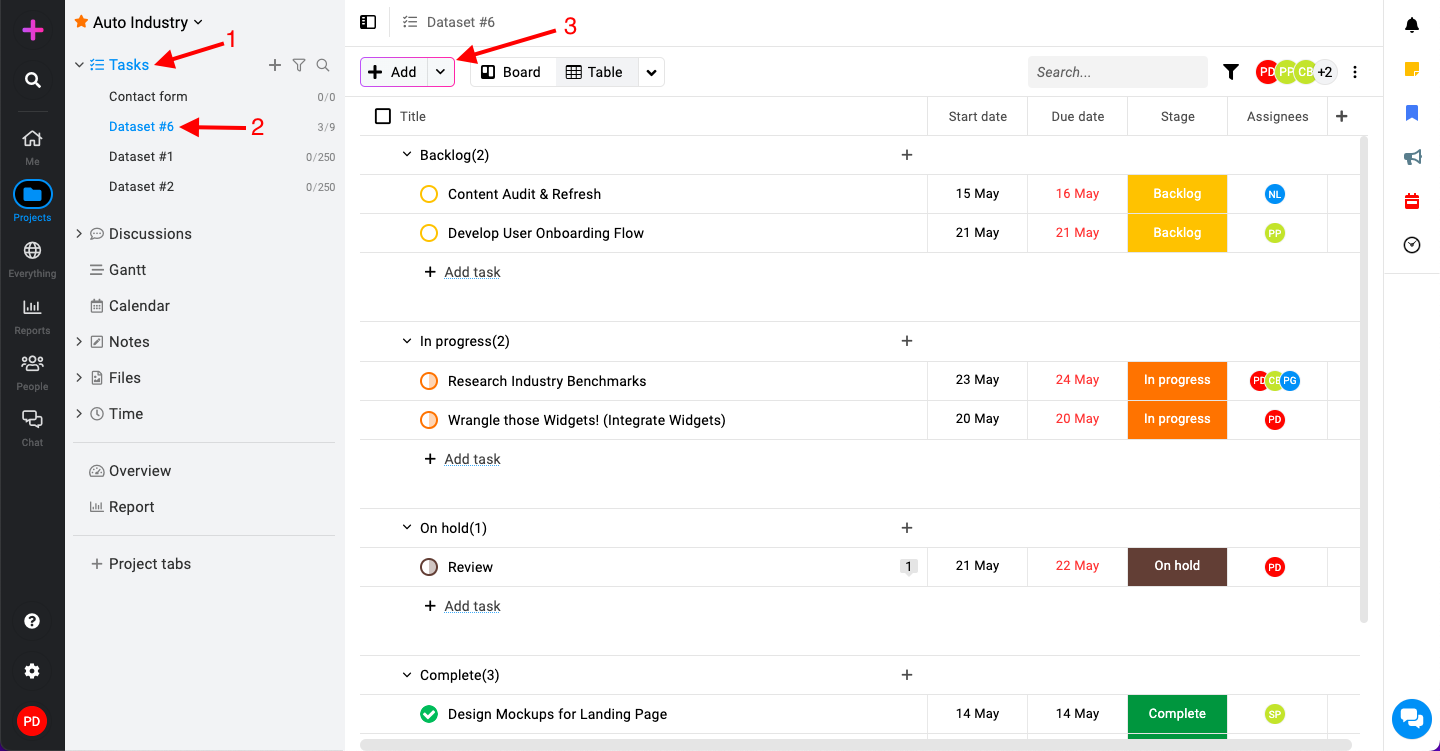
How to add and manage task
Add a task
- Open the project and task list: Click on the “Add” button at the top of the screen to open the task creation window.
- Enter task details: In the task creation window, fill in the following details:
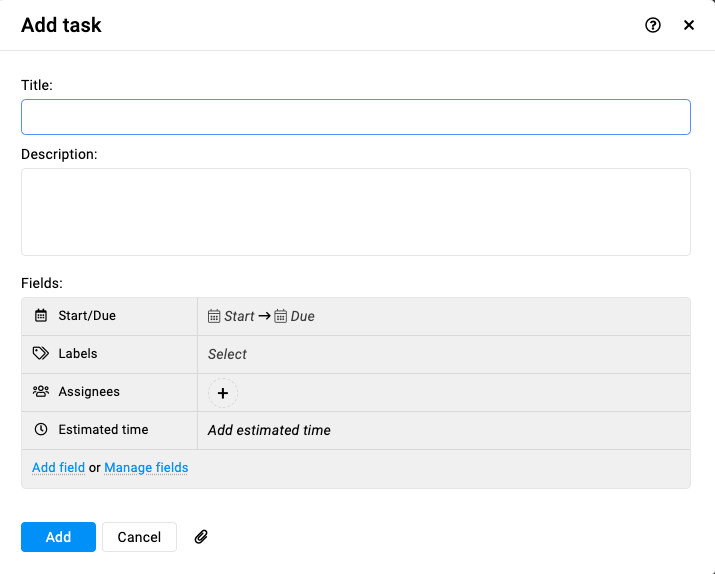
- Title: Enter a title that clearly describes the task.
- Description: Provide a detailed description of the task, including any necessary information or context.
- Fields:
- Start date and due date: Set the task’s start and end dates.
- Labels: Assign relevant labels to categorize and identify the task.
- Assignees: Select team members responsible for completing the task.
- Estimated time: Specify the estimated time required to complete the task.
- Custom fields: If applicable, add custom fields to capture specific information related to the task. Refer to additional documentation for details on custom fields.
- Add files & documents: Attach any necessary files or documents related to the task.
- Save the task: Click on the “Add” button.
Add a subtask
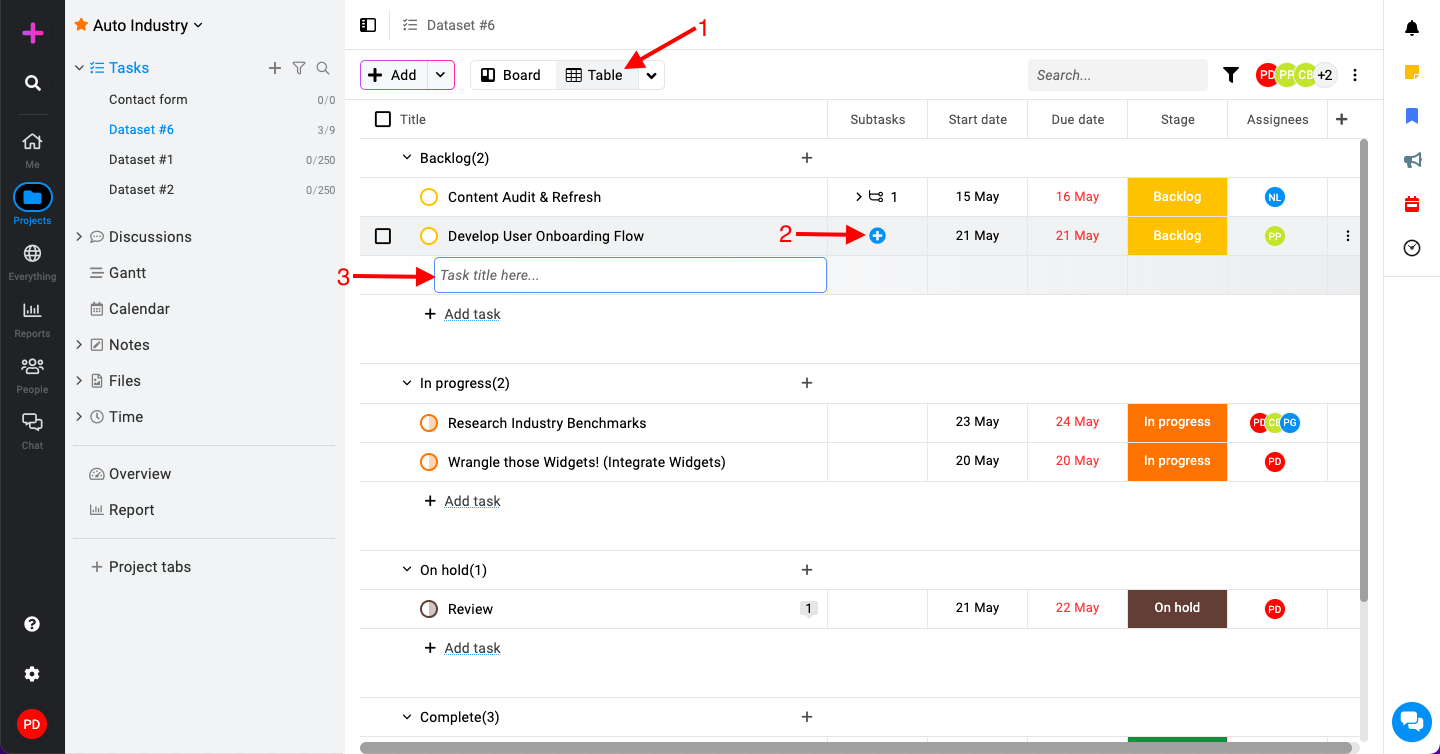
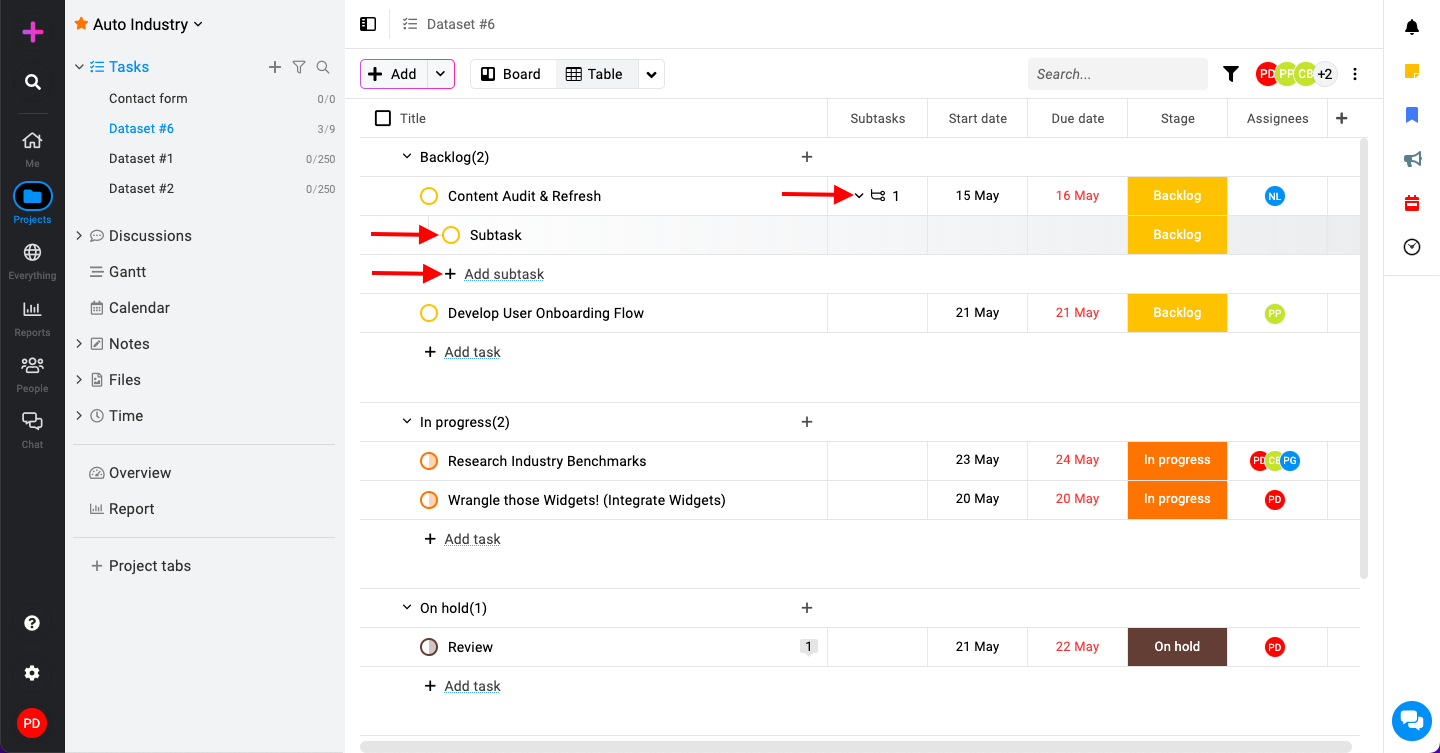
- Add a new subtask: While using the table view, under the “Subtask” column next to the task you want to add subtasks. Move your cursor within the Subtask column of the desired task and click on the “+” icon. Enter the title of the subtask and press “Enter” on your keyboard to create the subtask.
Manage people in task
- Access assignees: Right-click on the task name and select “Manage people“.
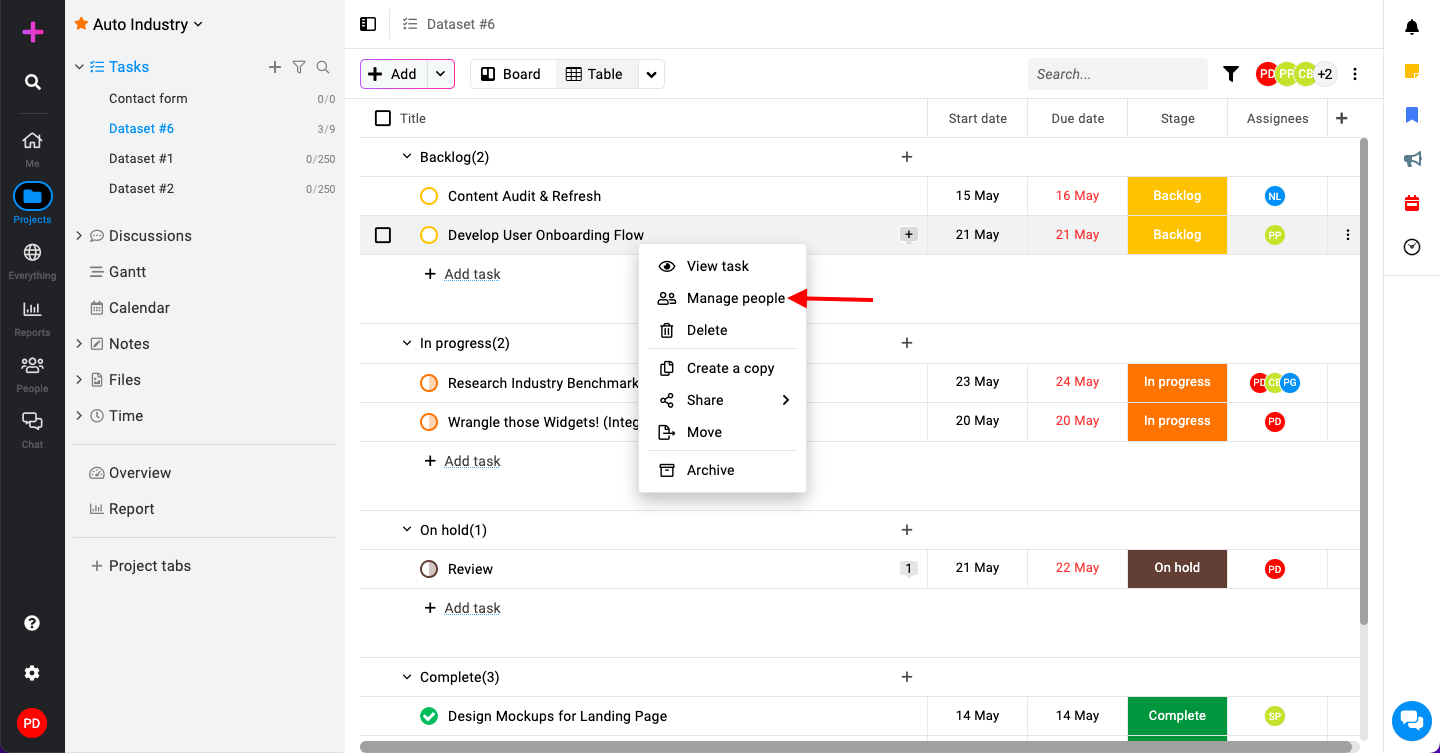
- Add or remove assignees: Click on the “Manage People” option to see a list of people assigned to this task.
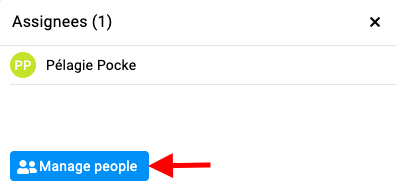
- Select assignees: In the assignees’ window, you’ll see a list of existing assignees who have access to this task.
- Tick the checkbox next to the names of the people you want to add as assignees or uncheck to remove them as assignees and click on the “Update” button.
Delete a task
- Select the task: Right-click on the task name and select “Delete“.
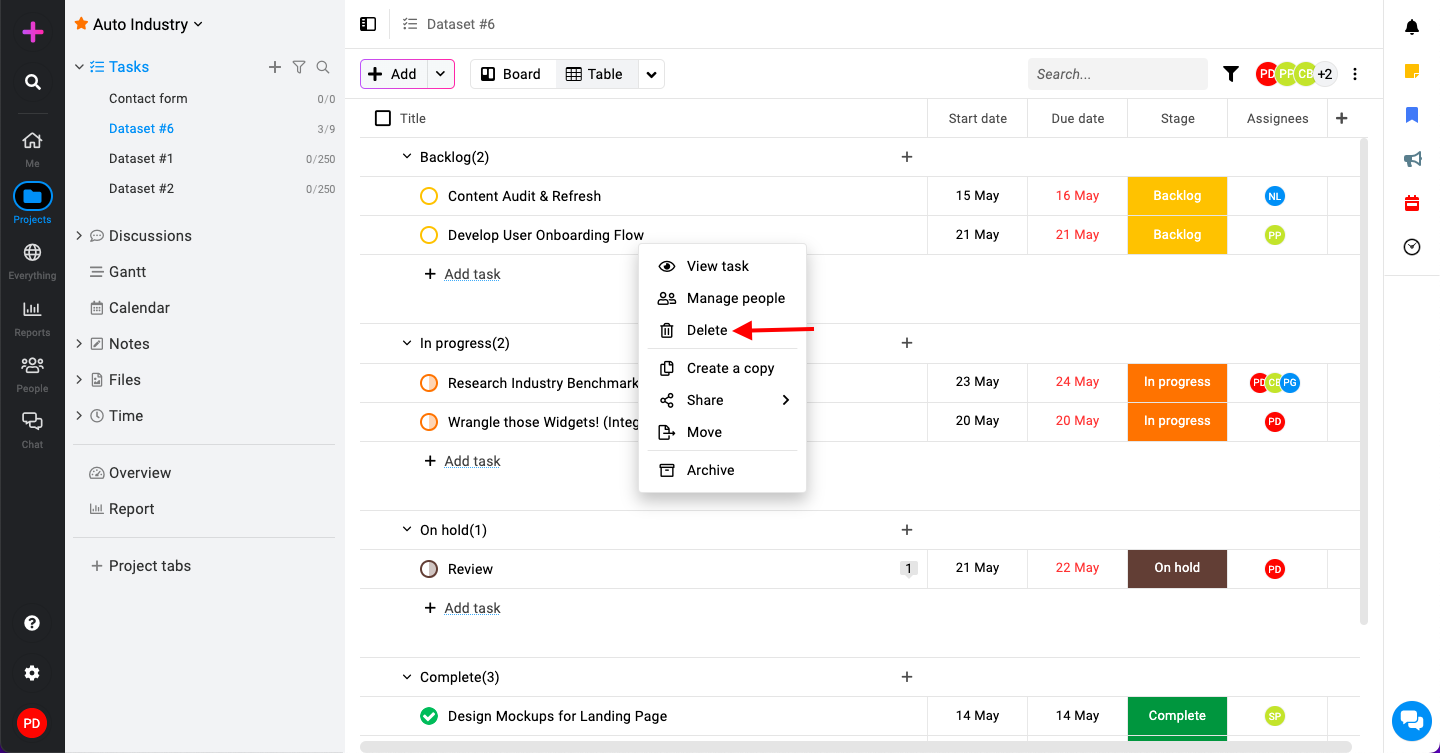
- Confirm deletion: Select “Yes” within this confirmation window to proceed with deleting the task.
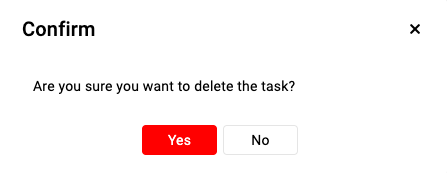
Note: ProofHub keeps items in the “Trash” for 15 days. Restore them easily by going to Trash. For detailed instructions on restoring deleted items from the trash, please refer to Trash.
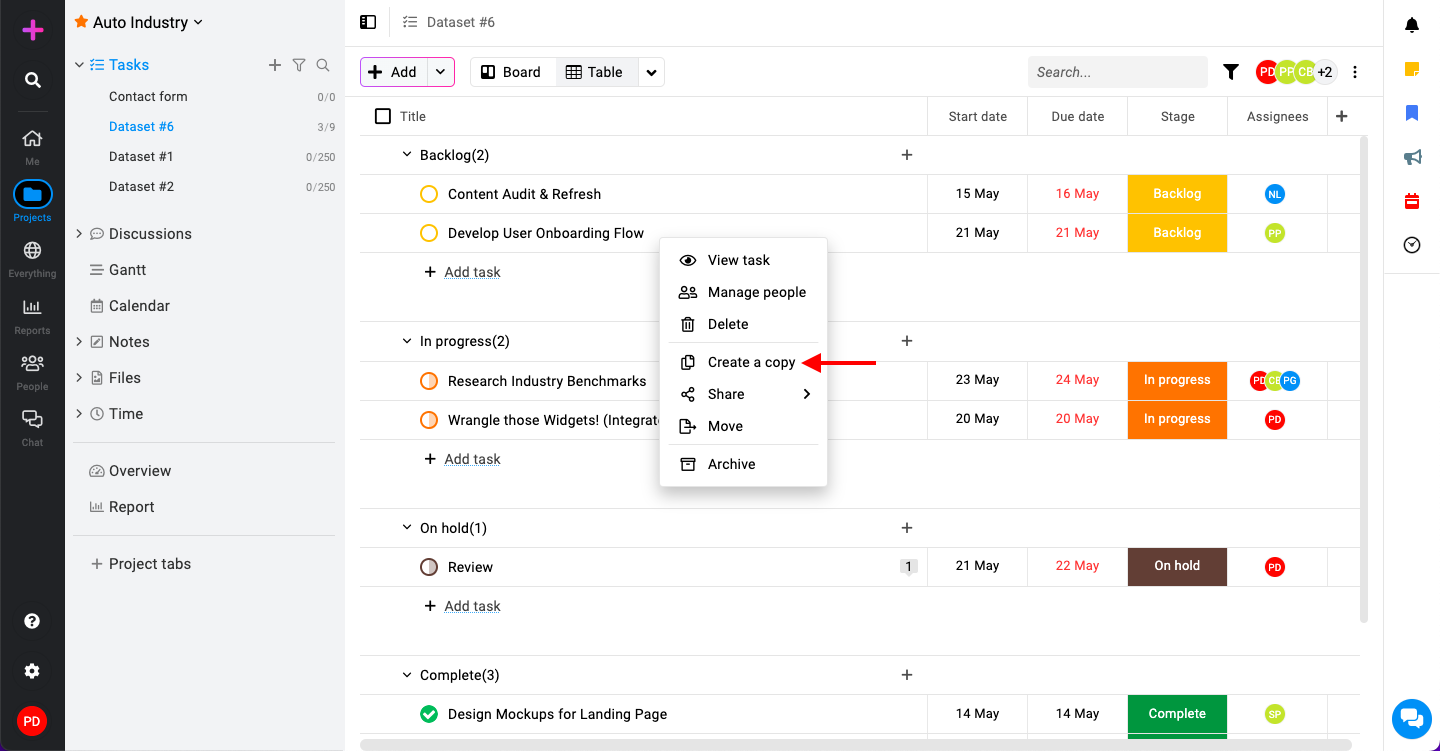
Create a copy of a task
- Select the task: Right-click on the task name and select “Create a copy“.
- In the “Copy task” window that opens:
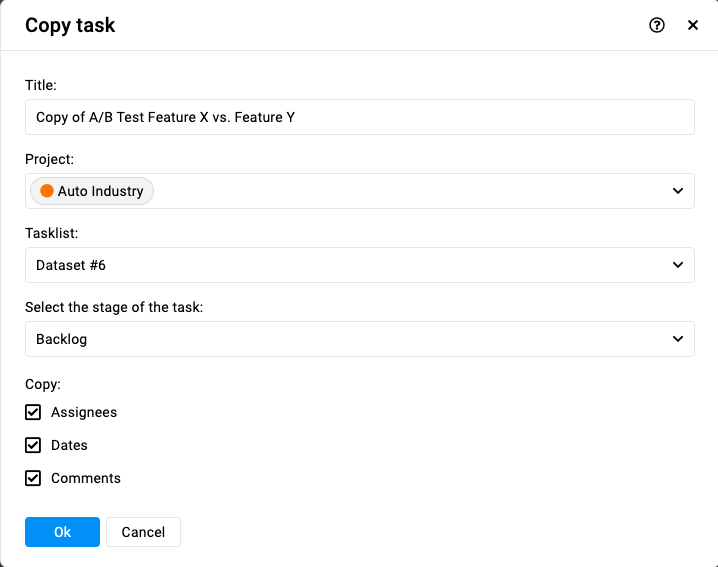
- Title: Change the task title for the new copy if needed.
- Project: Choose the project where the new task copy will be created.
- Tasklist: Specify the task list within the selected project where the task copy will be added.
- Select the stage of the task: Select the task stage (e.g., To-Do, In Progress, Completed) within the task list where the task copy will be placed.
- Copy from the original task:
- Assignees: Select this option to copy the same assignees from the original task to the new task copy.
- Dates: Check this box if you want to copy the start date and due date from the original task to the new task copy.
- Comments: Enable this option if you wish to copy comments associated with the original task to the new task copy.
Share task
- Select the task: Right-click on the task name and select “Share“.
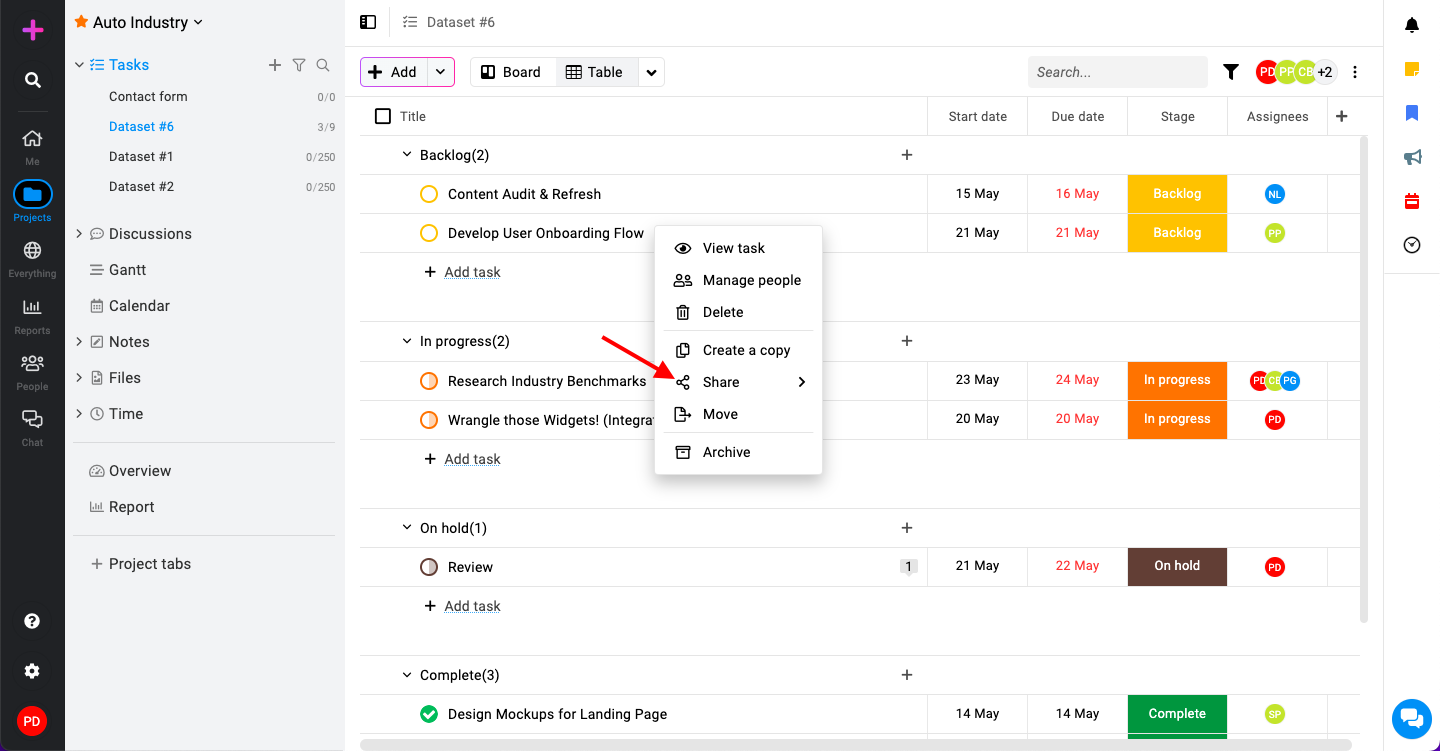
- Select a sharing option: In the “Share” menu, you will find two sharing options:
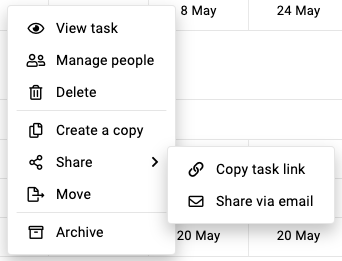
- Copy task link: Select this option to copy the URL path of the task to your clipboard. You can then share this link with others via any communication platform.
- Share via Email: Choose this option to share the task directly via email.
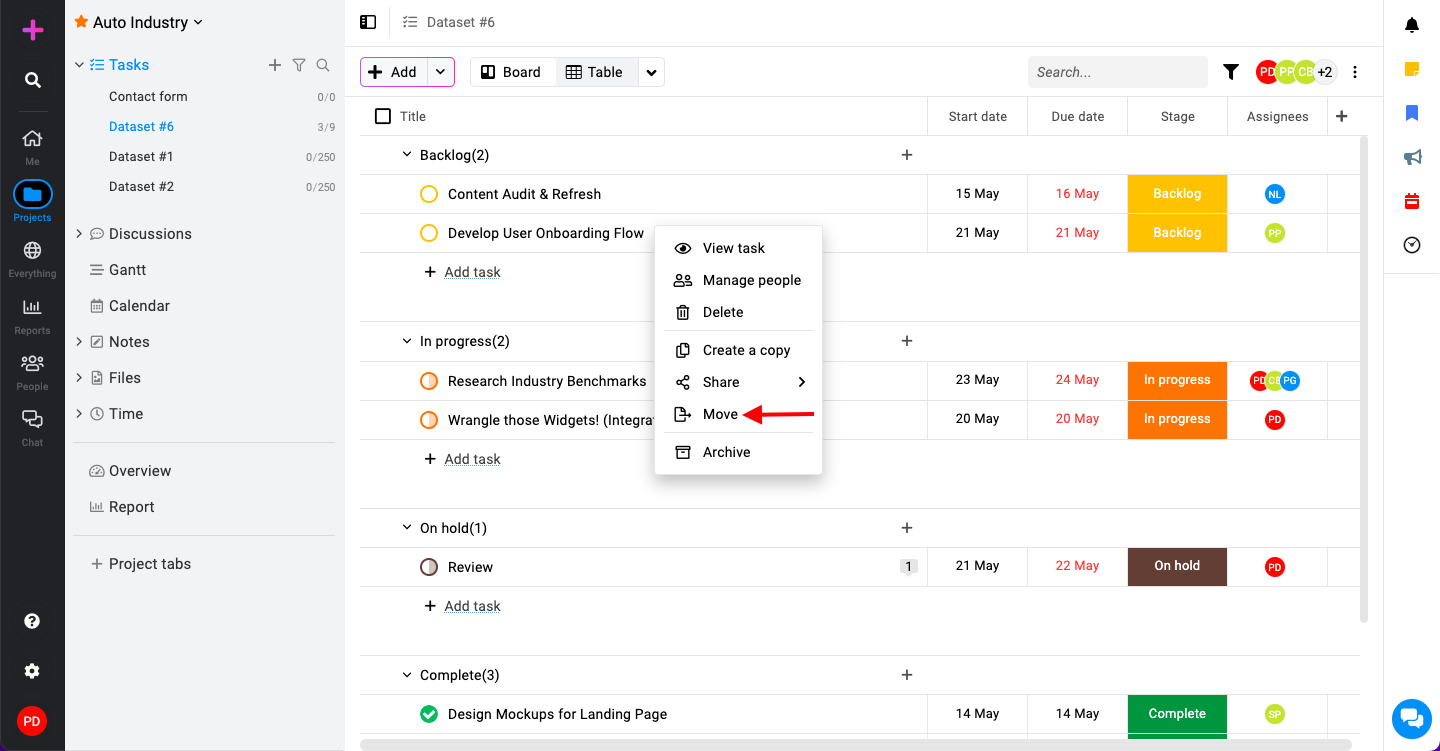
Move a task
- Select the task: Right-click on the task name and select “Move“.
- Customize details: In the “Move task(s)” window that opens:
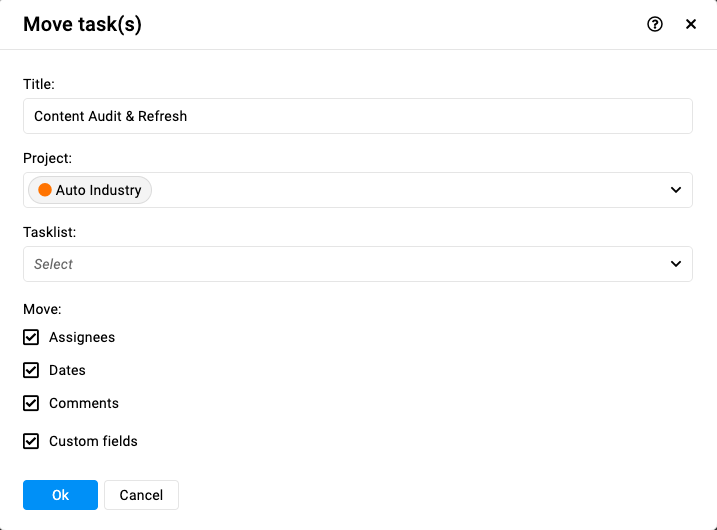
- Title: Change the task title if needed.
- Project: Select the project where the new task will be moved.
- Tasklist: Specify the task list within the selected project where the task will be moved.
- Move from the original task:
- Assignees: Select this option to keep the same assignees.
- Dates: Check this box if you want to keep the start date and due date from the original task.
- Comments: Enable this option if you wish to keep comments associated with the original task.
- Custom fields: Any custom fields created will be moved as well.
Note: If a task gets moved to a different project or list, its URL will change. This means the old link won’t work anymore.
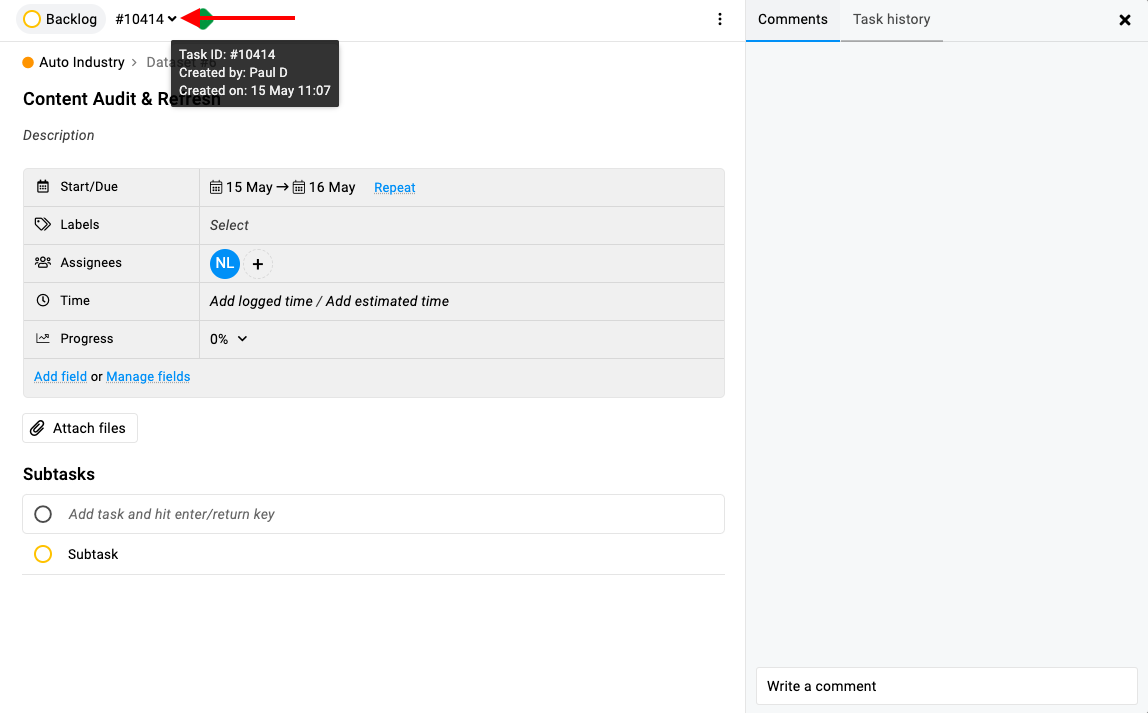
Task IDs
- In every ProofHub account, Task IDs start like this #001.
- Projects will continue the Task ID sequence, maintaining a chronological order across projects.
Searching tasks by Task ID
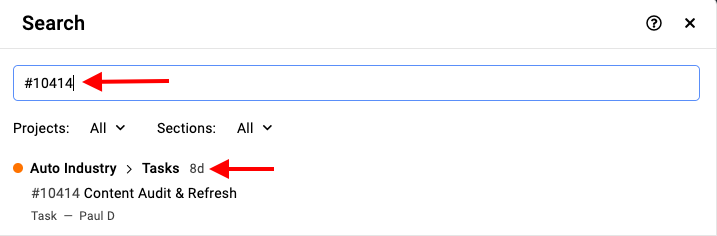
- You can easily search for a specific task using its Task ID from the advanced search option in ProofHub.
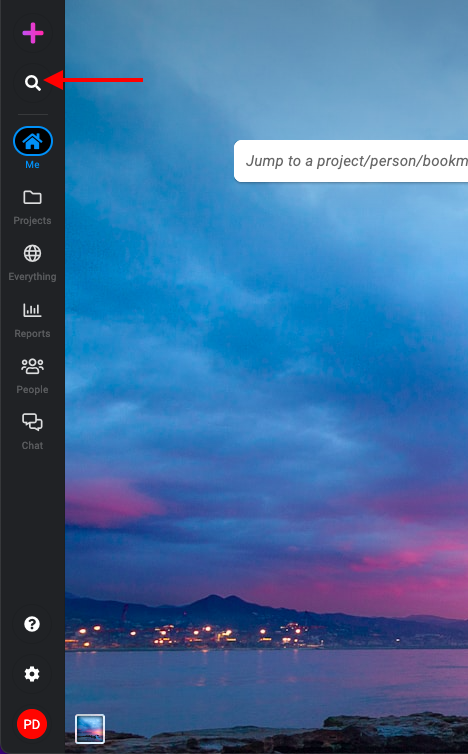
- To search for a task by Task ID, input the Task ID prefixed with # (e.g., “#1234”) into the advanced search.
Note: For detailed instructions about advanced search, please refer to Advanced search.
Show or hide Task IDs
- People can show or hide Task IDs at the task level within ProofHub.
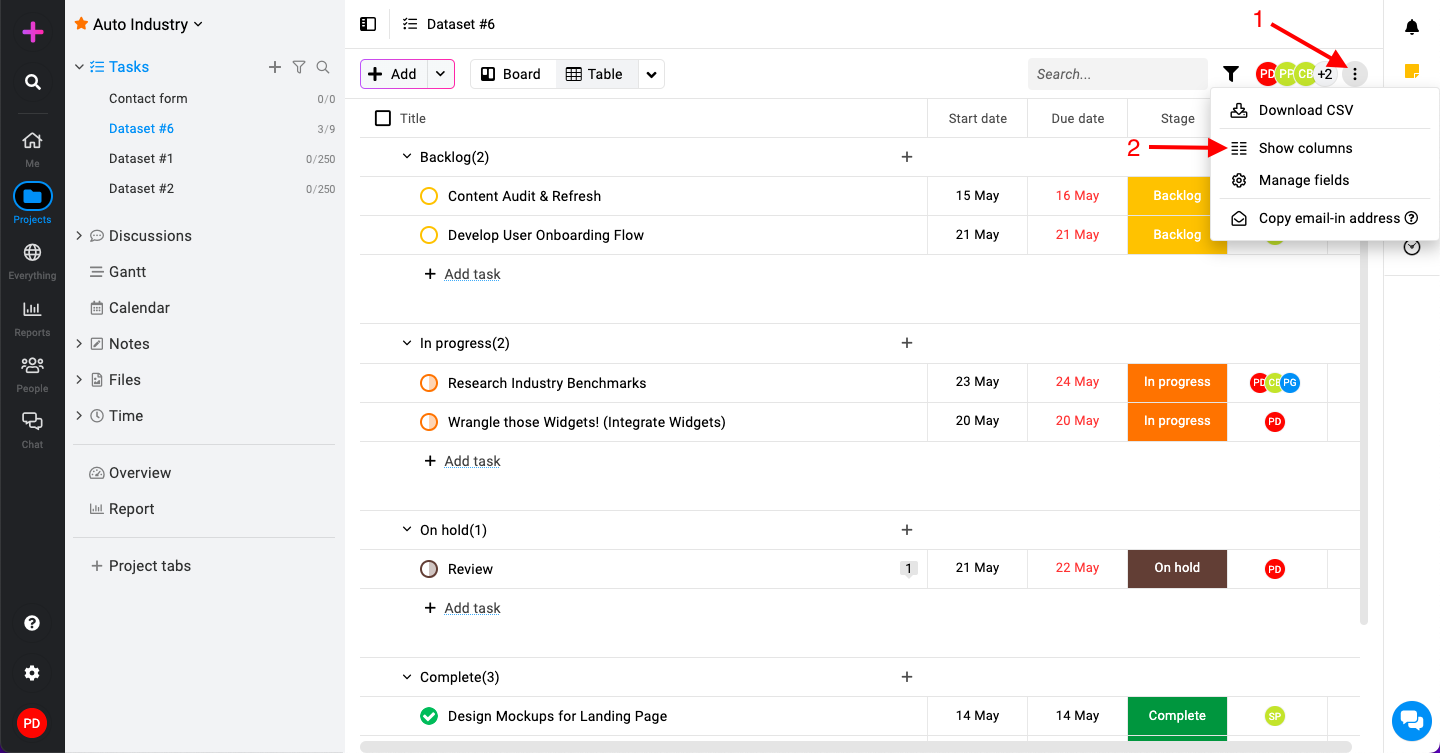
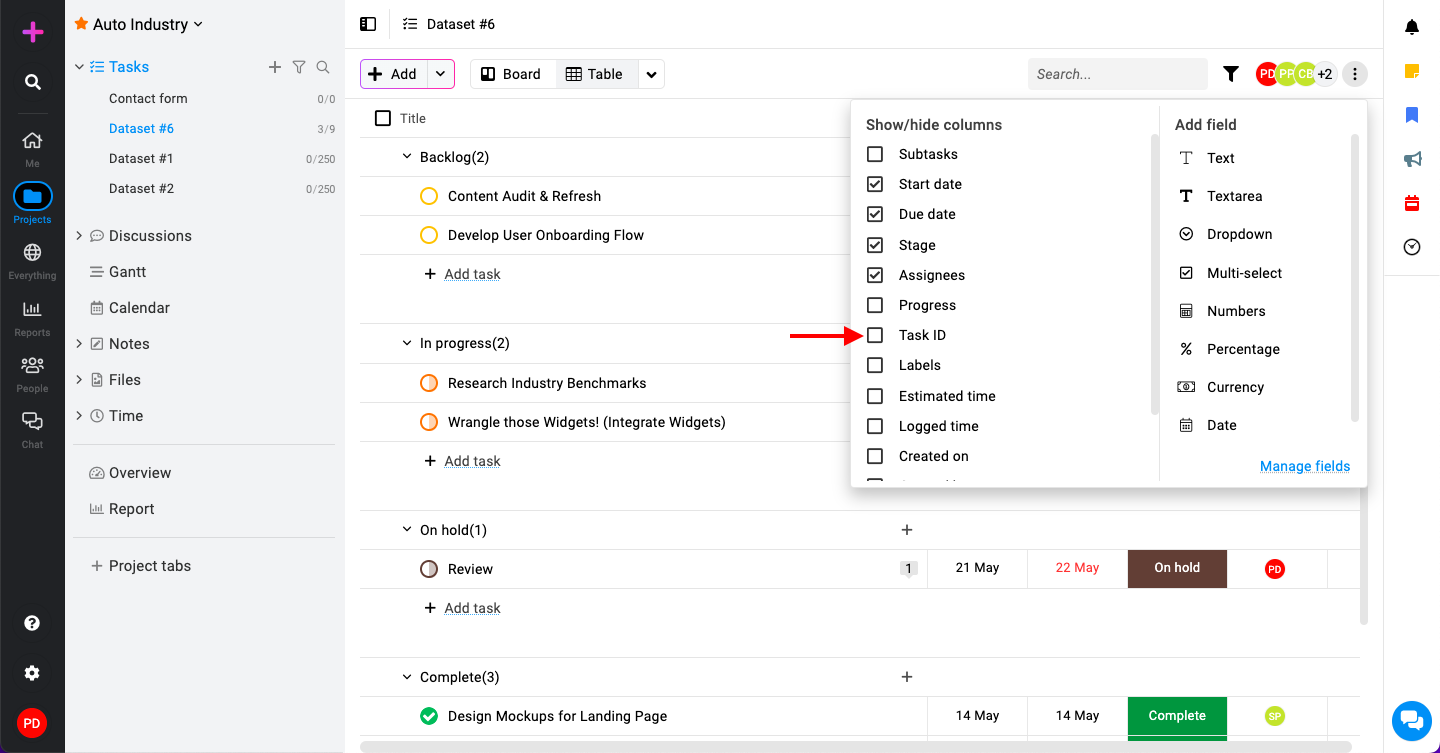
- Click on the three-dots icon on the top and select “Show columns“.
- Under “Show/hide columns“, check or uncheck “Task ID” based on your preference.
Need more help?
- Can't find the answer to your questions? Contact ProofHub Support
- You can also book a demo.
Table of contents
All the Tasks articles
- Introduction to tasks
- How to add and manage task list
- How to add and manage task
- How to add and manage custom fields
- How to import and export tasks
- How to add tasks via email-in
- How to add and manage forms
- How to change views in tasks
- How to use filters in task
- How to utilize all tasks
- How to log time in a task
- How to manage workflow in tasks
- How to view task history
- How to view task dependency
- How to add a recurring task
- How to archive and unarchive task
- How to archive and unarchive task lists