How to add and manage files
Upload a file
- Navigate to the files section: Click on the “Add” button and select “Upload files” from the drop-down.
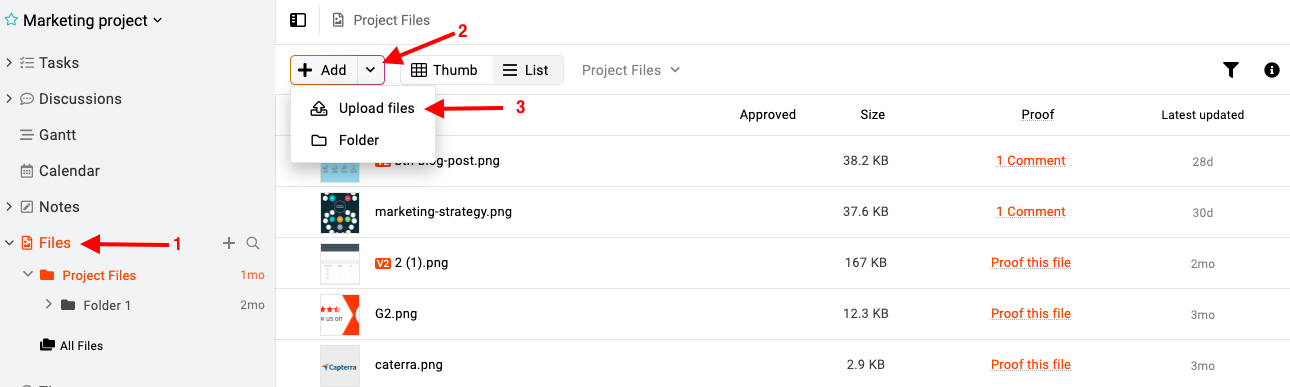
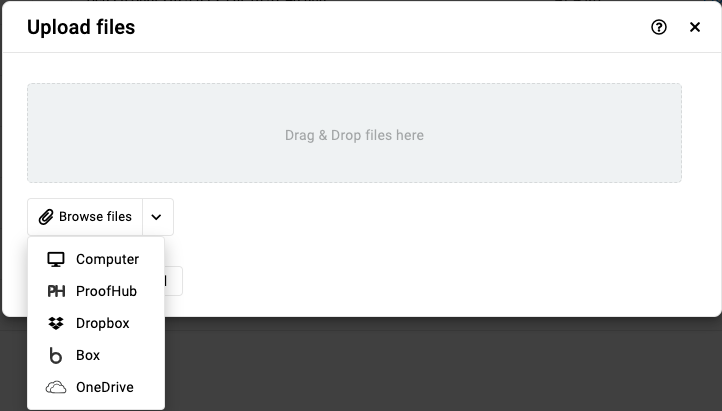
- You have the option to either drag and drop the file, or you can attach files from third-party storage applications by clicking the drop-down icon adjacent to the browse button.
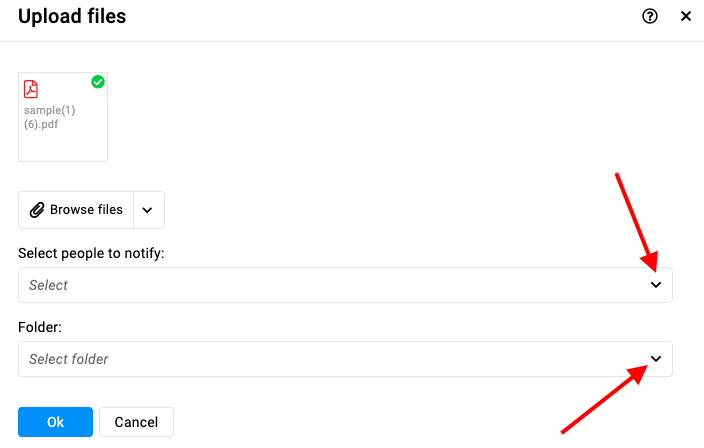
- Once you upload a file, you can select people you want to notify, choose a folder in which you want to save the file, and then click “Ok”.
Note:
- The files you upload from third-party storage applications like Dropbox, Box, and Onedrive are not physically moved to your ProofHub account so does not count against ProofHub storage space.
- You are allowed to upload a file of up to 1 GB in size.
- You can upload multiple files at once.
Download a file
Right-click on the file or click on the three dots and select the “Download” option.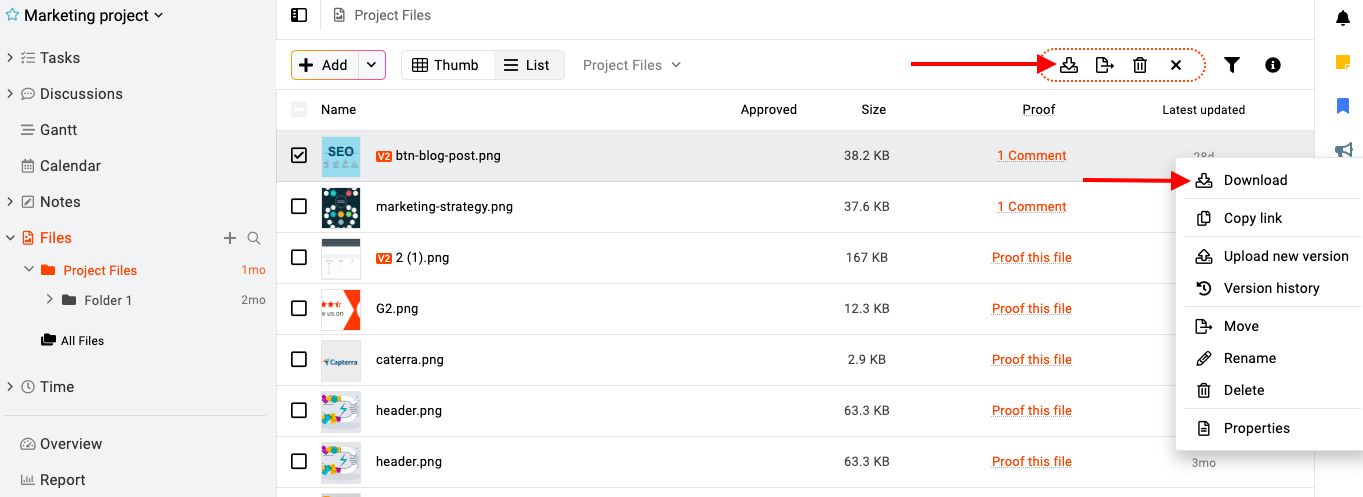
Note: You can choose multiple files using the “Ctrl/Cmd + A” and download them all by selecting the “Download” option at the top.
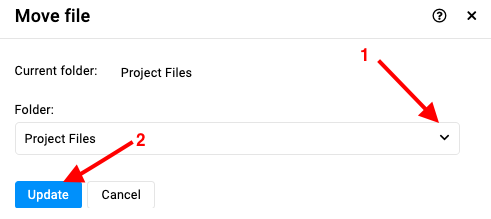
Move a file
- Right-click on the file or click on the three dots and select the “Move” option.
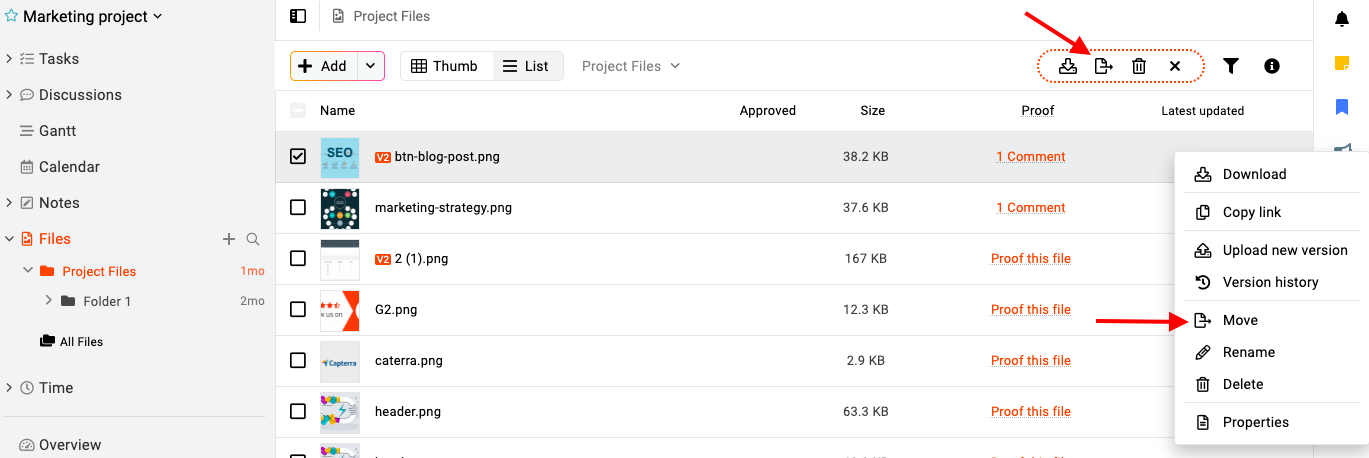
- Choose the folder or subfolder where you wish to move the file and click on “Update”.
Note: You can select multiple files using the “Ctrl/ Cmd +A” key. Once selected, you will see the “Move” option at the top. Click on it to move the files to another folder.
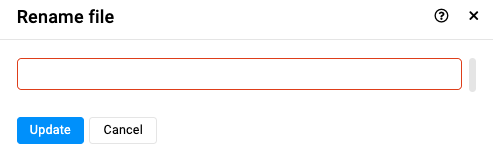
Rename a file
- Right-click on the file or click on the three dots and select the “Rename” option.
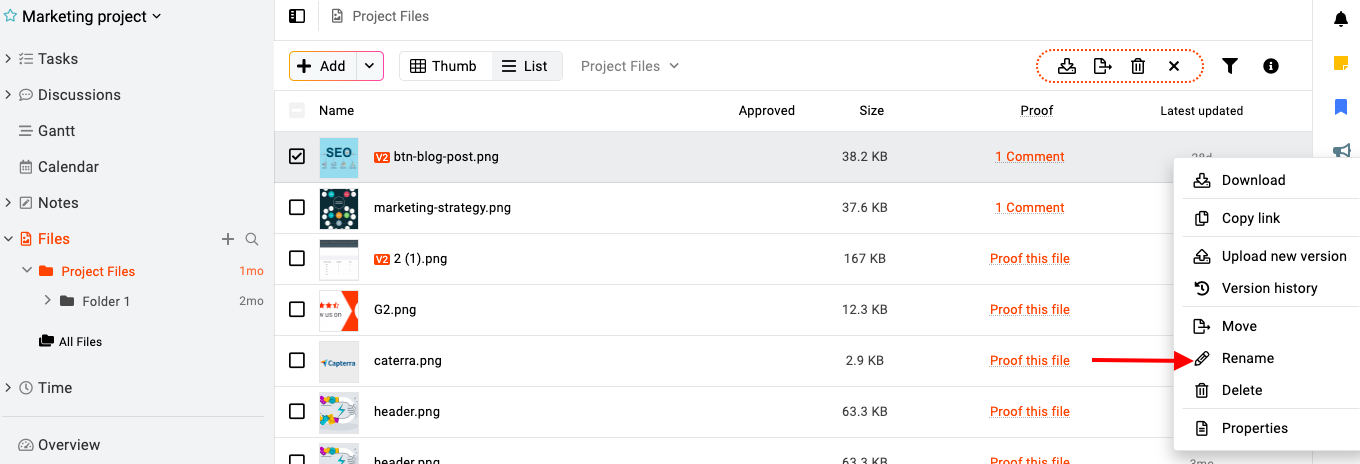
- Enter the new name and click on “Update”.
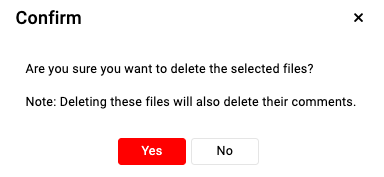
Delete a file
- Right-click on the file or click on the three dots and select the “Delete” option.
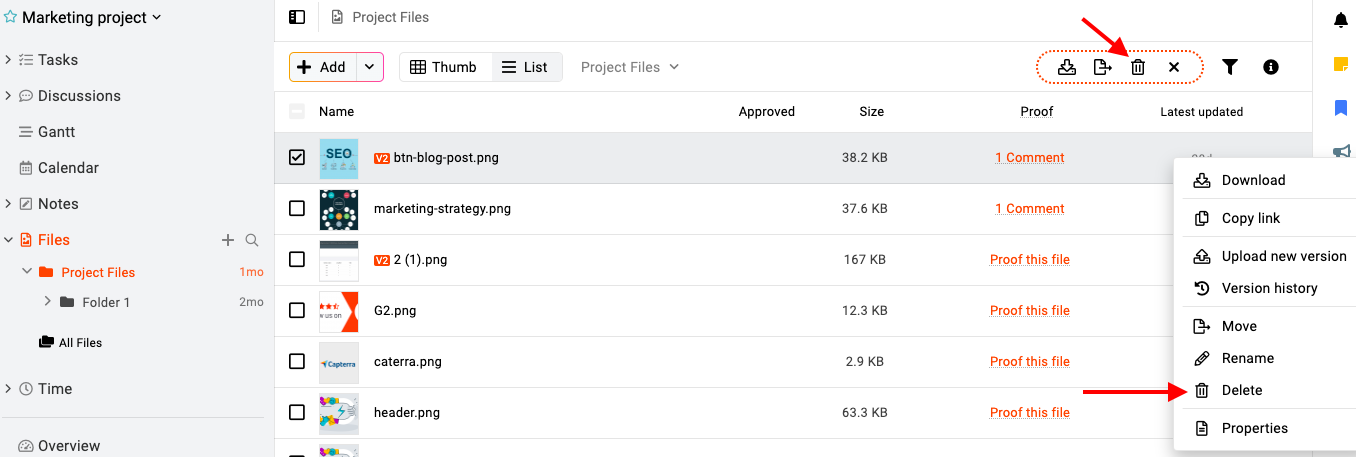
- Select “Yes” within this confirmation window to proceed with deleting a file.
Note:
- You can also select multiple files using the “Ctrl/Cmd +A” key and delete them all together by clicking the “Delete” option.
- ProofHub keeps items in the “Trash” for 15 days. Restore them easily by going to Trash. For detailed instructions on restoring deleted items from the trash, please refer to Trash.
Sort and filter files
In ProofHub, managing files efficiently is essential for streamlined collaboration and project organization. The sort and filter options empower users to quickly locate, organize, and access files based on specific criteria, enhancing productivity and workflow management. 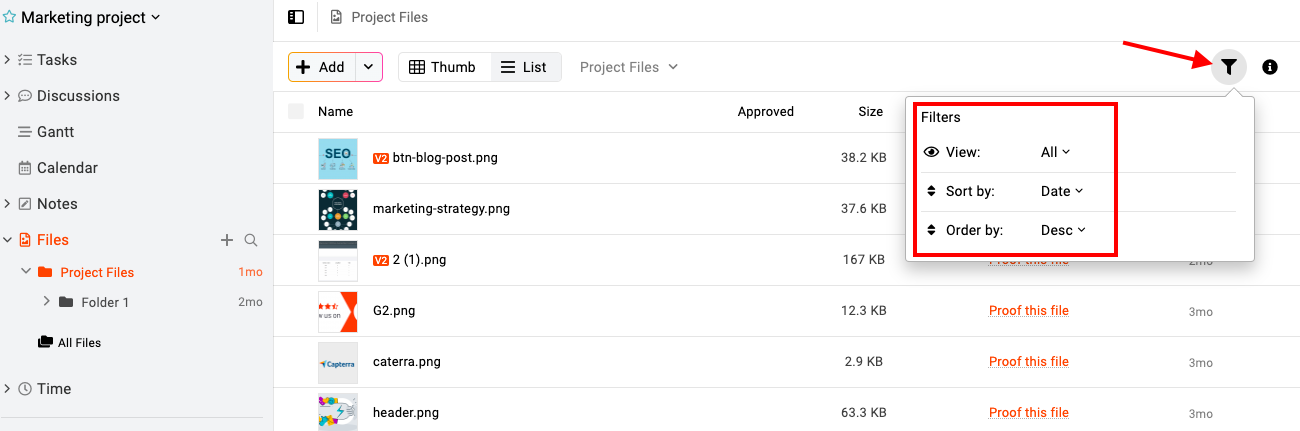
- View: By default, the “All” option is selected. You can select the “Approved” or “Proofed” option to see only those files that are either approved or proofed.
- Sort by: By default, all your files are sorted based on the “Date” (newest to oldest). You can select the “Date”, “Name”, “Type”, or “Size” options to sort files as per your requirements.
- Order by: You can choose between “Desc” (descending) or “Asc” (ascending) to arrange the files based on their latest updated dates.
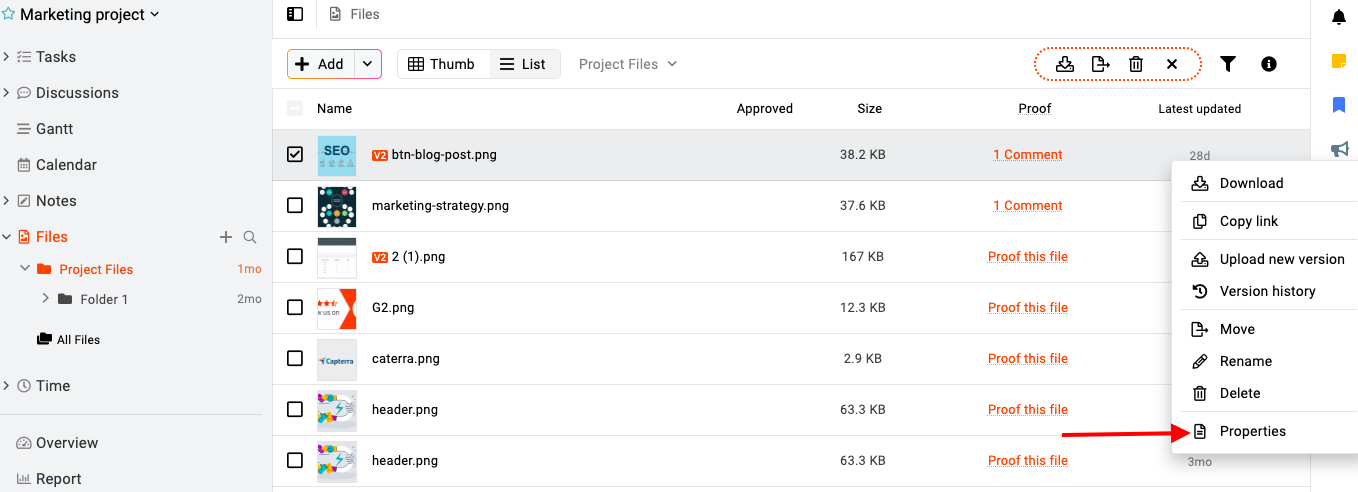
View the properties of a file
From properties, you can view file information such as type, size, upload section, upload dates, and uploaded-by details.
- Go to the top right of the screen click on the “i” icon and select the “Properties” option.

- You also have the option to view properties by either right-clicking on the file or clicking on the three dots and selecting the “Properties” option.
Need more help?
- Can't find the answer to your questions? Contact ProofHub Support
- You can also book a demo.