How to add and manage forms
Introduction to forms
ProofHub forms provide a streamlined way to gather requests from internal users and external stakeholders, enabling efficient communication and task creation within projects. Submitted requests through forms are automatically converted into tasks and added to a selected task list, facilitating organized task management and workflow. No ProofHub account is required to submit a form.
Add a form from the task section
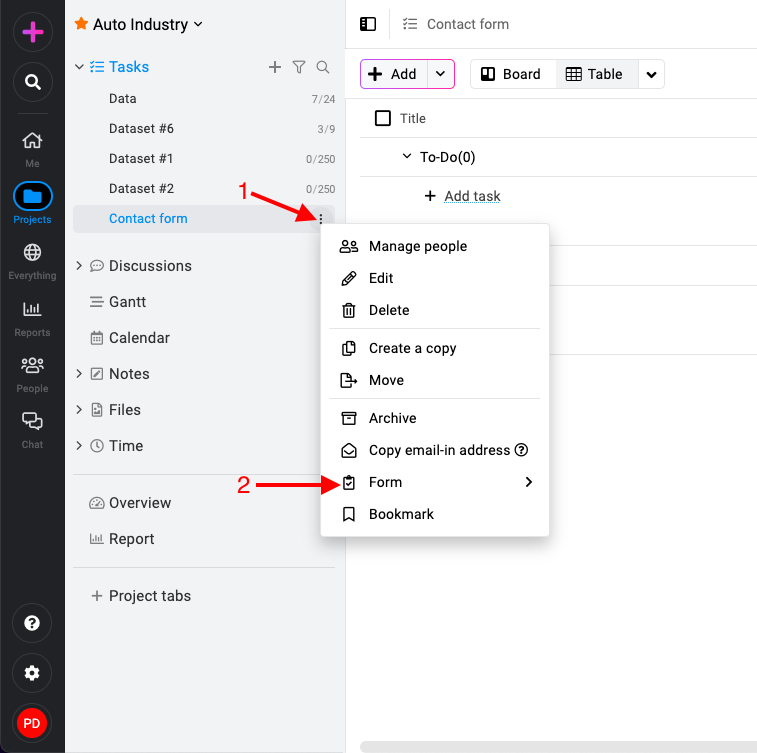
- Right-click or click the three-dots icon and select “Form“.
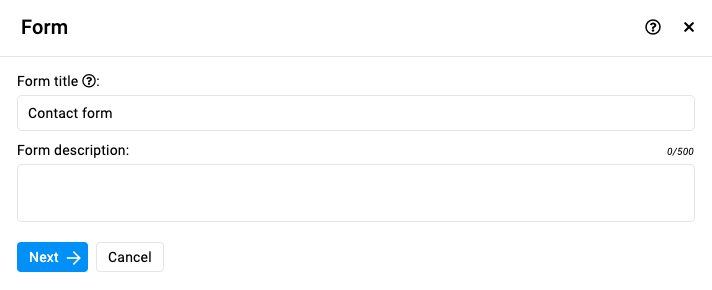
- Enter form title and description: Enter the title and description and click “Next” to proceed to the form customization options.
- Customize form fields:
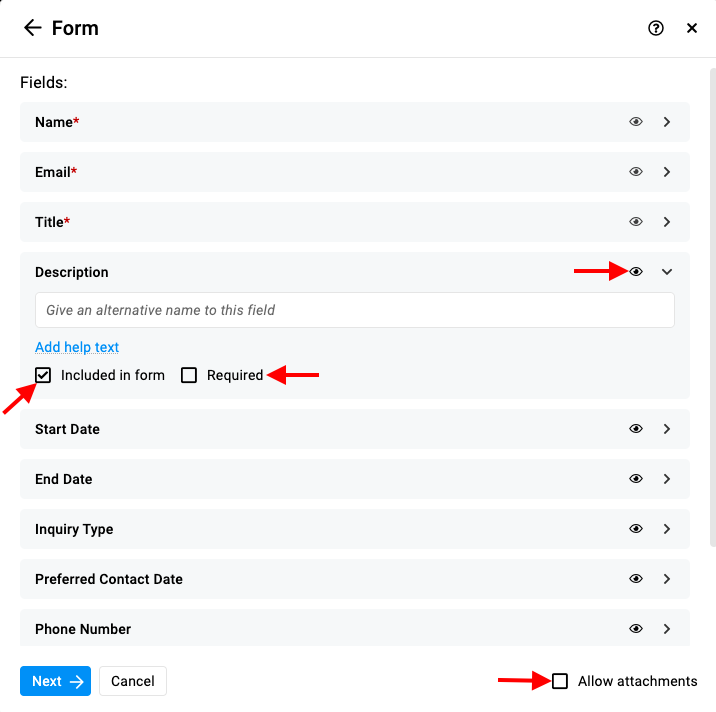
- Select which custom fields from the selected task list you want to display in the form.
- Note that the Name, Email, and Title fields are mandatory.
- Control field visibility by clicking on “Included in form” or toggling the eye icon next to each field.
- Mark fields as mandatory if necessary by enabling the mandatory “Required” option.
- Enable the “Allow attachments” option if you want people to be able to upload files along with their form submissions.
Note: Users can upload up to 5 files, each with a maximum size of 10 MB.
- Customize form appearance:
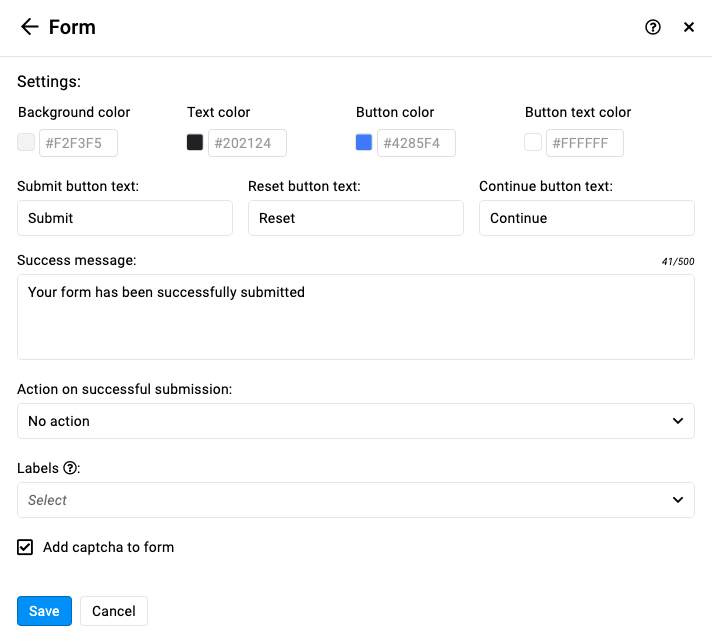
- Customize the visual appearance of the form by selecting background color, text color, button color, and button text color.
- Define the success message that will be displayed after successful form submission.
- Choose whether users can submit multiple requests (resubmissions) or redirect users to a specific URL after form submission.
- Automatically assign specific labels to tasks created via this form by selecting the desired labels.
- Enable or disable CAPTCHA by the “Add captcha to form” option.
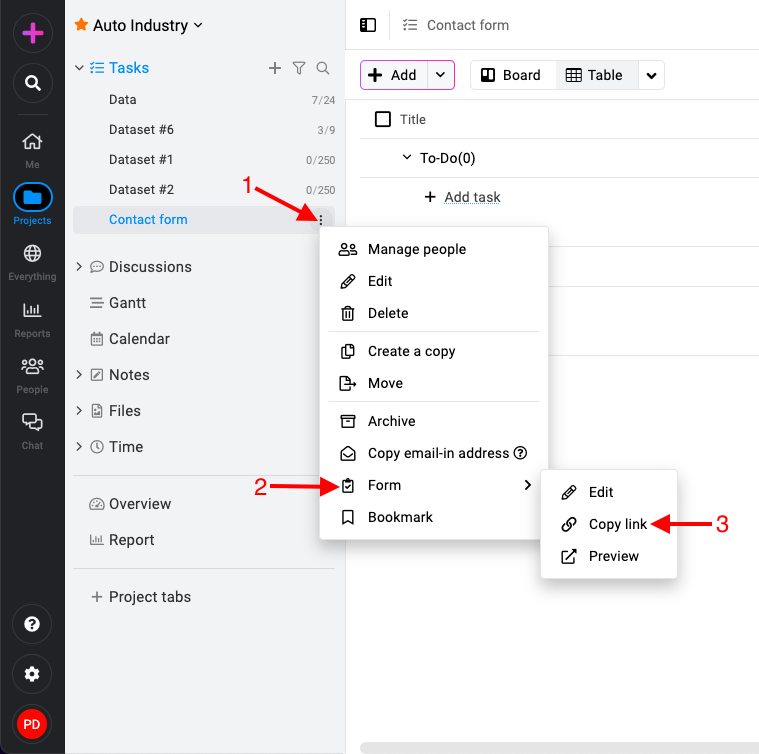
Share forms
- Right-click or click the three-dots icon and select “Form>Copy link“.
Embed forms
- Right-click or click on the three-dots icon and select “Edit“.
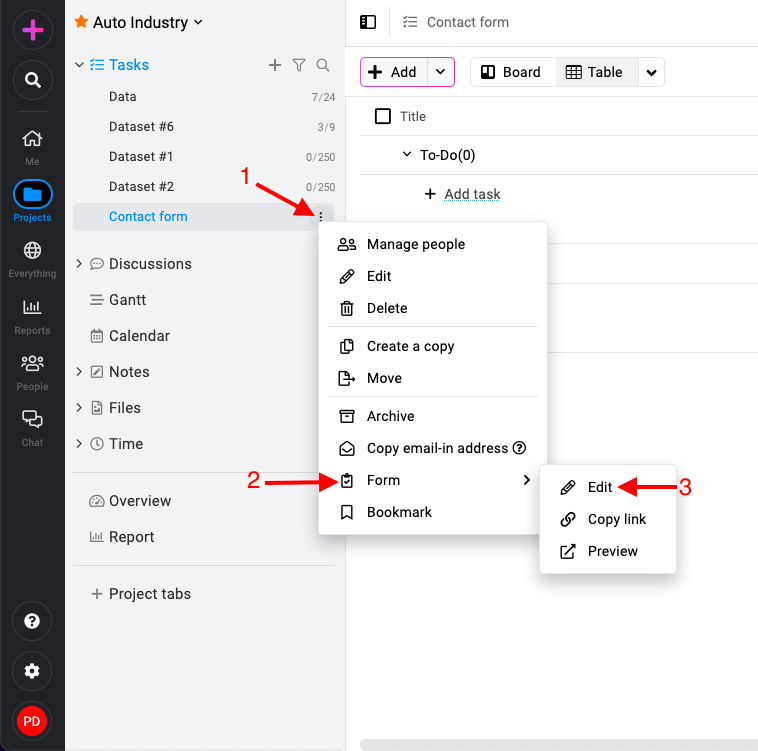
- In the edit window, click on the three-dots icon again and select “Copy embed code“.
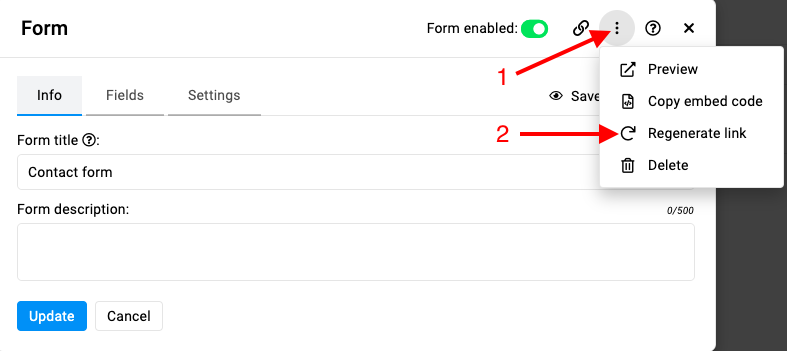
Regenerate form link
- Right-click or click on the three-dots icon and select “Edit“.
- In the edit window, click on the three-dots icon again and select “Regenerate link“.
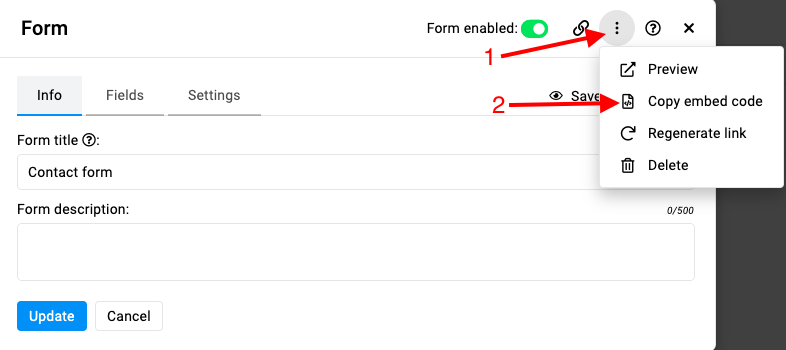
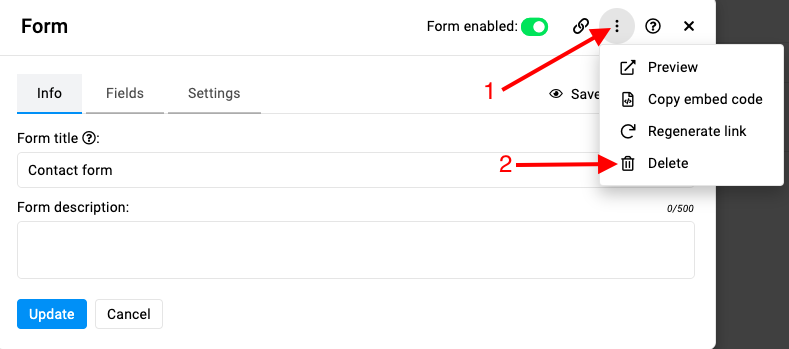
Delete form
- Right-click or click on the three-dots icon and select “Edit”.
- In the edit window, click on the three-dots icon and select “Delete“.
Enable or disable the form
- Right-click or click on the three-dots icon and select “Edit”.
- In the edit window, toggle the “Form enabled” on or off.
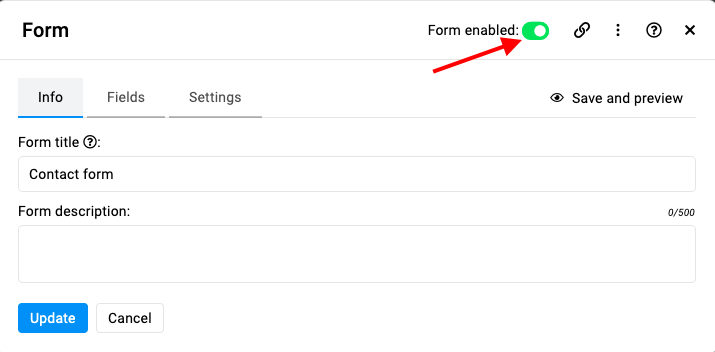
Note: Tasks cannot be added using a request form if the form is disabled.
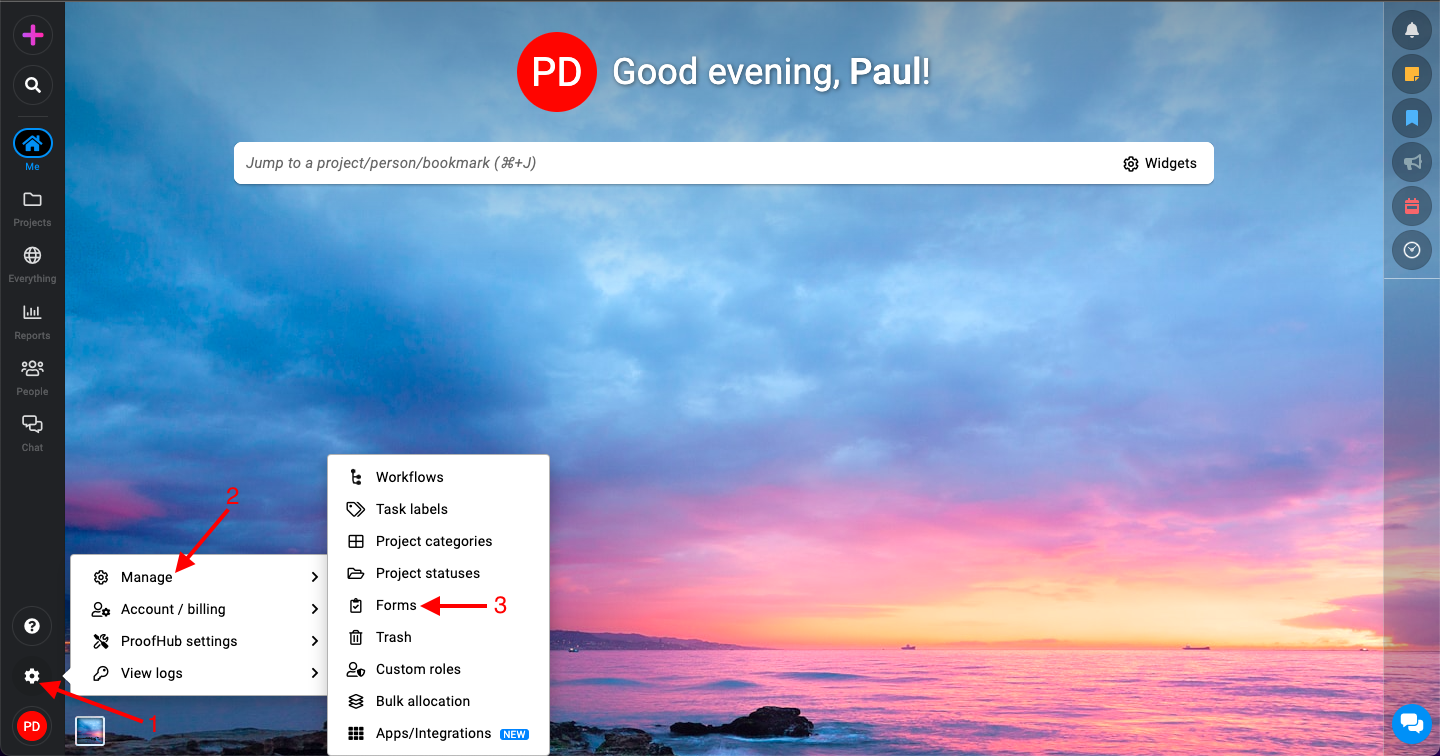
Add a form from the manage section
- Click on the “Manage” icon located in the bottom left corner. Select “Forms” from the Manage section.
- On the forms screen, click on the “Add” option to create a new form.
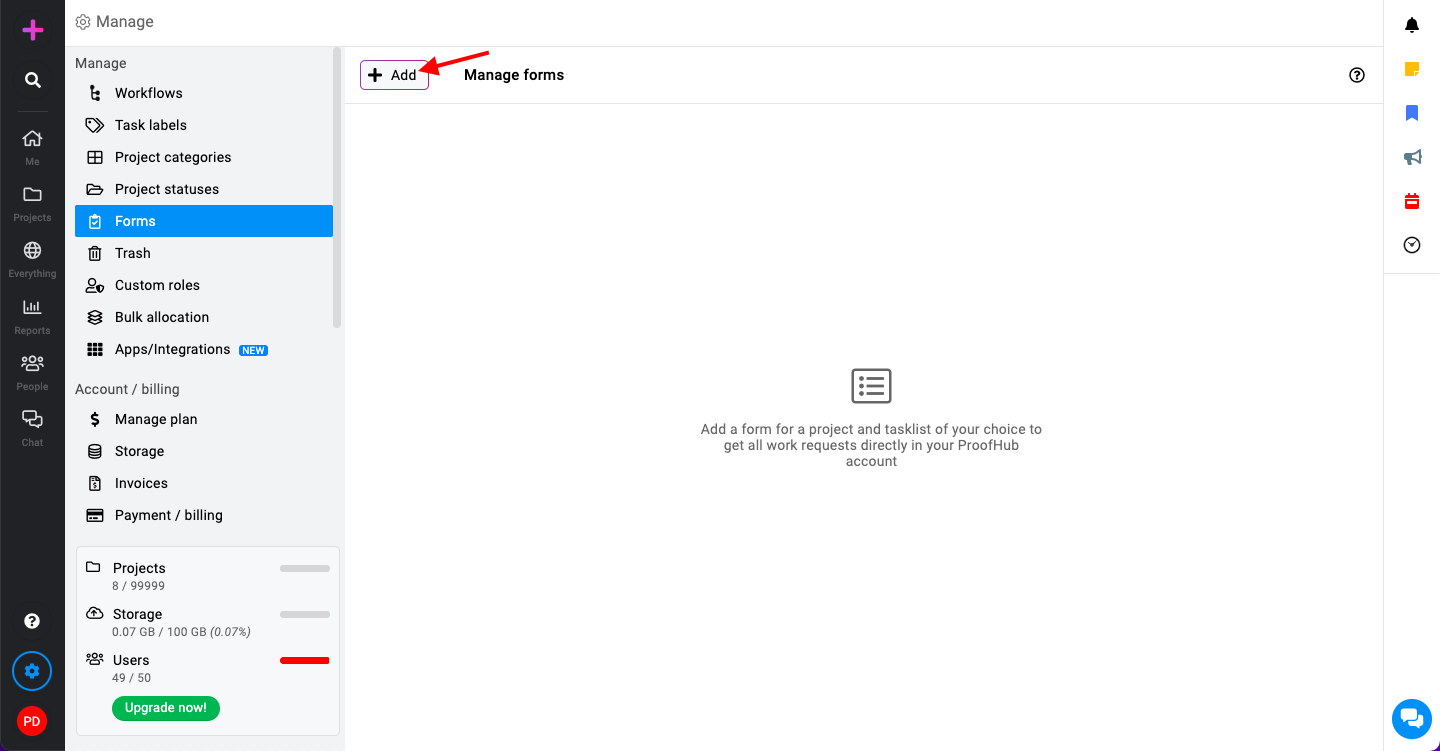
- In the form creation window, provide the necessary details:
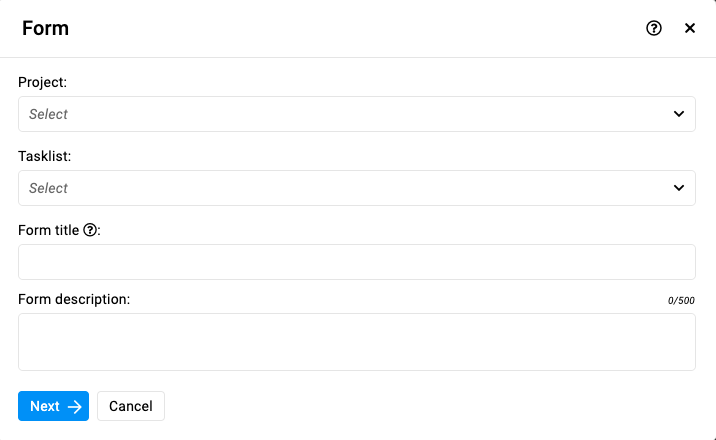
- Project: Select the project to which the form will be associated.
- Task list: Choose the task list where tasks created from form submissions will be added.
- Form title: Enter a title for your form.
- Form description: Describe your form.
- Click “Next” to proceed.
Need more help?
- Can't find the answer to your questions? Contact ProofHub Support
- You can also book a demo.
Table of contents
All the Tasks articles
- Introduction to tasks
- How to add and manage task list
- How to add and manage task
- How to add and manage custom fields
- How to import and export tasks
- How to add tasks via email-in
- How to add and manage forms
- How to change views in tasks
- How to use filters in task
- How to utilize all tasks
- How to log time in a task
- How to manage workflow in tasks
- How to view task history
- How to view task dependency
- How to add a recurring task
- How to archive and unarchive task
- How to archive and unarchive task lists