How to manage ProofHub settings
Company
Company name
- Manage section: Select the “Proofhub settings“ section and select “Company“.

- Enter the company name in the provided field and click on the “Update” button.

Company logo
Click on the Choose file, choose the new logo file from your computer, upload it, and click on the “Update” button.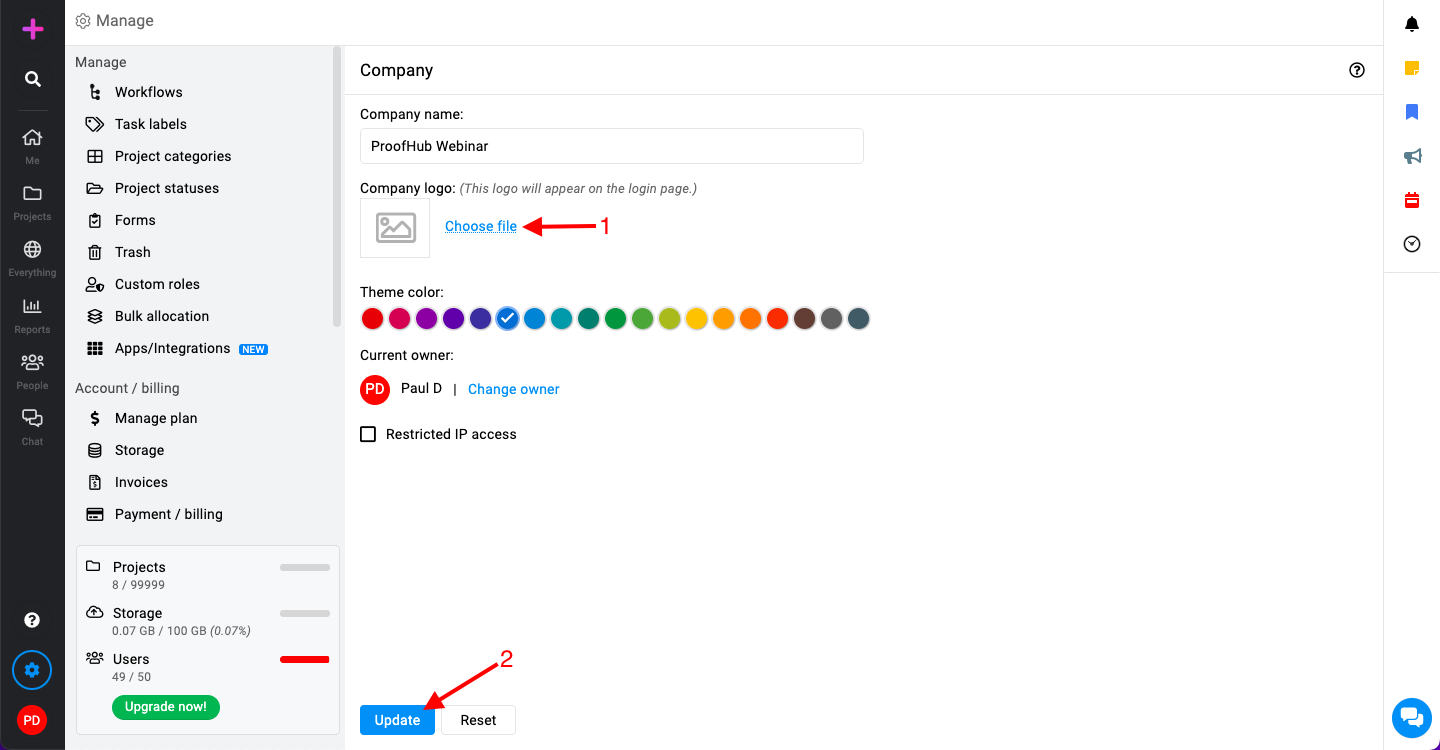
Theme color
Select the new theme color from the color picker and click on the “Update” button.
Change owner
Click on the “Change owner” option. Select the new owner from the list of users and click on the “Update” button.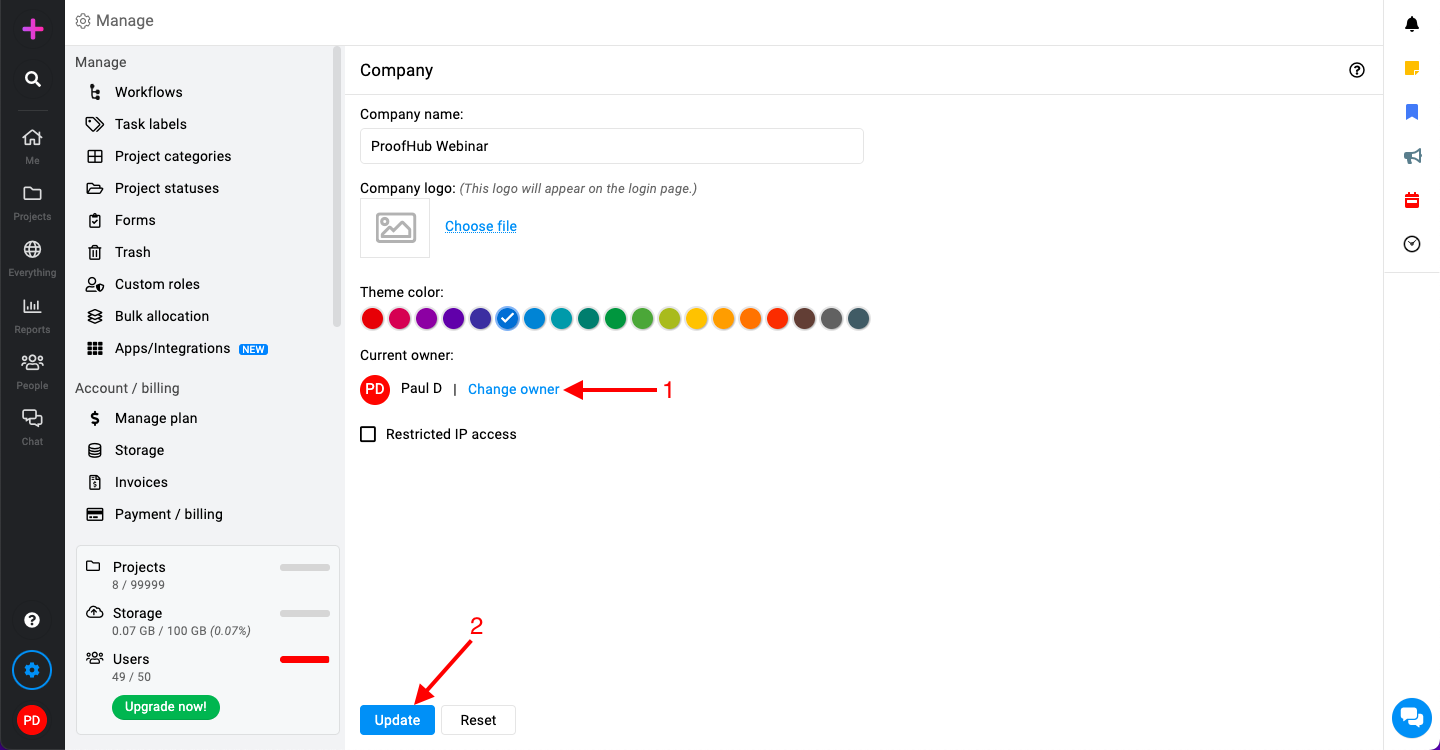
Note: When transferring ownership, the previous owner is automatically assigned the admin role, ensuring they still have some access and control over projects.
Restricted IP access
Locate the restricted IP access section. Enter the IP addresses from which you want to allow access to ProofHub and click on the “Update” button.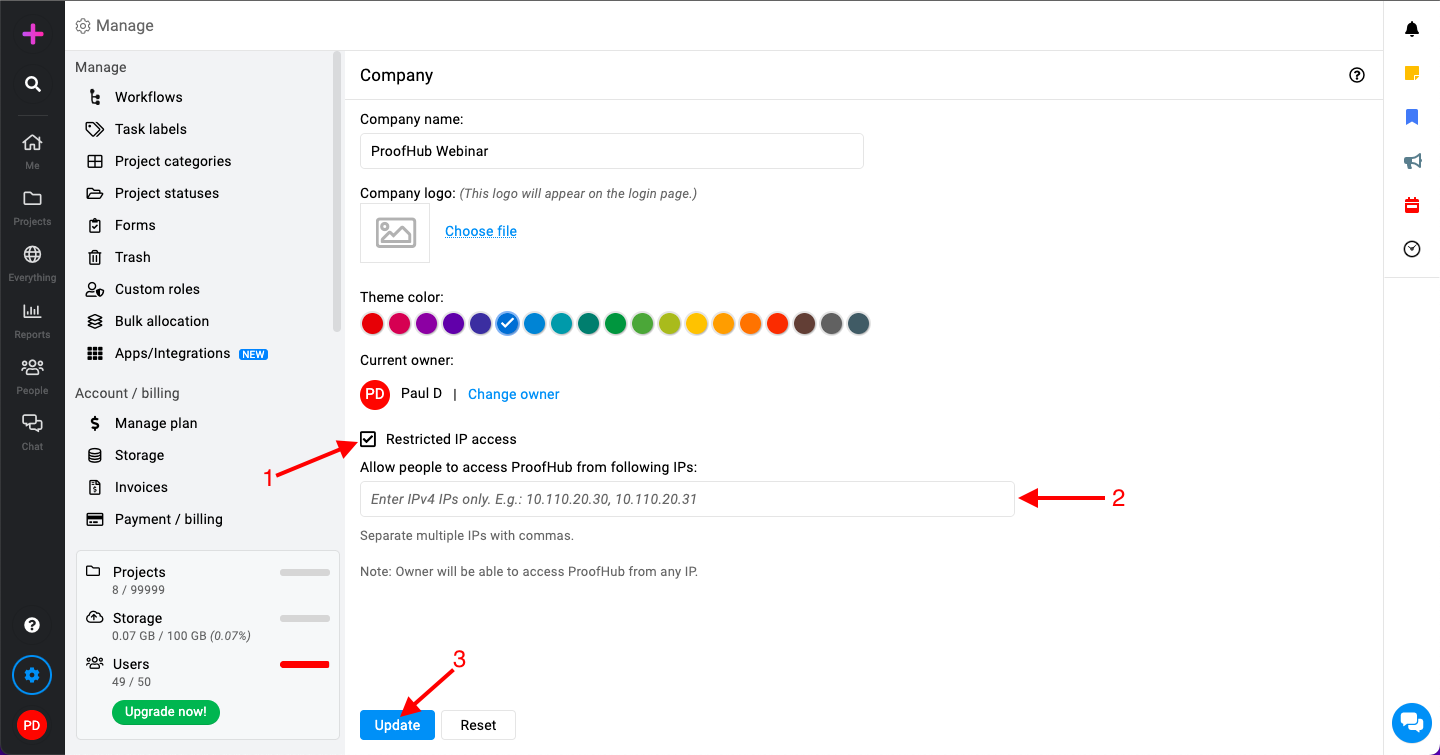
Note: The owner will be able to access ProofHub from any IP address.
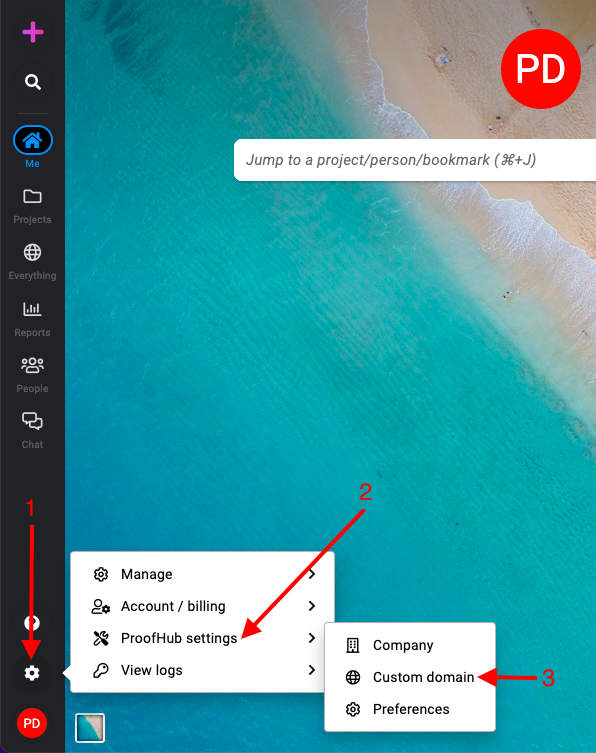
Custom domain
Setting up a custom domain in ProofHub allows you to personalize your ProofHub URL to align with your brand identity.
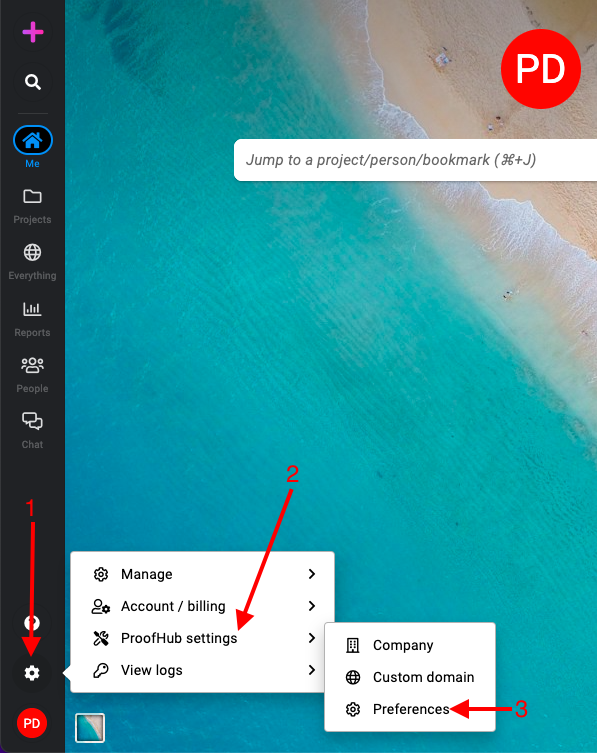
- Manage section: Select the “Proofhub settings“ section and select “Custom domain“.
- Set custom domain: In the custom domain section, enter your desired custom domain or sub-domain (e.g., hub.yoursite.com or projects.yoursite.com).
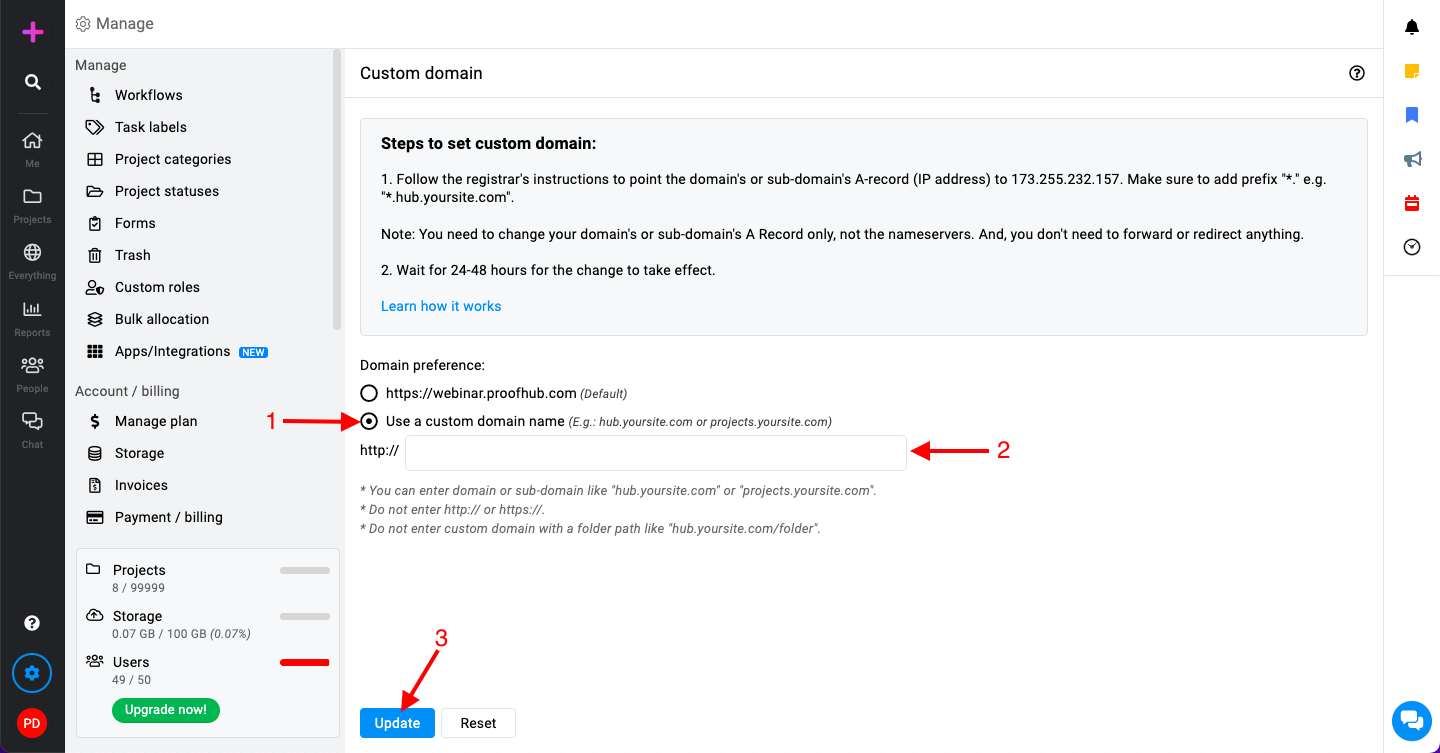
- Click on “Update” to save changes.
CNAME : To point your domain through CNAME, you can perform the following steps: - Login to your domain host.
- Put the hostname as the URL you want to use to access your ProofHub account.
- Point the CNAME record to: customdomain.proofhub.com
- You’re done with redirecting your domain to ProofHub server through CNAME.
Note: Omit “http://” or “https://”, and do not include a folder path like “hub.yoursite.com/folder”. Allow 24-48 hours for the DNS changes to propagate fully. During this period, your custom domain may not be immediately accessible.
Preferences
Managing your company’s preferences in ProofHub allows you to customize various settings to better align with your organizational policies and workflows. These adjustments apply to the entire company, ensuring consistency across all projects and users.
Change date format, time format, and start week
- Manage section: Select the “Proofhub settings” section and select “Preferences“.
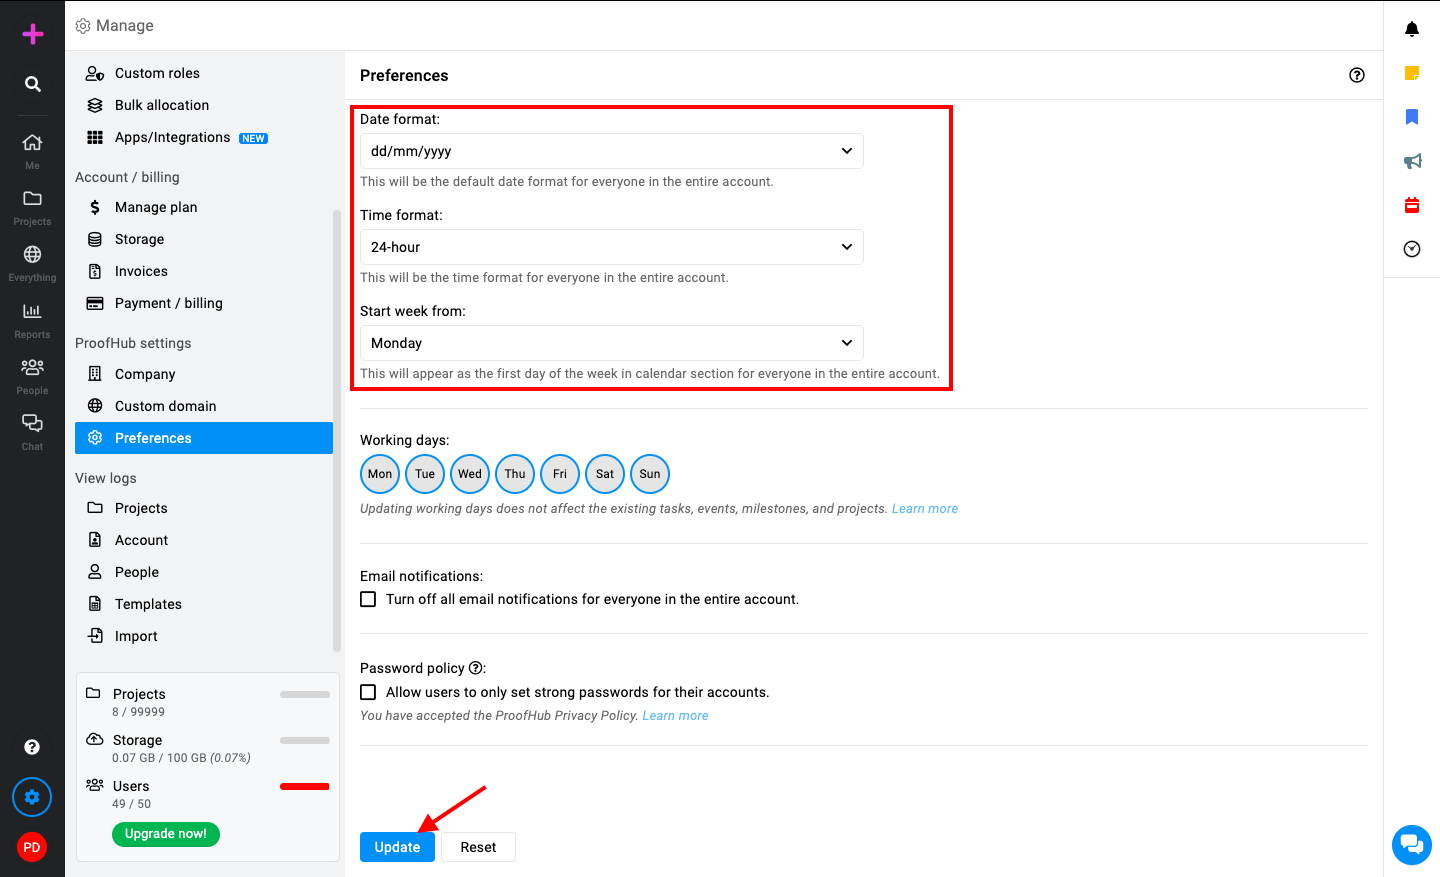
- Date format: From the dropdown menu, select your preferred date format (e.g., MM/DD/YYYY, DD/MM/YYYY).
- Time format: From the dropdown menu, select your preferred time format (e.g., 12-hour, 24-hour).
- Start week from: From the dropdown menu, select the day you want the week to start (e.g., Sunday, Monday).
- Save changes: Click the “Update” button to apply your new preferences.
Working days
- Check or uncheck the days of the week to reflect your organization’s working days.
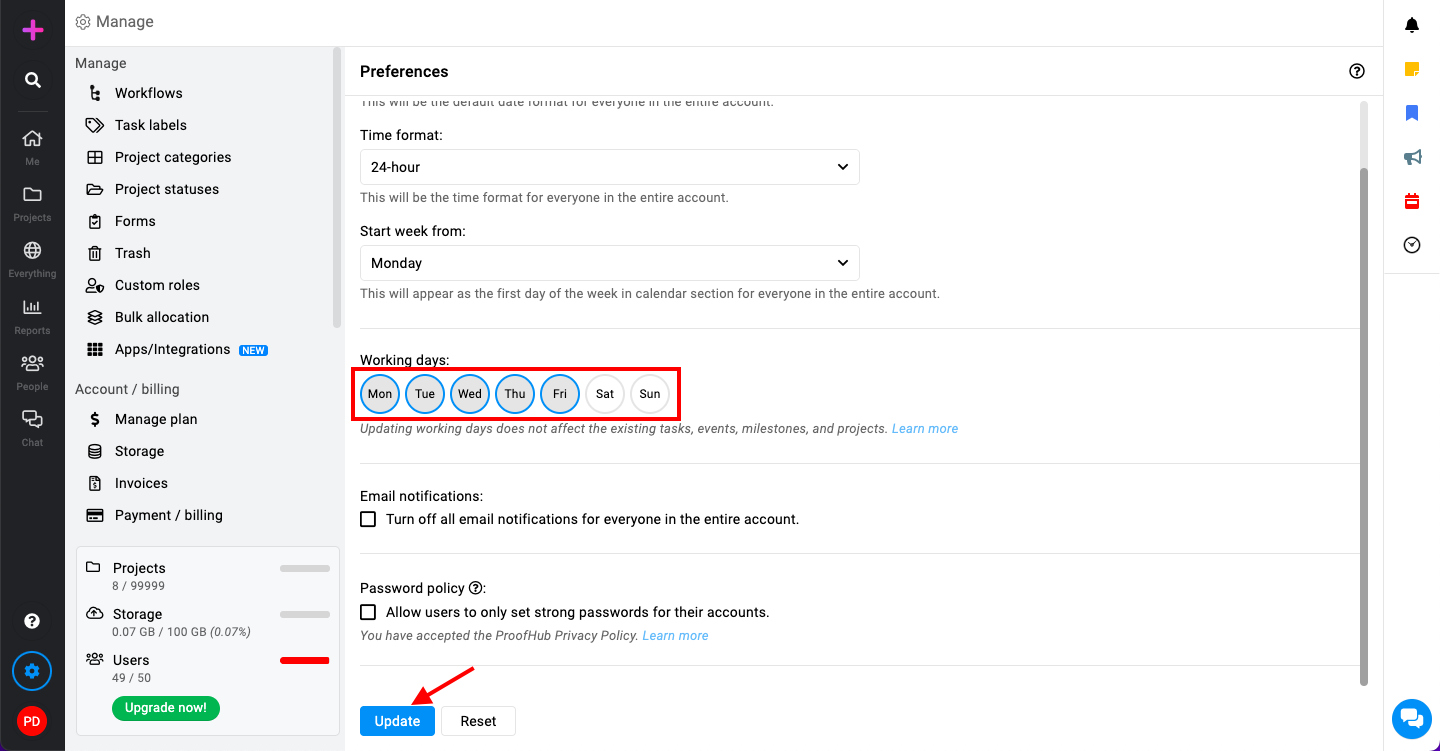
Note: Updating working days does not affect existing tasks, events, milestones, and projects. - Save changes: Click the “Update” button to apply your new preferences.
Email notifications
- Check or uncheck to turn on/off all email notifications for everyone in the entire account.
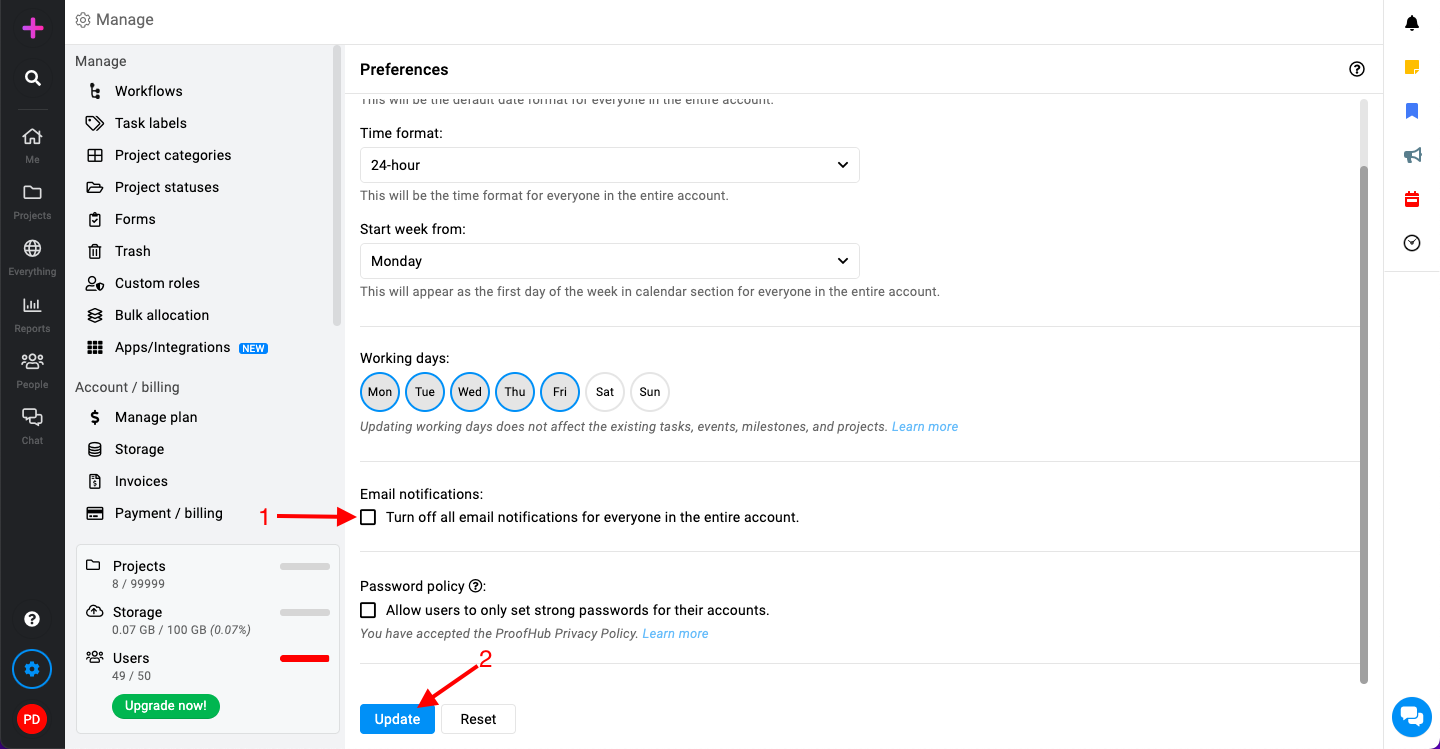
- Save changes: Click the “Update” button to apply your new preferences.
Password policy
- Check the box to allow users to only set strong passwords for their accounts.
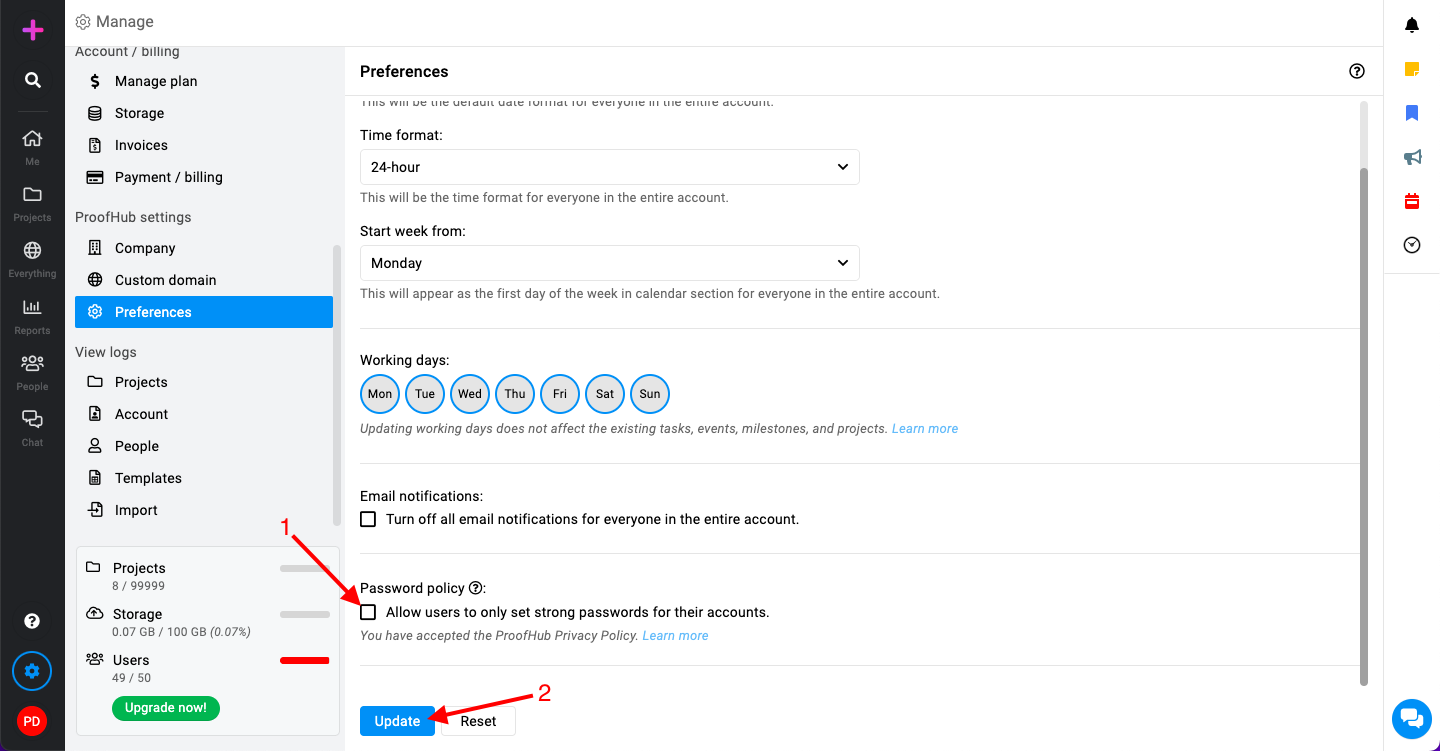
- Save changes: Click the “Update” button to apply your new preferences.
Need more help?
- Can't find the answer to your questions? Contact ProofHub Support
- You can also book a demo.
Table of contents
All the Manage articles
- How to add and manage workflow
- How to add and manage task labels
- How to add and manage project categories
- How to add and manage project statuses
- How to manage trash
- How to add and manage custom roles
- How to manage bulk allocation
- How to manage apps and integrations
- How to manage a plan
- How to cancel an account
- How to import from Asana and Basecamp
- How to view activity logs
- How to manage ProofHub settings