Forms

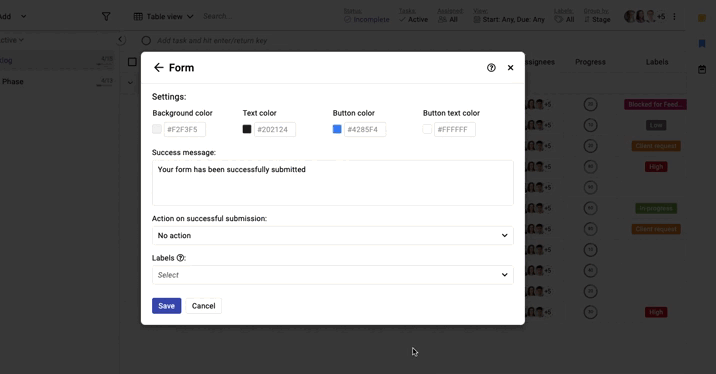
ProofHub forms help you gather requests from internal users as well as people who are not part of your account. Forms help you in establishing a definite channel of communication between teams, external clients, and stakeholders. The submitted requests are automatically added as tasks in the selected tasklist of a project. 


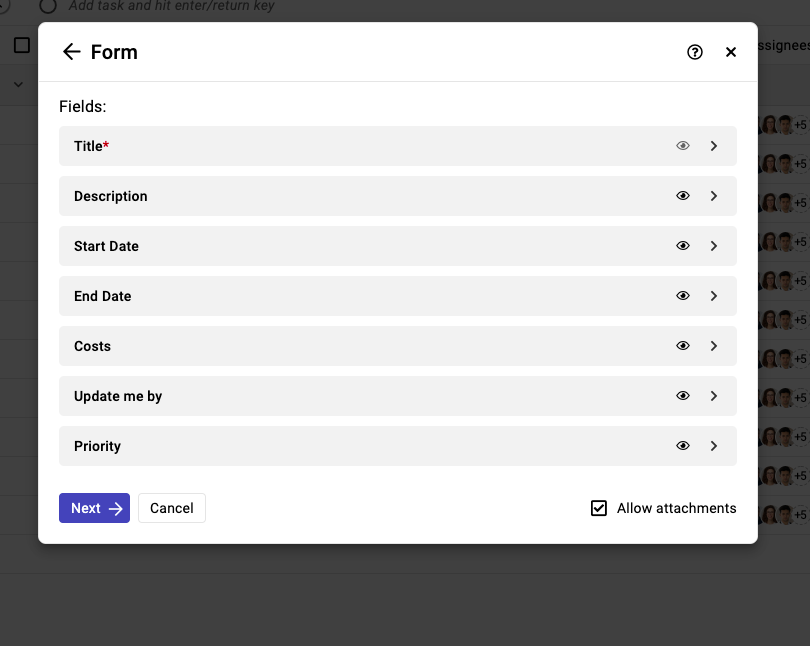
You can have your custom fields enabled in the forms and they are typically used to gather more information about the product or service. These fields will be available to the end-users and they can fill in the essential information through them.

Create forms
Configure forms
Share forms
Manage forms

Create forms

Forms can be added in two different ways.

  1. Add a form from the Task section.
  2. Add a form from the Manage section.

 How to add a form from the Task section?

  1. Go to any project.
  2. Click on the 3 dots/context menu available next to the task list.
  3. Click on the “Form” option from the context menu.

How to add a form from the Manage section?

  1. Click on the Manage drop-down from the top right corner of the screen.
  2. Select the “Forms” option from the drop-down.
  3. On the next screen, click on the “Add” option to add a new form.

Configure forms

How to configure forms? 

  1. Go to the task section of the project and select the “form” option from the context menu of the task list.
  2.  The add form window will open and here you can enter a title. You can also optionally add a description of the form in case you want to share additional information with the users of the form.
  3. On the next screen, you can choose which of the custom fields are available in the selected task list you wish to display in the form. Kindly note that the Name, Email, and Title are the mandatory fields.
  4. You can control the visibility of the field by clicking on the “Included in the form” option or just clicking on the eye icon next to the respective field.
  5. You can also mark any field as mandatory based on your use case.
  6. If you want to allow users to be able to upload files, you can enable the option to “ Allow attachments”. Please note that the users can upload up to 5 files each of 10 MB
  7. On the next screen, you can further customize the form by choosing the background color, text color, button color, and button text color.      
  8. You can also control the success message which will be displayed after the successful submission of the form.
  9. If you want to allow users to add more than one request, choose the option to resubmissions. Or if you want to redirect the user to a specific URL, you can configure the same. 
  10. To automatically assign specific labels to any tasks created via this form, you can select the labels here. 
  11. You can also control the captcha from the “Add form to captcha” option to enable/disable it for the users.

Share forms

How to share forms with end-users?

  1. Once a form is created, click on the “Copy link” option to share this link with your end customers.
  2. In case you want to embed the form somewhere, select the “Copy embed code” option 

Manage forms

How to Manage forms?

  1. Go to any project.
  2. Click on the 3 dots/context menu available next to the task list.
  3. Hover over the “Form” option from the context menu.
  4. From here you can choose to edit the form, copy the link or preview the form.
  5. Once you click on the “ Edit” form option, you can enable or disable the form requests, and edit information like form title or description, fields, or other form settings. 

How to enable/disable the forms?

  1. To enable or disable the form requests you can simply click on the “Enable/Disable request” option either from the manage form section or from the tasklist‘s context menu “Edit form” option.
  2. Once you disable the request for the forms, the form will no longer accept any further requests.

What happens when the form is submitted?

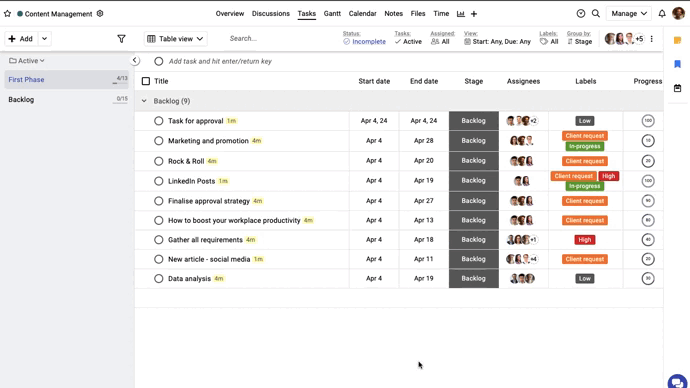
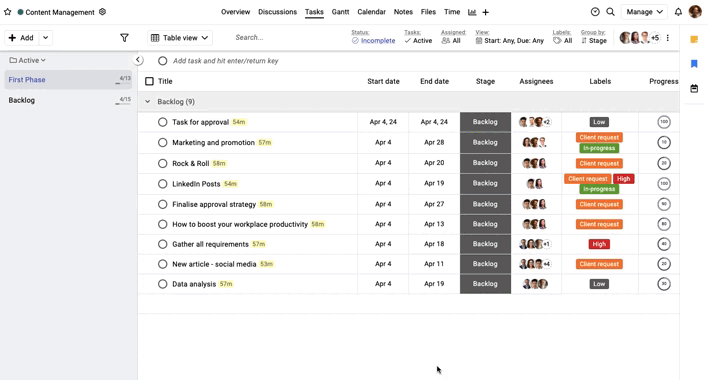
When someone fills out your form, it will show up as a new task in the task list it is connected to. Also, all the values will be filled in their respective fields. 

How to regenerate the link for the form?

If the wrong person accidentally received a link to your form, you can now regenerate a new link in order to ensure that the relevant people will have access to your form. Any person who has a previous link that has since been regenerated will not be able to access that form.

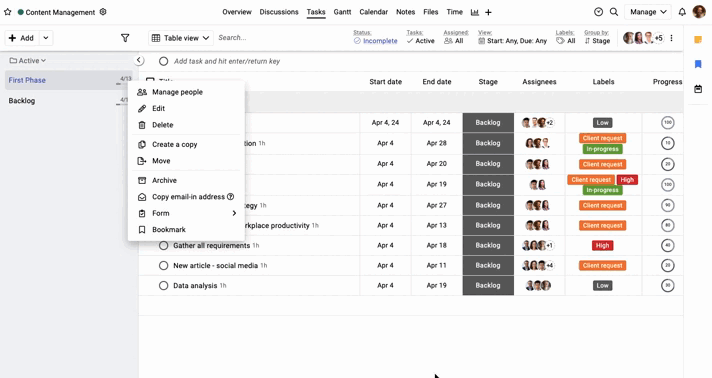
Firstly, open up the Form for which the link needs to be re-generated, click on the context many, and further click on the regenerate link. Once you confirm to regenerate the form link, any previous links that were created for this form will automatically get disabled.

What happens if someone uses an old link to a form?

If someone has access to an old link of a form that has since been regenerated, they will not be able to use that link to fill in new information.

Permissions and Limits :

  1. Only users with “Manage forms” access can create, edit or delete forms.

  2. During the trial period, only 10 requests can be submitted per 10 minutes.

Note: To help protect spam entries, the forms are protected using the captcha mechanism.

Need more help?

- Can't find the answer to your questions? Contact ProofHub Support
- Check our blog for the latest additions, updates and tips.