The Table views allow you to visualize the tasks according to your preferences. Here all relevant data is available in one place and it will help you to get a big picture of your tasks at a single glance.
With the use of table view, you can manage the below :
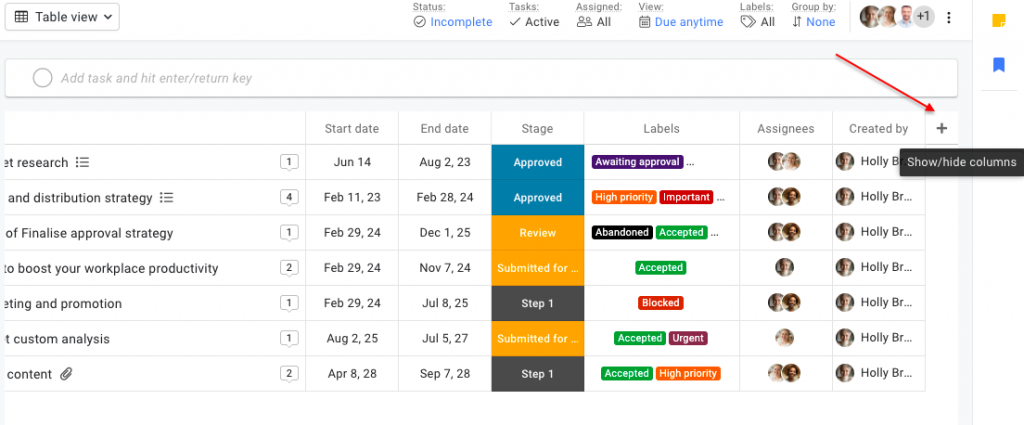
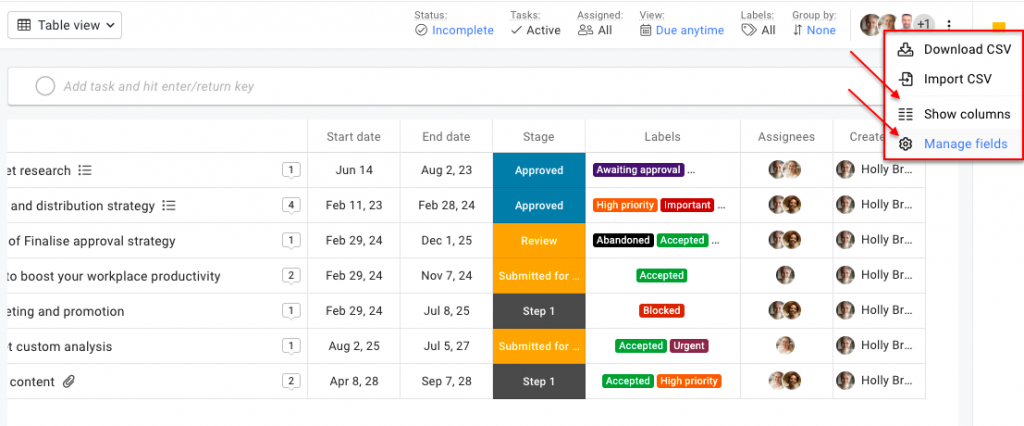
You can also click on the context menu on the right side of filters to choose the columns to be displayed or to manage the custom fields.
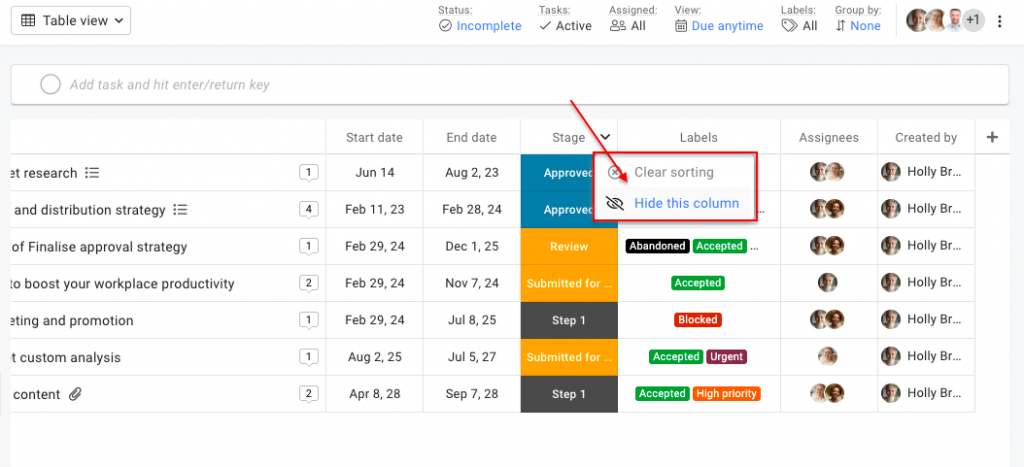
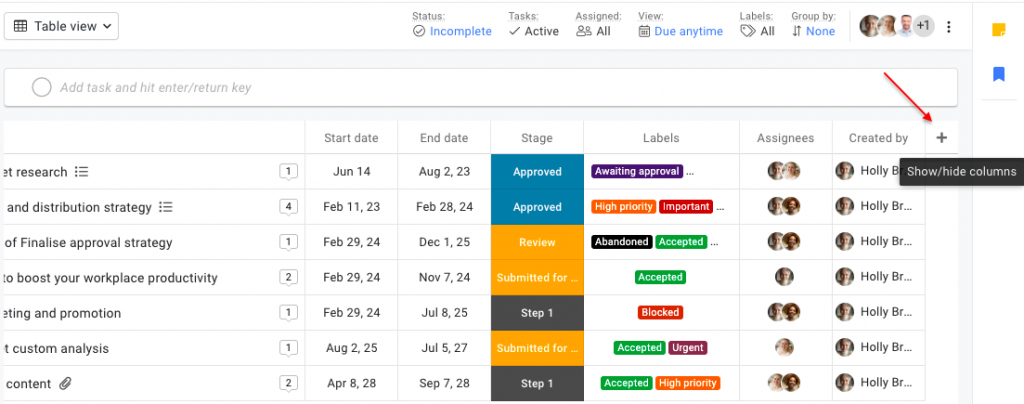
If you want to hide any column, you can click on the specific column which you would like to sneak and select the option “ Hide this column ” or you can click on the plus icon next to the last column of the table and choose the columns to be displayed.
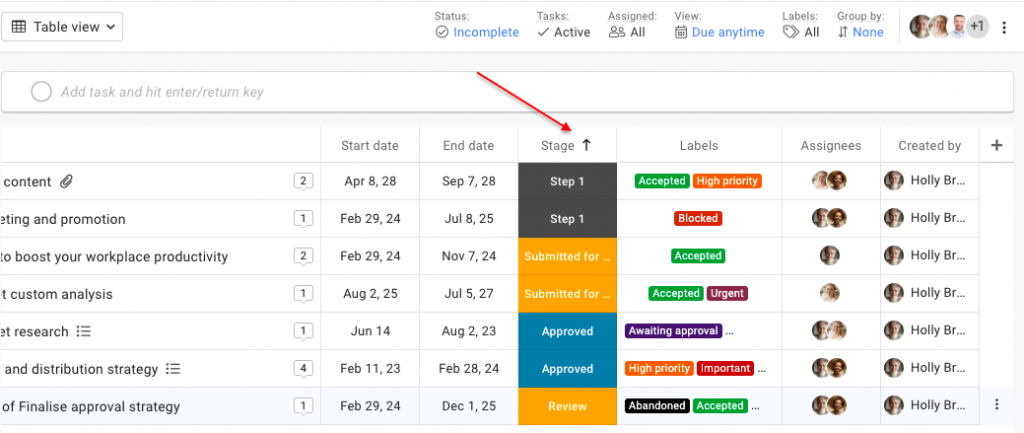
Sorting your tasks is a really easy way to keep yourself organized. It helps you understand what you have to do and in what order so that you can get all of your tasks done.
Following are the steps to sort your table view by columns
Any filter or sorting which is applied for the columns is reflected in the current task list and doesn’t affect the filters or sorting of any other task list.
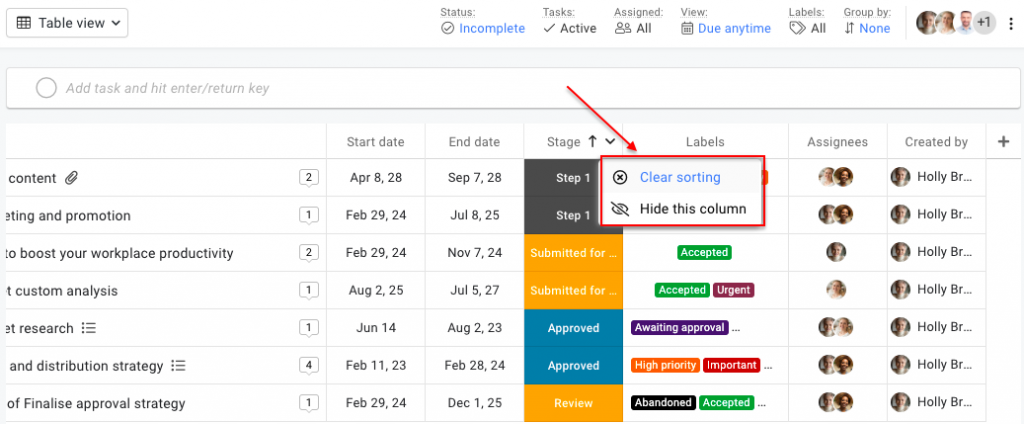
You can clear the applied sorting by selecting the option from the column menu.
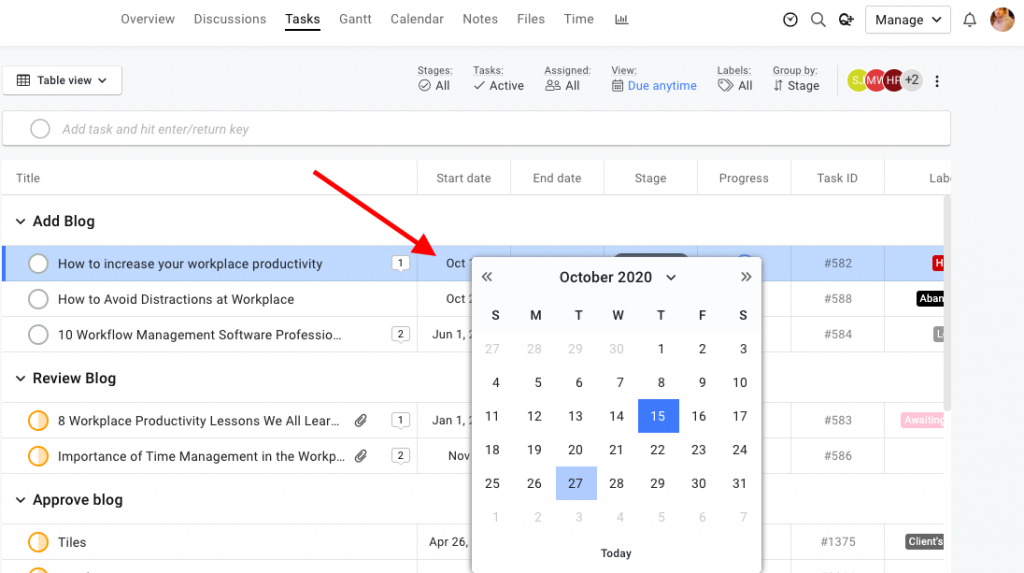
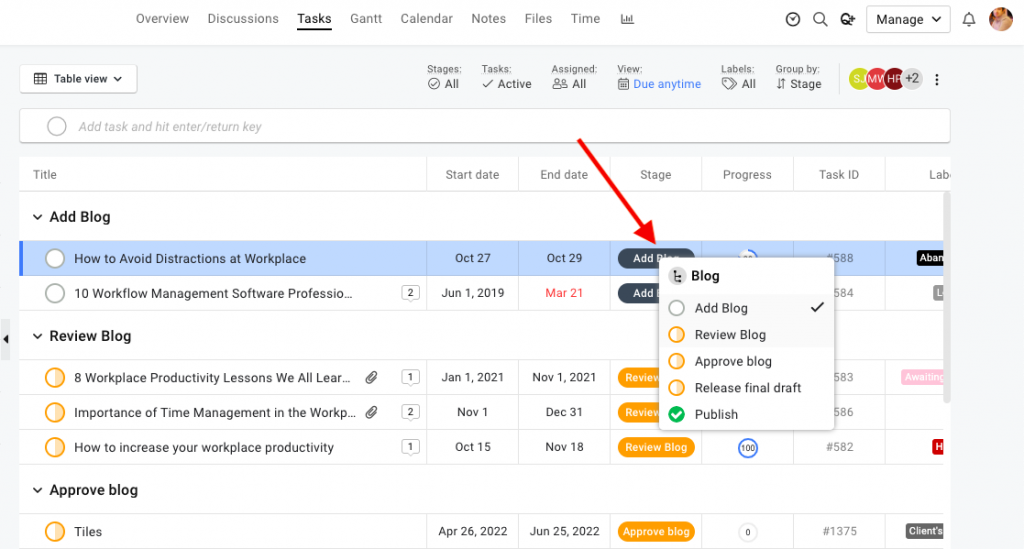
You can directly take different actions on a task like changing the assignees of a task, changing the stage of the task, estimating or tracking time for a task, and many more by clicking on the corresponding column of the task.
In case you want to manually arrange the tasks, it can be done when grouping is set to none and there is no sorting applied on the data. This task order will also become visible to other users when they have grouping set to none and there is no sorting applied in their table view as well.
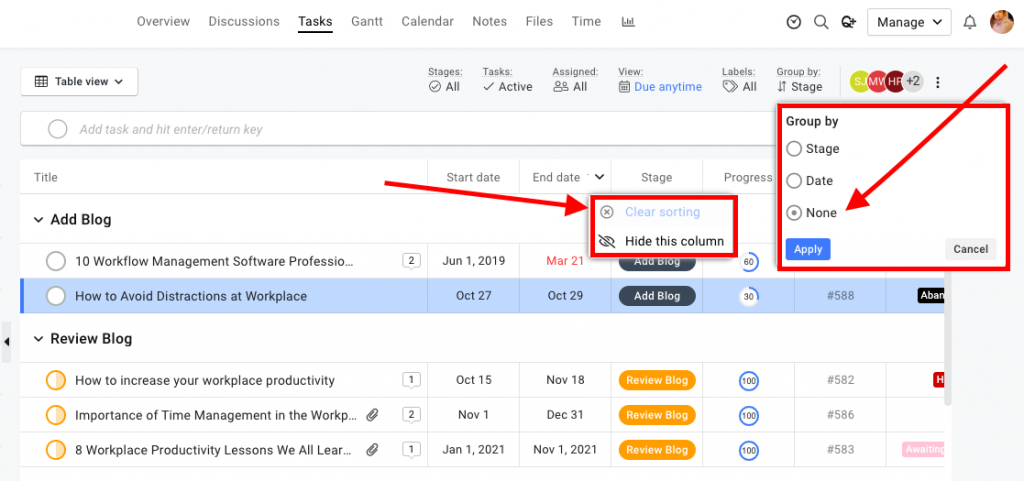
Make the columns wide or narrow as per your need, simply click in the middle of any two columns that you’d like to resize and glide it along to change the column width.

You can rearrange the columns in the table view. To move a column click and drag using the column title and move it to the desired position.

With custom fields, you can add additional fields to store custom data at the task level. By default, ProofHub offers some predefined fields in each task. In addition to these, you can add the following field types :
Add a new custom field from the Table view


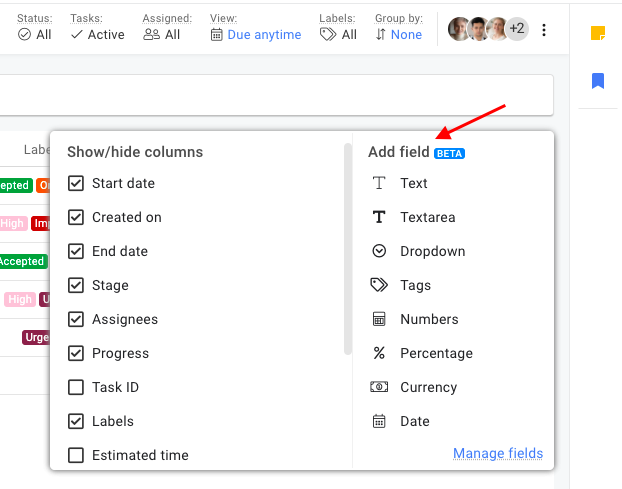
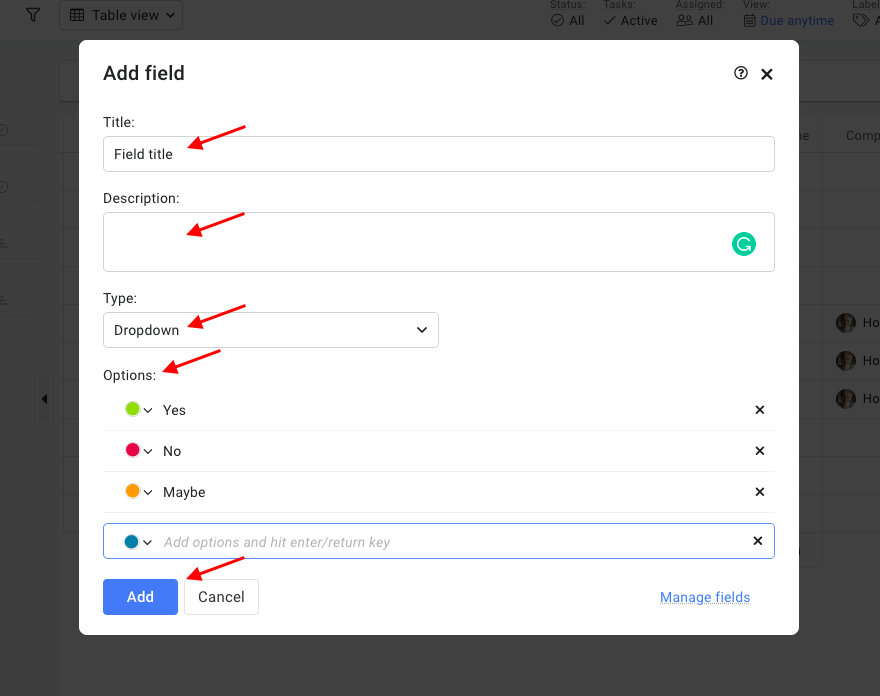
How different custom fields work
1. Text – The text field can be used to save data of any type. The data added will appear in a single line.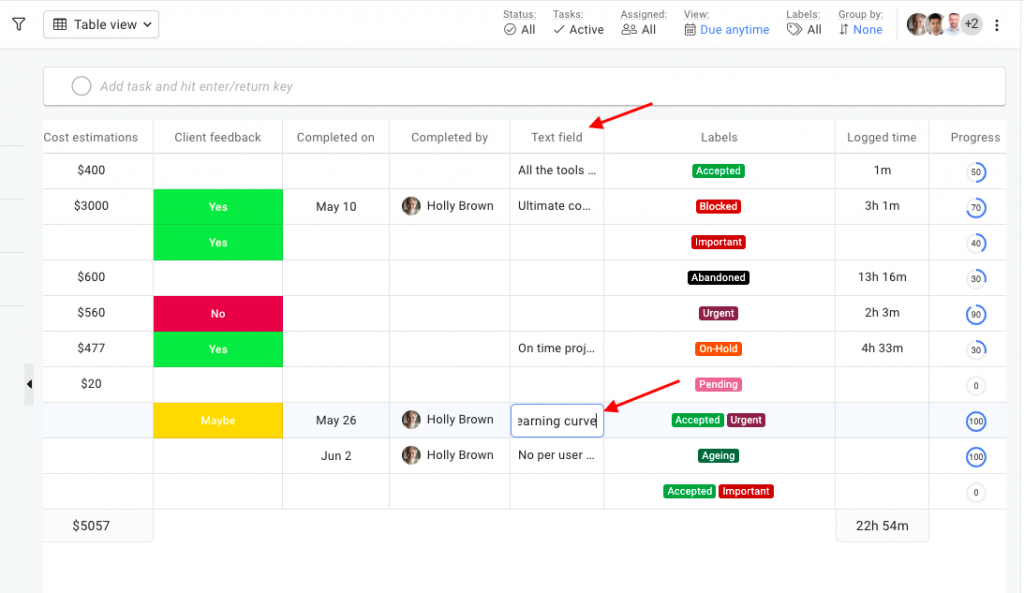
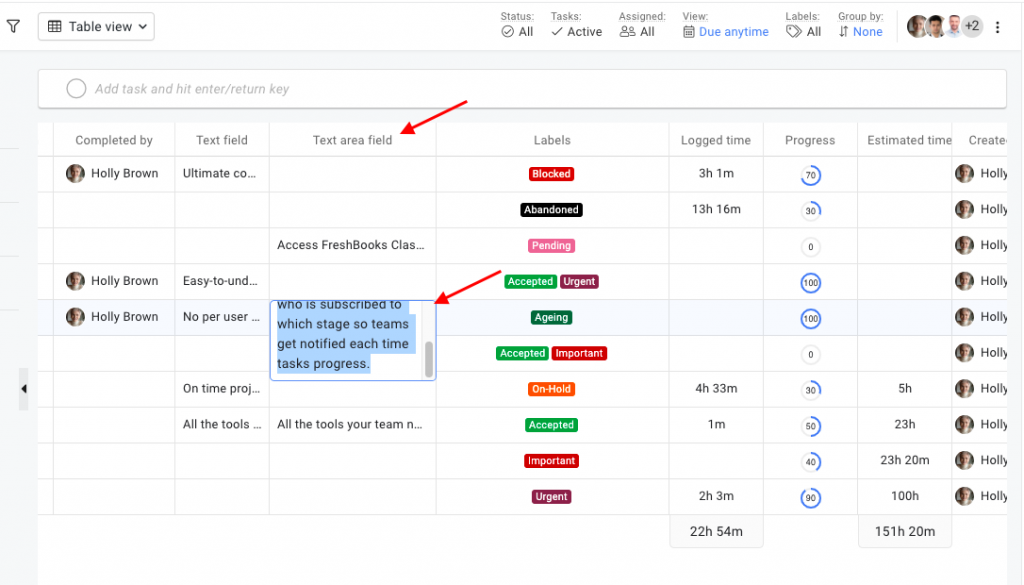
2. Text area – The text area field is similar to the text field as it can also be used to save data of any type. The data entered in this field appears in multiple lines.
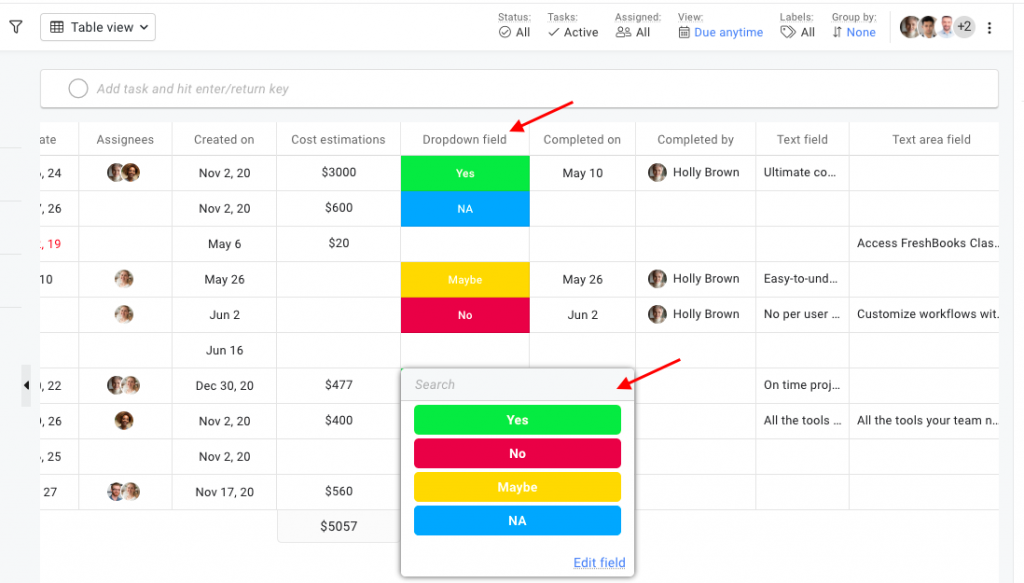
3. Dropdown – The dropdown field can be used to create a list of options to select from. Add any number of options and color code them for a better view.
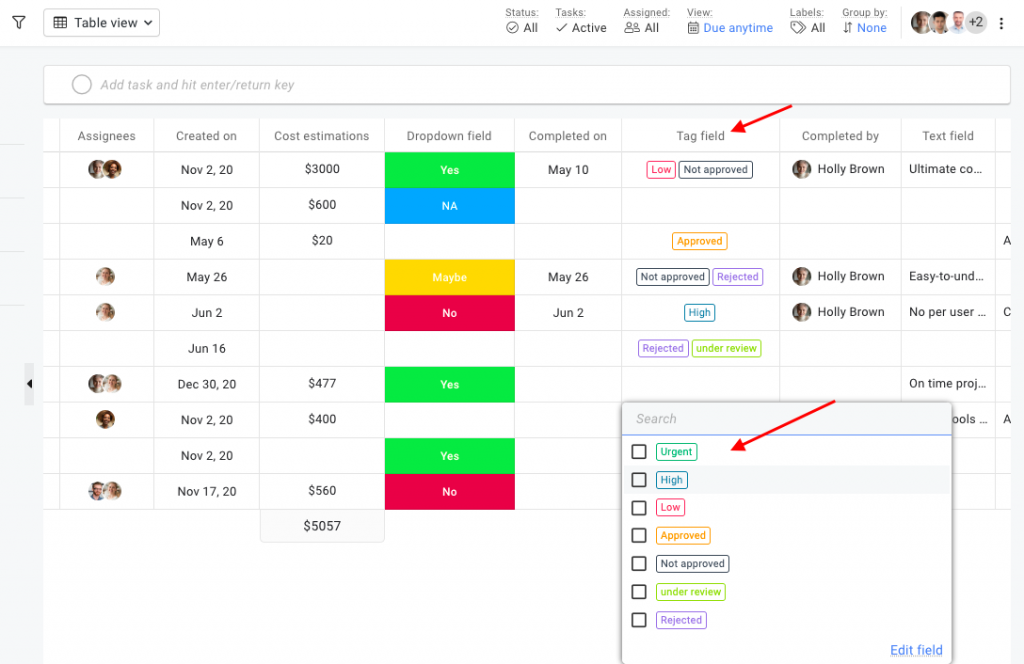
4. Tags – Create task tags and customize them using different color codes. Unlike the dropbox field, you can attach more than one tag to a task.
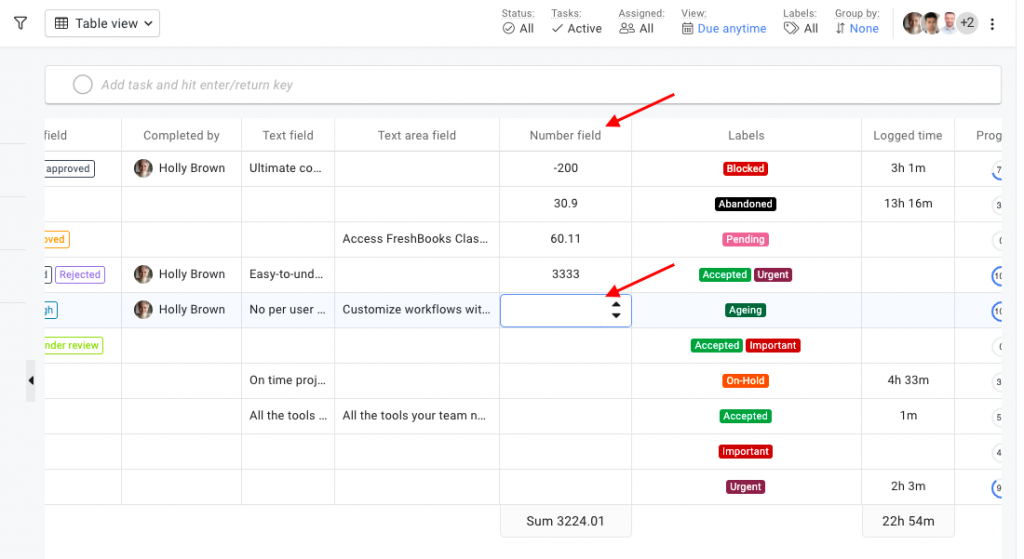
5. Numbers – The numbers field can be used to store numeric data in the form of negative, positive, decimal, and exponential figures.
6. Percentage – The percentage field can be used to store percent data.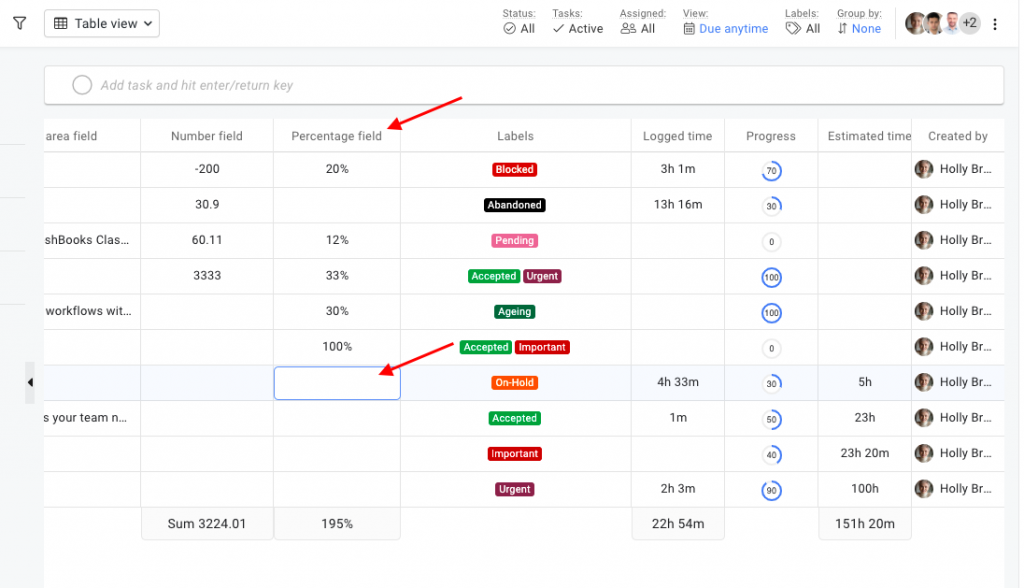
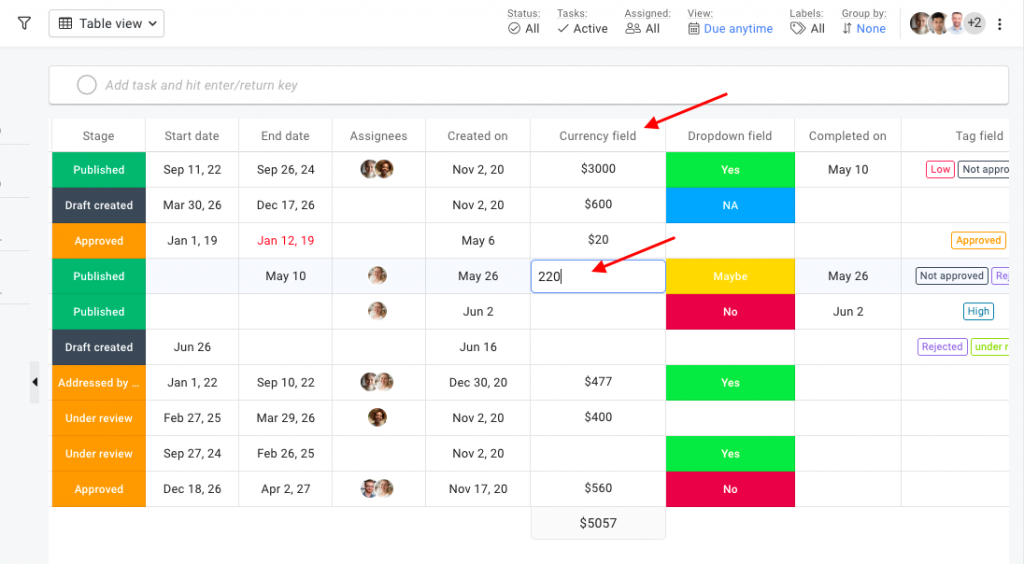
7. Currency – The currency field can be used to store data in different currency types. The default currency types are $ USD, $ CAD, $ AUD, £ GBP, € EUR, ¥ YUA, $ NT, ₽ RU, and zł PL. However, you can also add more currency types to save financial data.
8. Date – The date field can be used to save dates on tasks.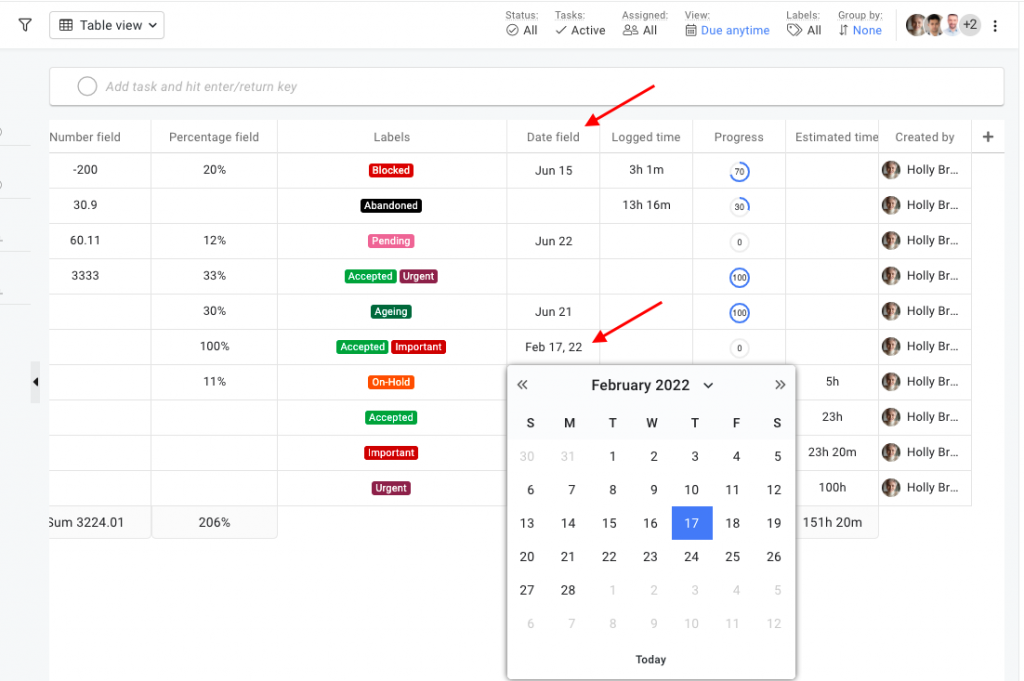
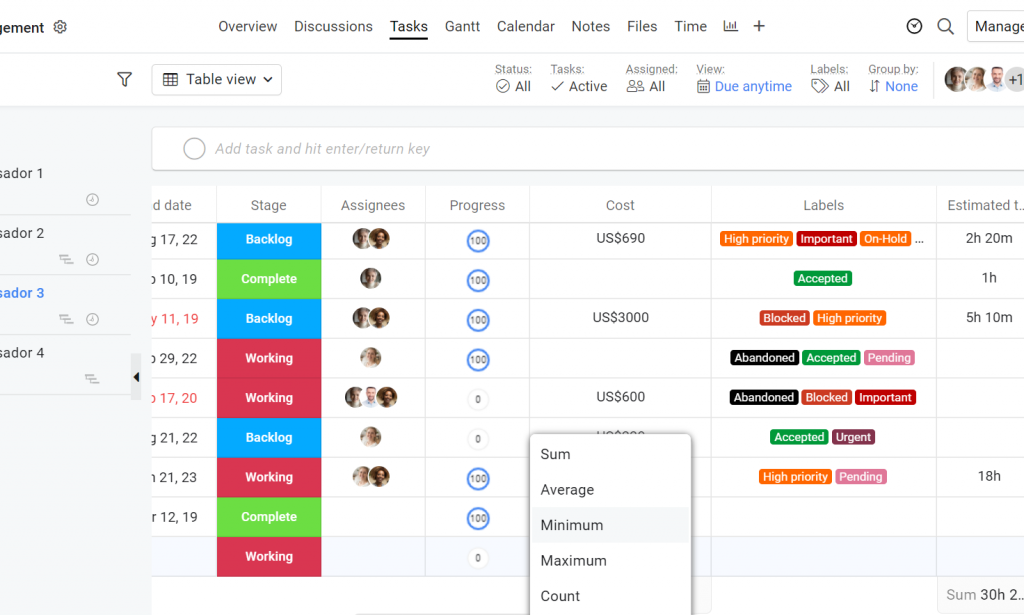
If you hover over a function, the display will show you a description of the formula. The formula can be applied to fields like numbers, percentages, and currency fields. Further, you can use sum, average, minimum, maximum, and count as formulas for these columns.
- Can't find the answer to your questions? Contact ProofHub Support
- Check our blog for the latest additions, updates and tips.