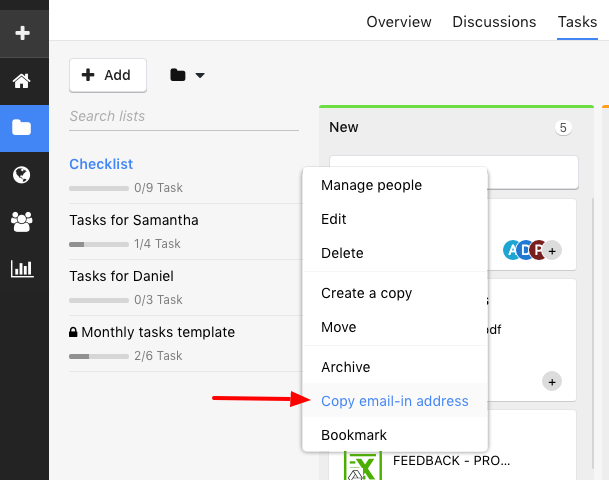
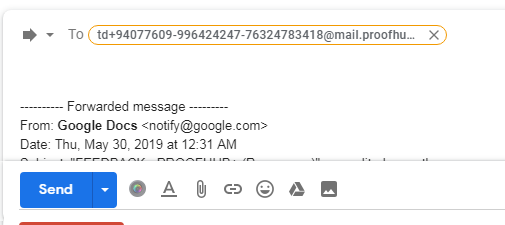
Every Task list has its unique email-in address. You can save that email-in address in your contacts so that you can add task via email. Following are the steps to create a task via email-in:
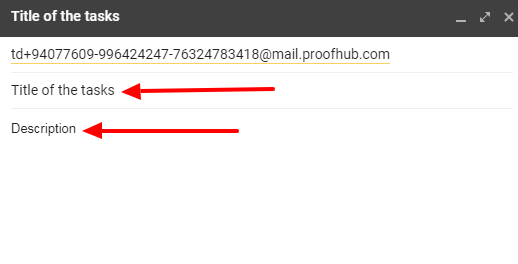
For a more organized approach, while adding tasks via email-in, you can use the formats mentioned below as well. In the body of the email, you can enter task details in any of the two below-mentioned formats.
While adding the start and end dates, you will have to keep the date format in mind. If your account has a date format like mm/dd/yyyy, then you need to write the dates according to this format.
Format:
[Task] Task name
[Desc] Description
[Start] 01/12/2024
[End] 01/15/2024
[Subtask] Task name
[Desc] Description
[Start] 01/12/2024
[End] 01/17/2024
Once you’ve entered all the details of the task to be created send the email. The task will get created in the task list whose email-in address you selected.
Note:
Please fulfill the below conditions for using the Email-in feature in ProofHub
Reply via email
One can add a comment to a task by replying to the email notification one has received regarding the task. Following are its steps:
- Can't find the answer to your questions? Contact ProofHub Support
- Check our blog for the latest additions, updates and tips.