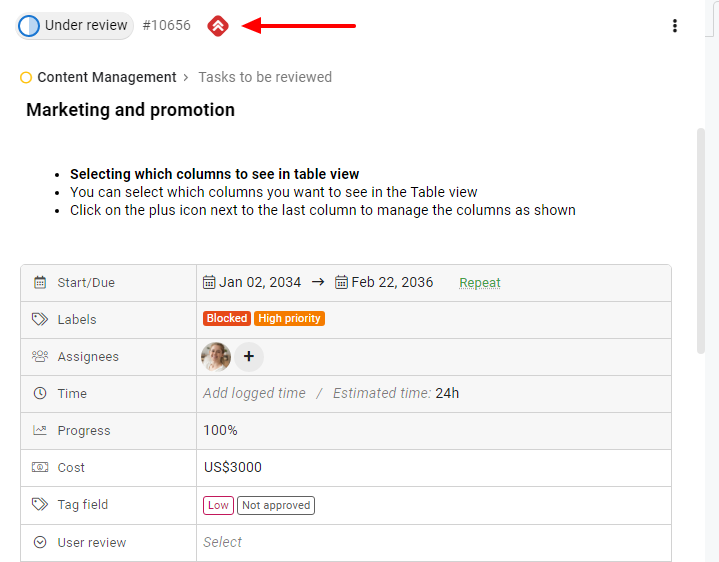
Custom fields
With custom fields, you can add additional fields to store custom data at the task level.
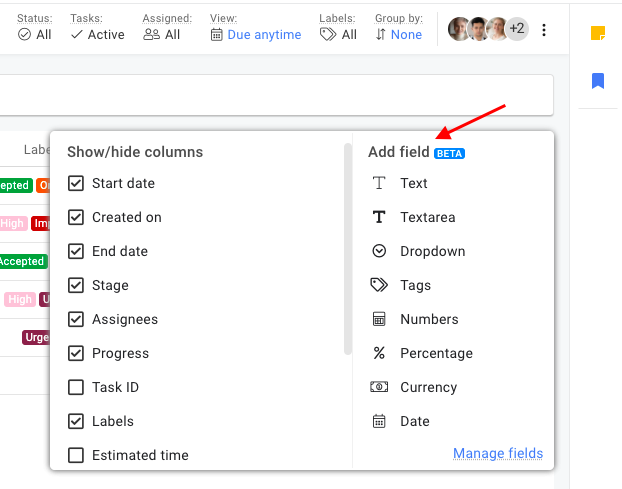
By default, ProofHub offers some predefined fields in each task. In addition to these, you can add the following field types.
- Text
- Text area
- Dropdown
- Multi-select
- Numbers
- Percentage
- Currency
- Date
- Priority
Add custom fields
Add field: there are two ways to add a new custom field
- Add a new custom field from the Table view
- Add a new custom field from the task window
Add a new custom field from the Table view
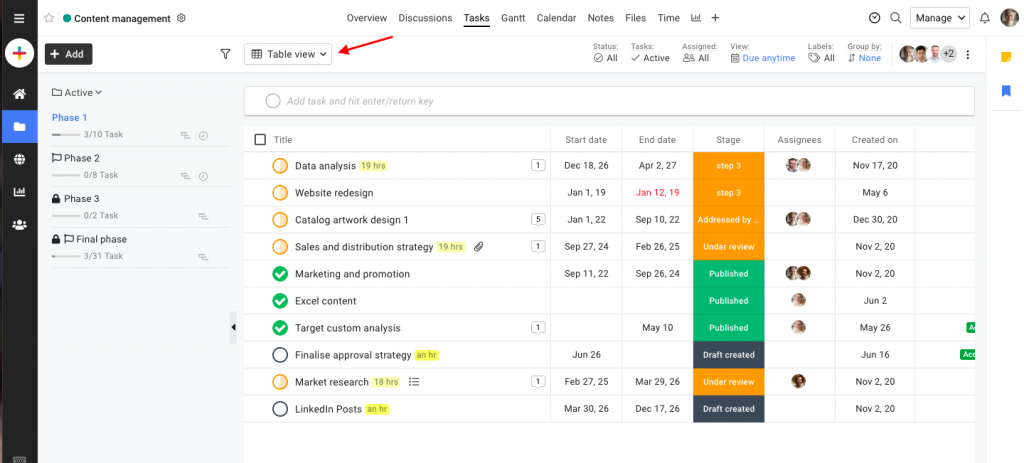
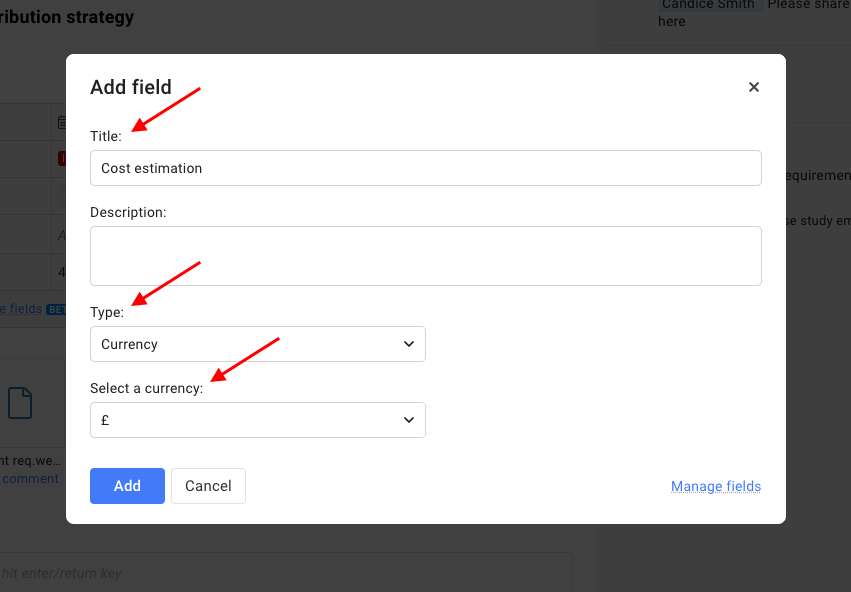
- Go to the Table view in the Task section of the project
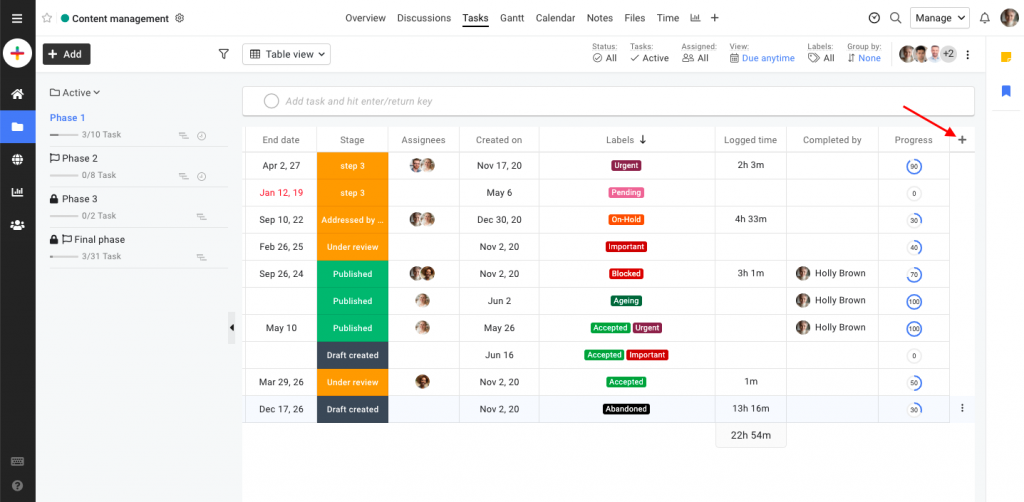
- Scroll to the extreme right of the screen and click on the plus icon.
- Select the field type to be added.
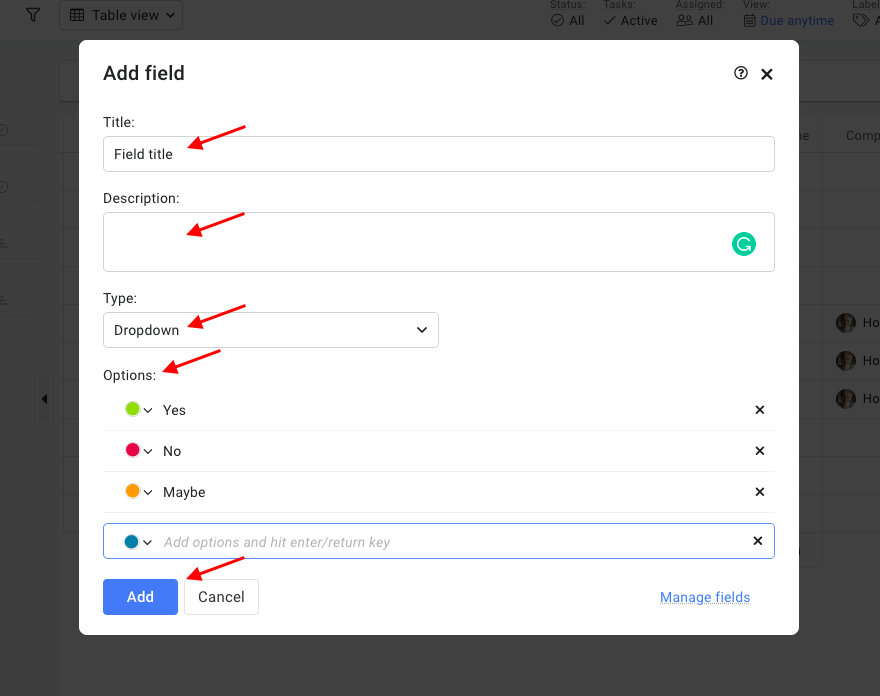
- Add a field name/title.
- Add field description (optional). The description will appear as a tooltip when you hover on the field name.
- Make the required changes depending on the field type selected.
- Click on the ‘Add’ option to add the field.
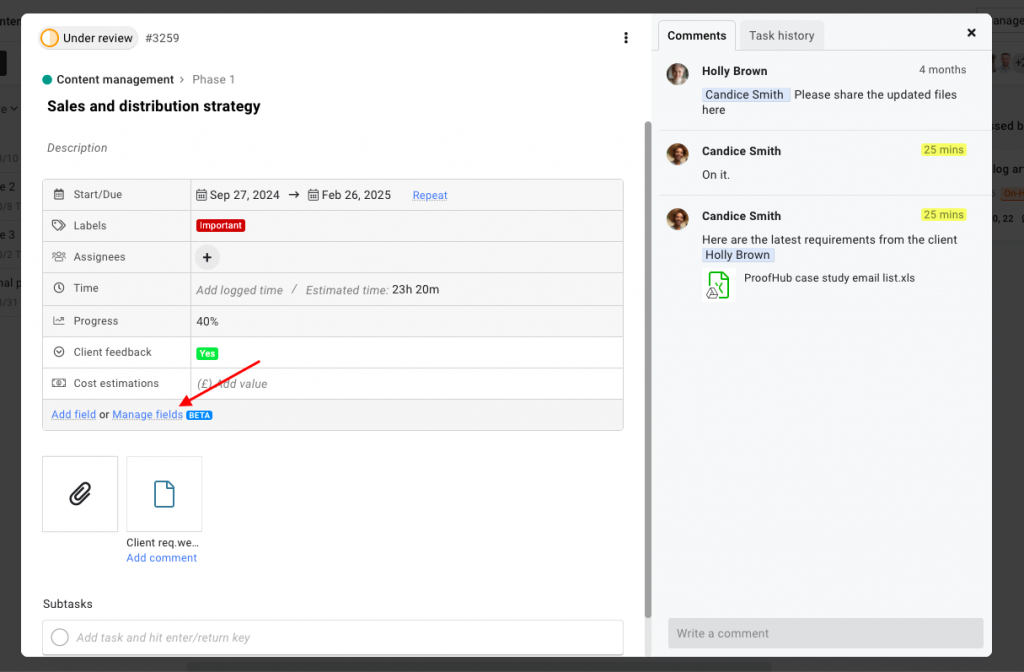
Add a new custom field from the task window
- Click on a task to open the task window.
- Click on the ‘Add field’ option to add a new field.

- Add a new field name/title.
- Select the field type.
- Add field description (optional).
- Click on the ‘Add’ option to add the field.
Manage custom fields
Edit field: there are two ways to edit a custom field
- Edit a custom field from the Table view
- Edit a custom field from the task window
Edit a custom field from the Table view
- Click on the arrow next to the field name.
- Select the ‘Edit field’ option to Edit the field.
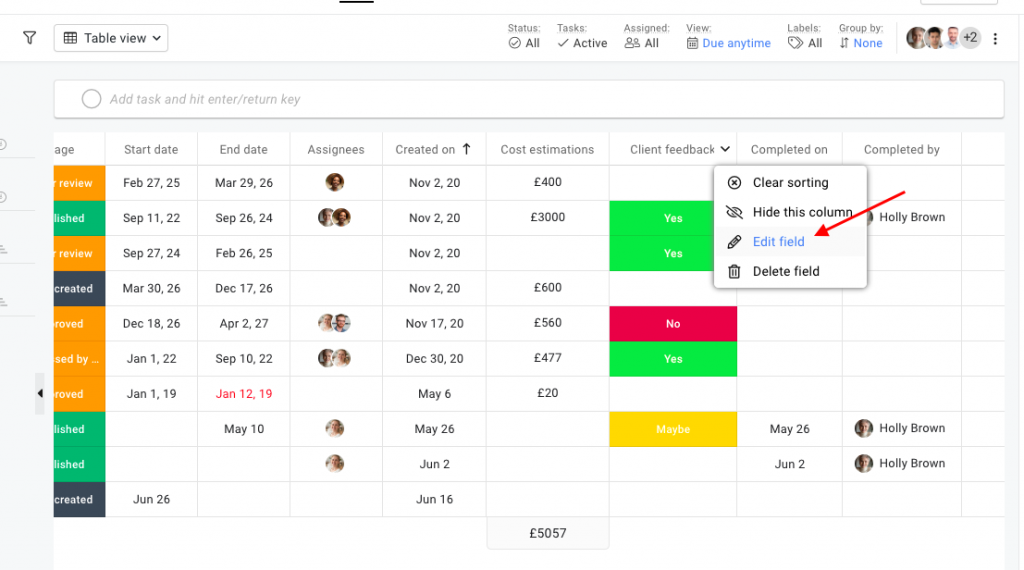
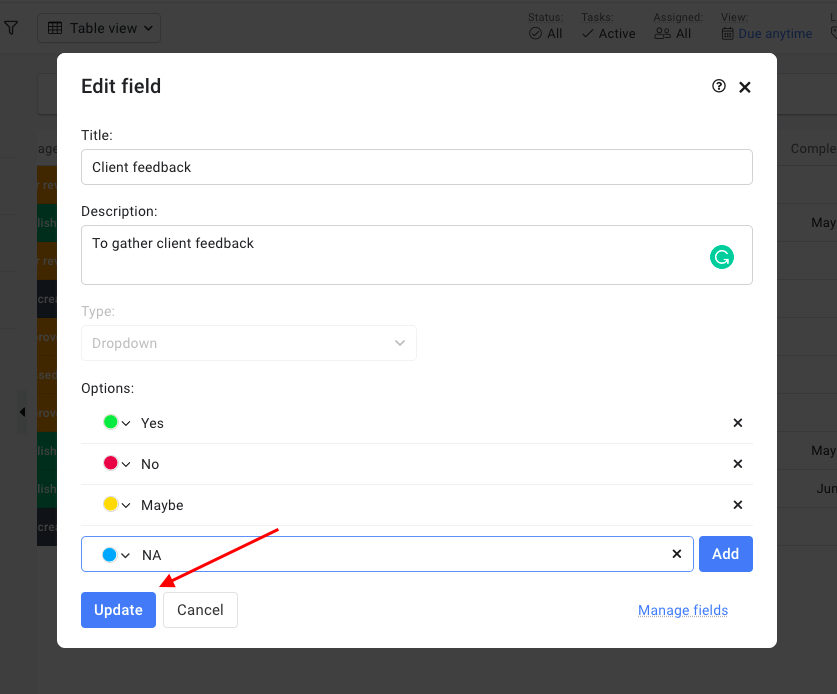
- You can edit the field title and description.
- The field type of a custom field cannot be edited.
- Click on the ‘Update’ option to update the field details.
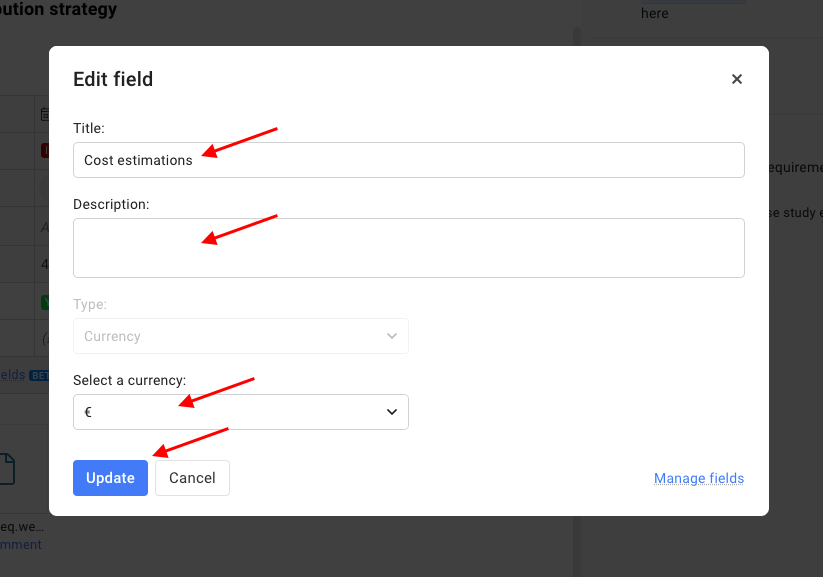
Edit a custom field from the task window
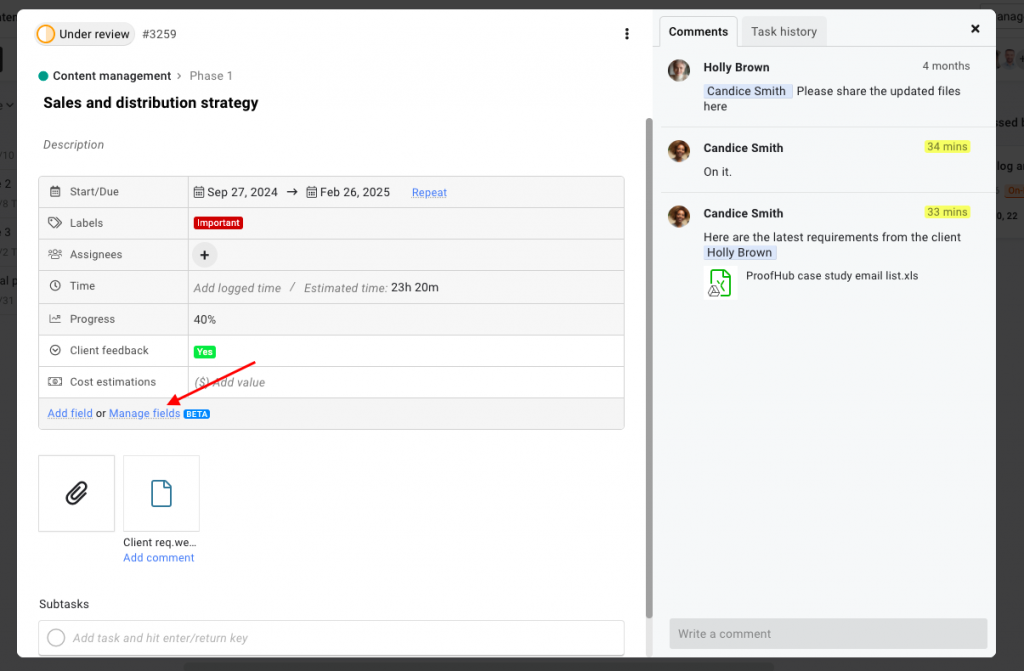
- Click on a task to open the task window.
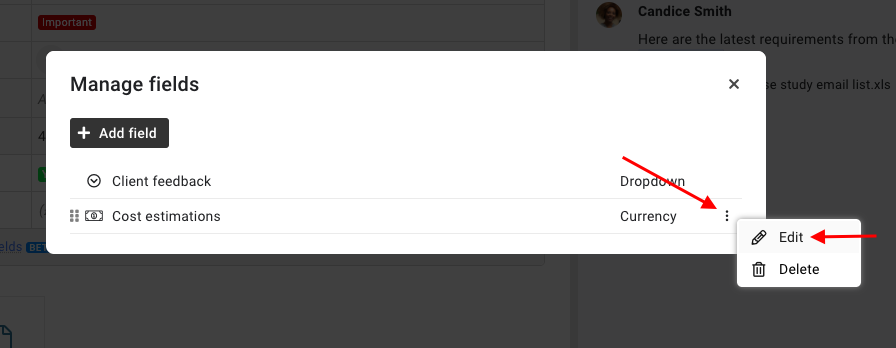
- Click on the ‘Manage field’ option to edit a custom field.
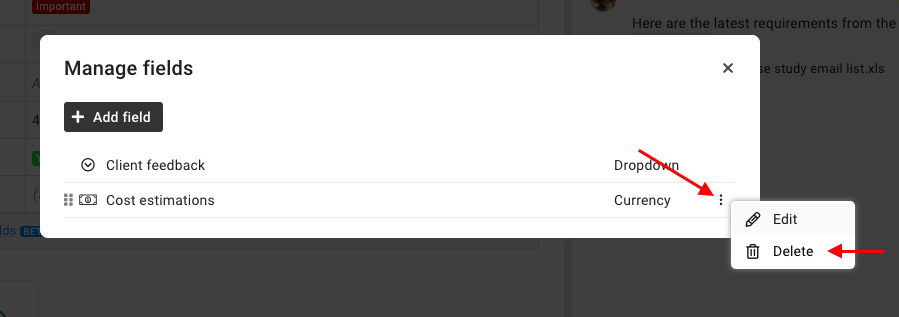
- Click on the 3 dots in the manage fields window and select the ‘Edit’ option.
- You can easily edit the field title and description.
- The field type of a custom field cannot be edited.
- Click on the ‘Update’ option to update the field details.
Delete field: there are two ways to delete a custom field
- Delete a custom field from the Table view
- Delete a custom field from the task window
Delete a custom field from the Table view
- Click on the arrow next to the field name.
- Select the ‘Delete field’ option to delete the field.
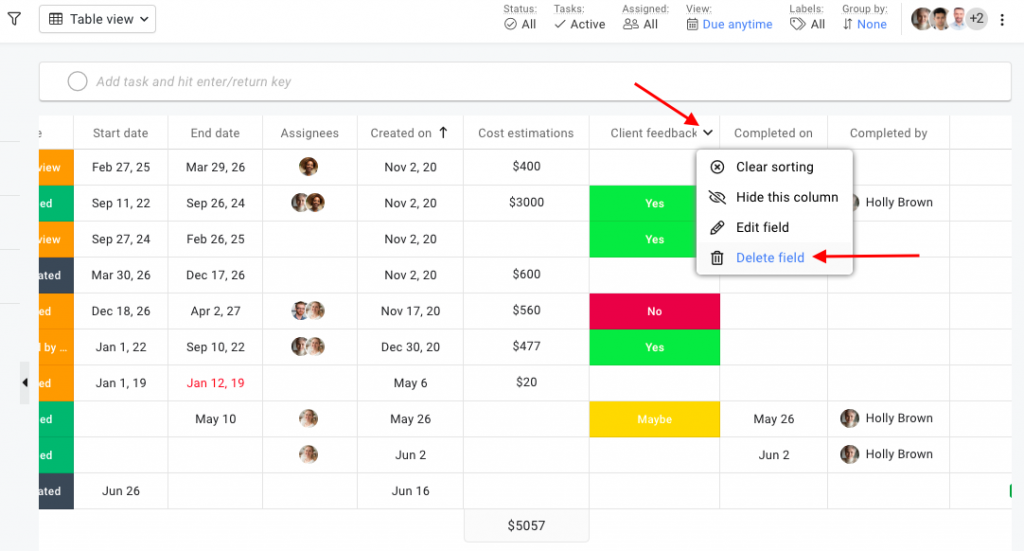
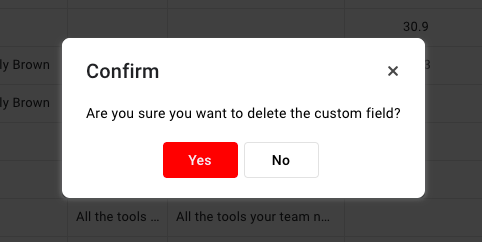
- Click ‘Yes’ on the confirmation pop-up to delete the field.
Delete a custom field from the task window
- Click on a task to open the task window.
- Click on the ‘Manage field’ option to delete a custom field.
- Click on the 3 dots in the manage fields window and select the ‘Delete’ option.
- Click ‘Yes’ on the confirmation pop-up to delete the field.

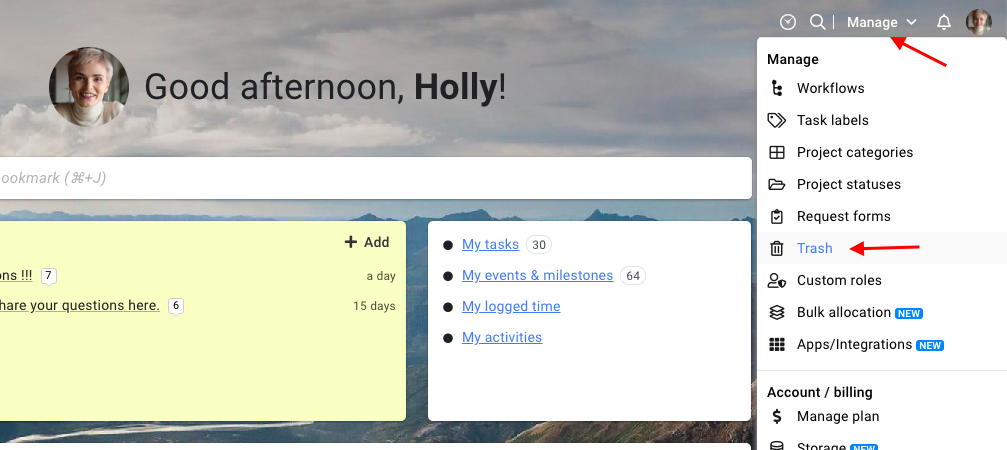
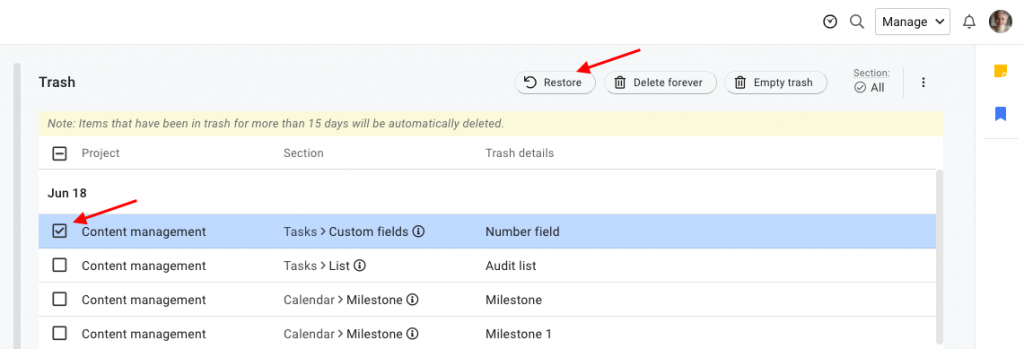
Restore field: a deleted custom field can be restored from the trash section within 15 days of deletion.
- Click on the Manage dropdown.
- Go to Trash.
- Select the item to be restored and click on restore.
- The custom field will be restored to the task list.
Copy or move tasks with custom fields
Copy tasks with custom fields
- Right-click on the task and select the Create a copy option.
- Select the new project and tasklist name where the task copy will be added.
- Select the Custom fields check box to copy the custom fields along with the task.
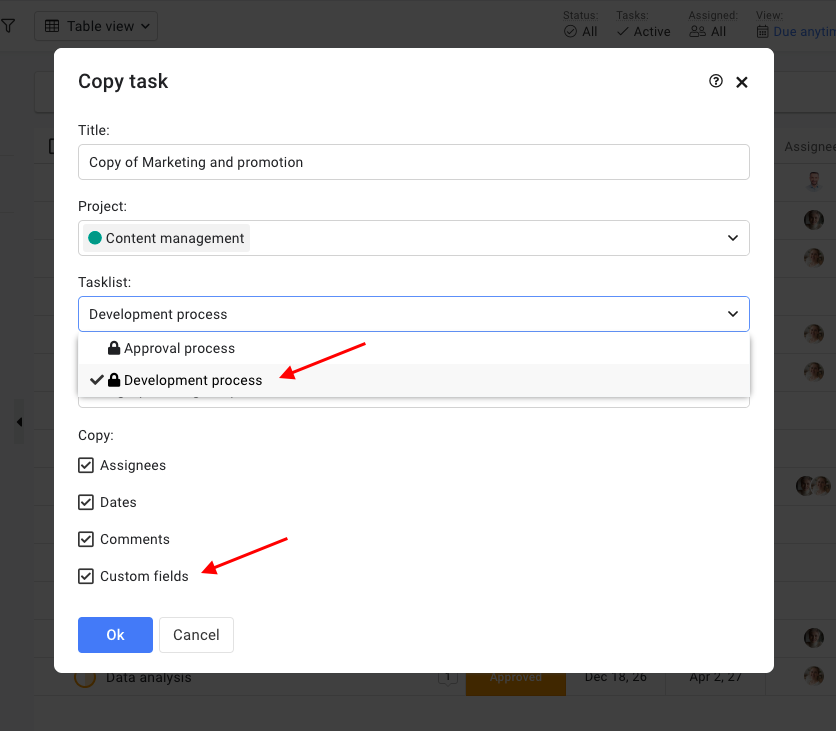
- Click Ok.
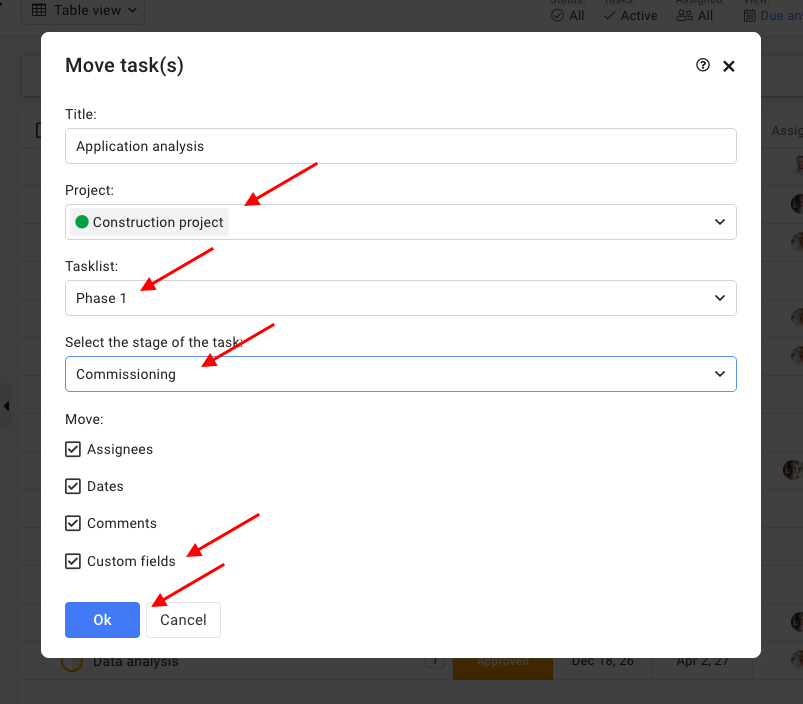
Move tasks with custom fields
- Right-click on the task and select the Move option.
- Select the new project and tasklist name where you want to move the task.
- Select the Custom fields check box to move the custom fields along with the task.
- Click Ok.
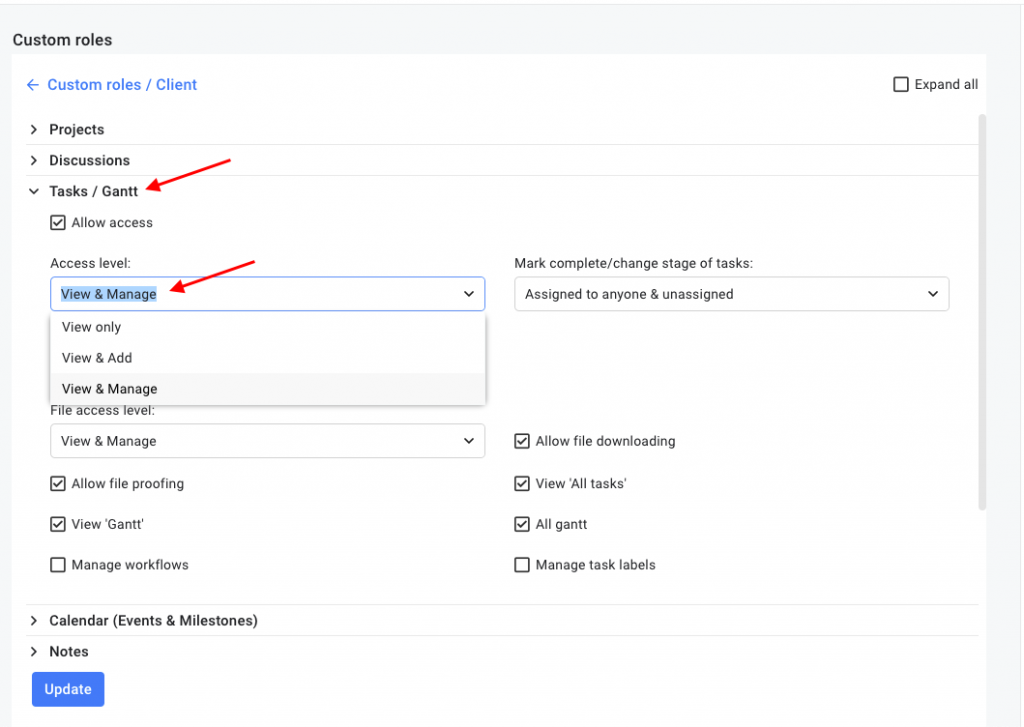
Custom field permissions: Custom field permission are managed with the task permissions
- A user with View and manage access to tasks can create, edit and delete all custom fields. Also, the user with this access can add, edit and delete data from any custom field in the project.
- A user with View and add access to tasks can create new custom fields, however, they can only edit and delete fields from task lists created by them. The user with this access can only add, edit and delete data to tasks created by them. They do not have access to add data on tasks added by other users. Also, if a user with this access level creates a task list, they will then have manage access for tasks and custom fields of that task list.
- A user with View-only access to tasks can not create, edit and delete custom fields. Also, the user with this access cannot add, edit and delete data from any custom field in the project.
How different custom fields work
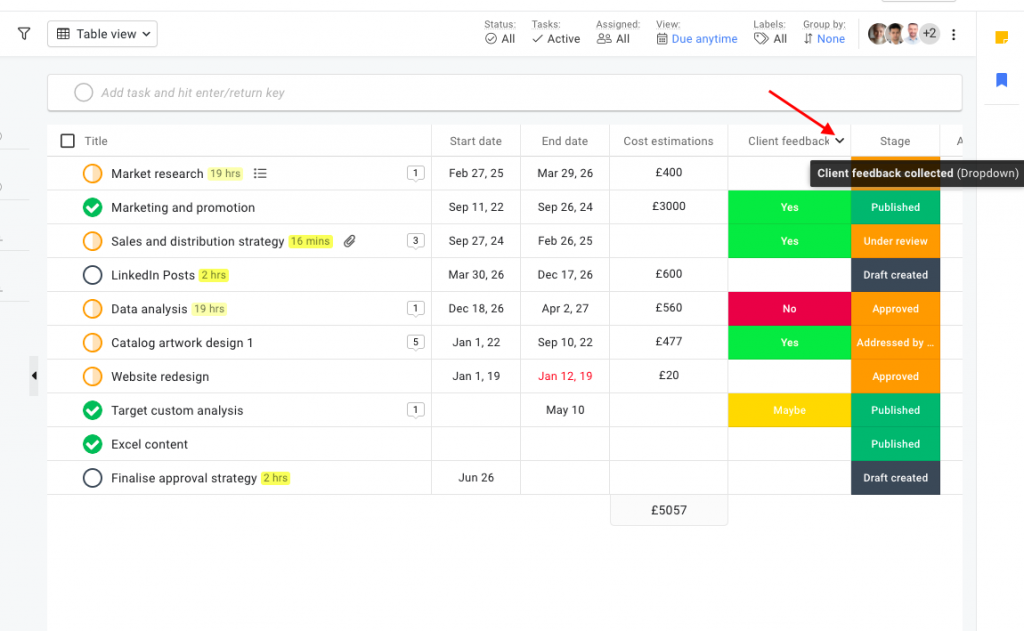
1. Text – The text field can be used to save data of any type. The data added will appear in a single line.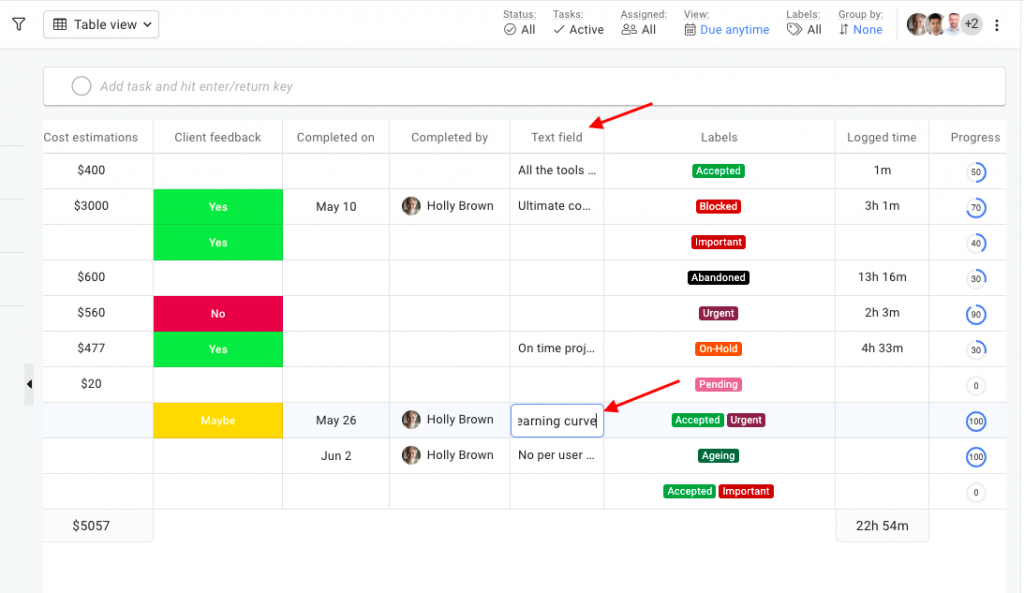
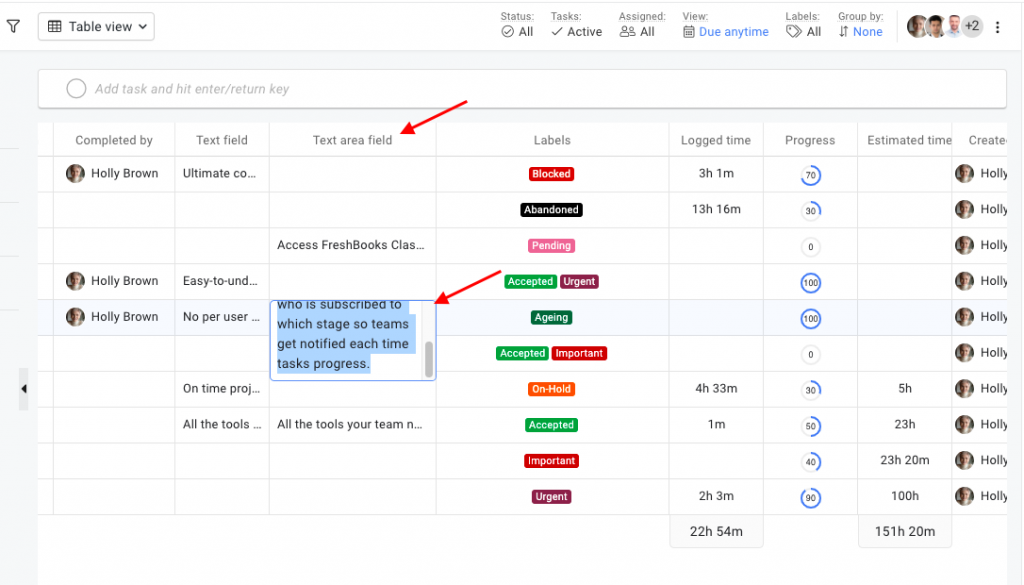
2. Text area – The text area field is similar to the text field as it can also be used to save data of any type. The data entered in this field appears in multiple lines.
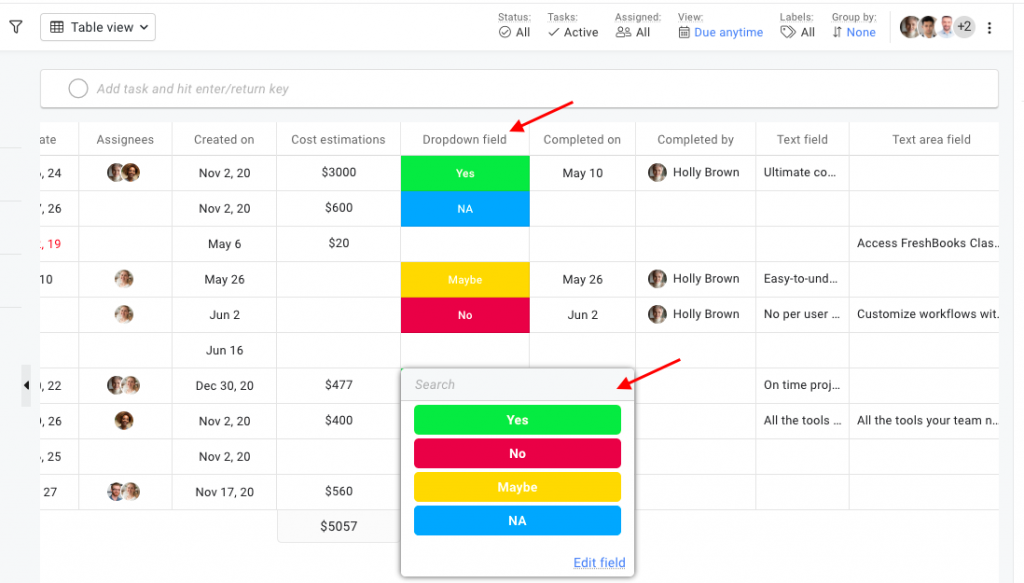
3. Dropdown – The dropdown field can be used to create a list of options to select from. Add any number of options and color code them for a better view.
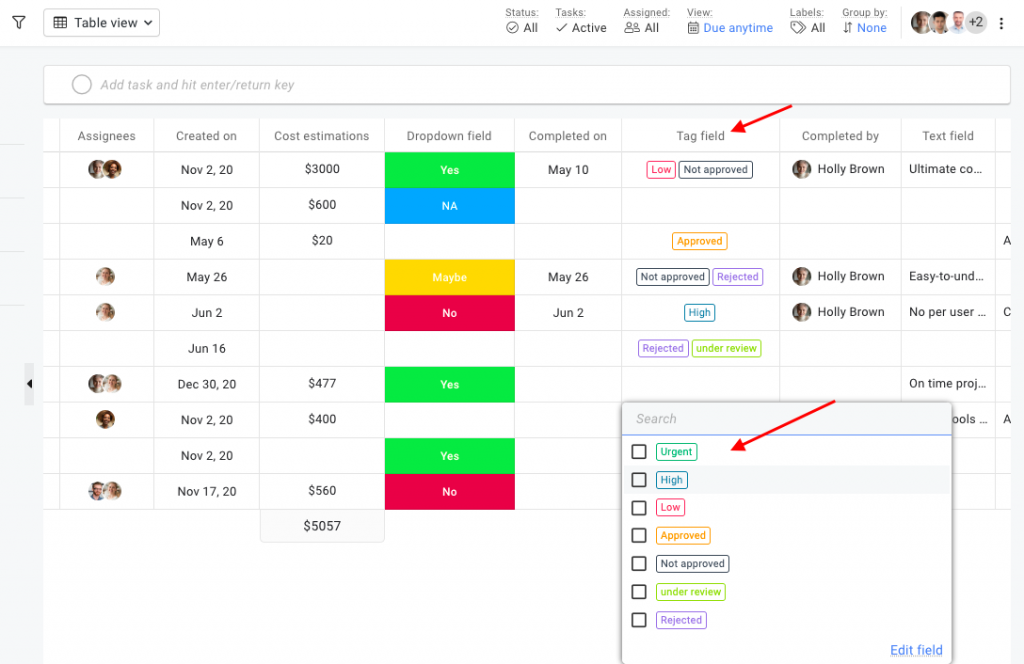
4. Multi-select– The multi-select field allowed you to select multiple customize values. Unlike the dropbox field, you can attach more than one value.
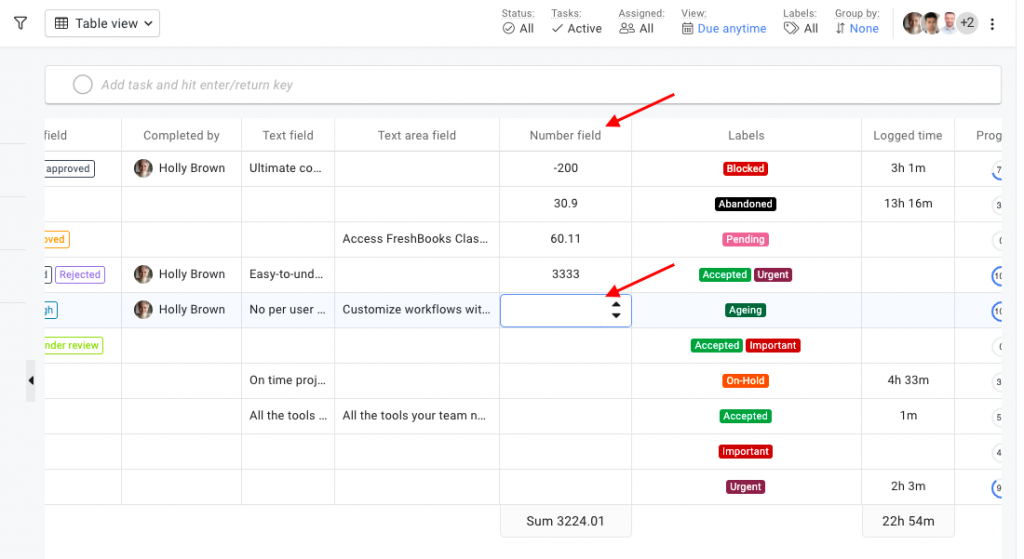
5. Numbers – The numbers field can be used to store numeric data in the form of negative, positive, decimal, and exponential figures.
6. Percentage – The percentage field can be used to store percent data.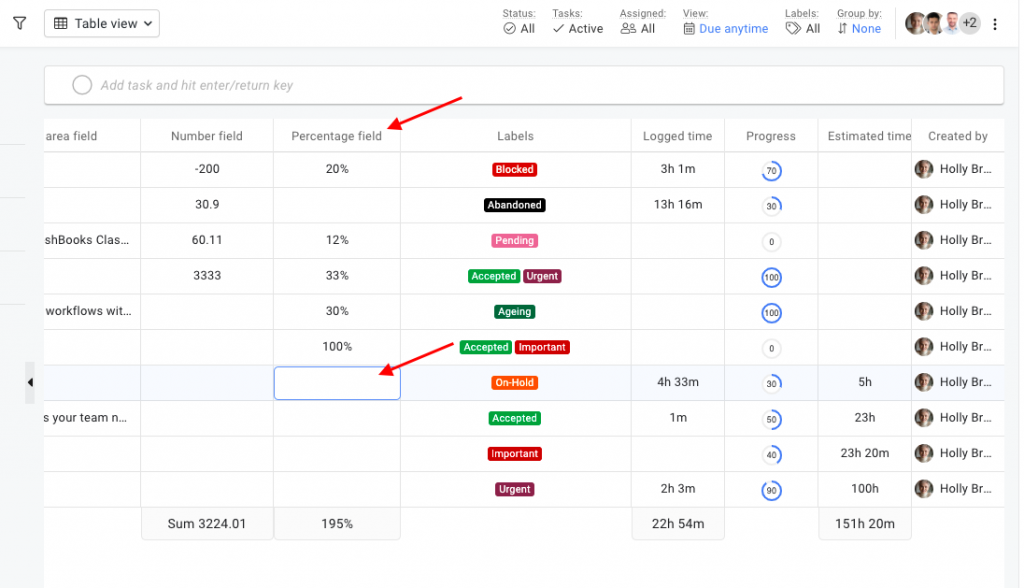
7. Currency – The currency field can be used to store data in different currency types. The default currency types are $ USD, $ CAD, $ AUD, £ GBP, € EUR, ¥ YUA, $ NT, ₽ RU, and zł PL. However, you can also add more currency types to save financial data.
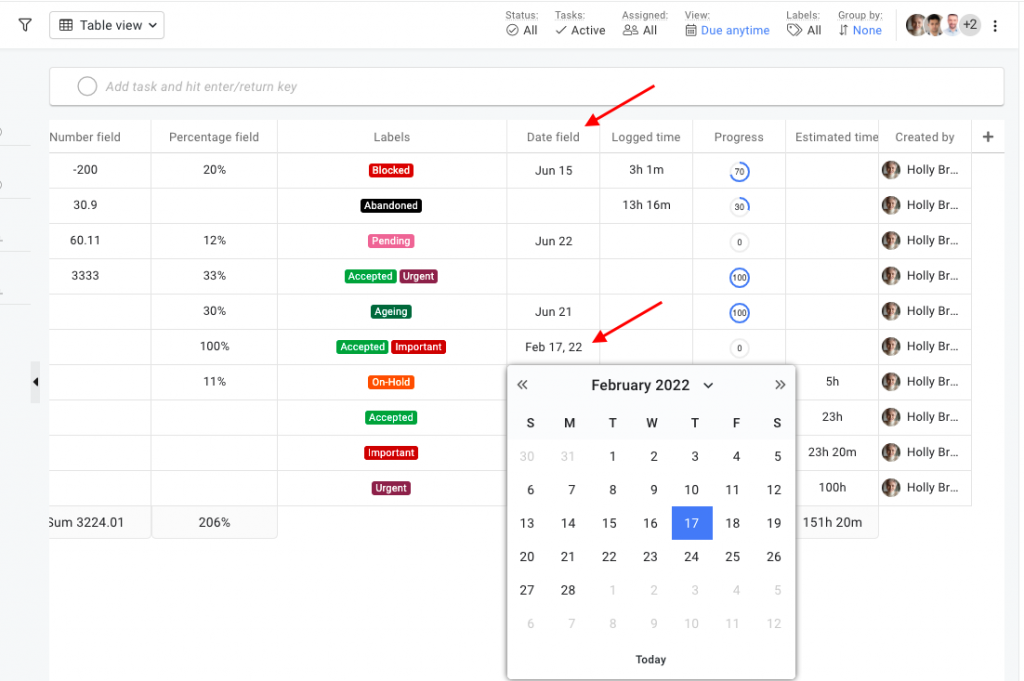
8. Date – The date field can be used to save dates on tasks.
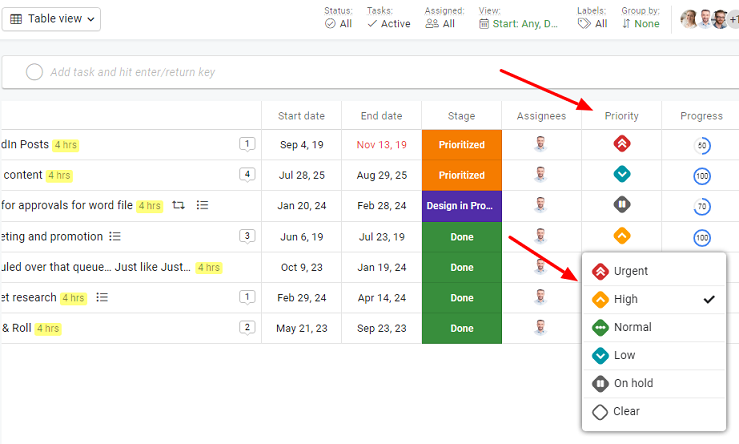
9. Priority field–The Priority field helps to define the Priority on the tasks. It can be added only once in the Tasklist. You will get predefined stages in this field.
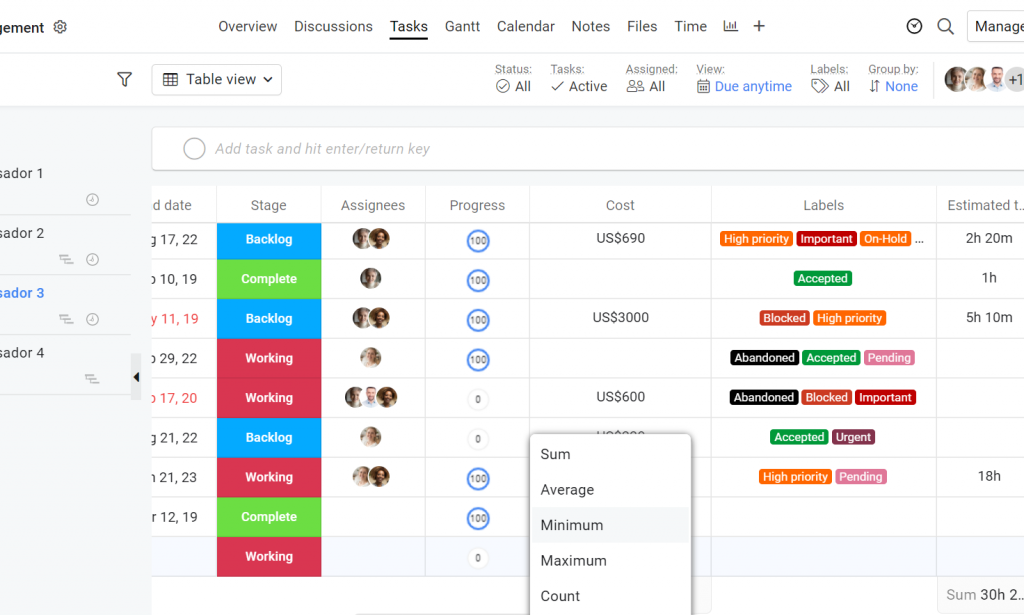
Formula
If you hover over a function, the display will show you a description of the formula. The formula can be applied to fields like numbers, percentages, and currency fields. Further, you can use sum, average, minimum, maximum, and count as formulas for these columns.
Need more help?
- Can't find the answer to your questions? Contact ProofHub Support
- Check our blog for the latest additions, updates and tips.